How to disable automatic repair on Windows 10
To disable automatic repair during the third unsuccessful boot of Windows 10, use these steps:
- Open Start.
- Search for Command Prompt, right-click the top result, and select Run as administrator.
- Type the following command and press Enter: bcdedit.
- Make note of the reoveryenabled and identifier values under the "Windows Boot Loader" section.
- Type the following command to disable automatic repair and press Enter: bcdedit /set {current} recoveryenabled...
Full Answer
How to disable Windows 10 automatic repair at startup?
Enable or Disable Automatic Repair in Command Prompt in Windows 10. 1 Open an elevated command prompt. 2 Type bcdedit into the elevated command prompt, and press Enter. (see screenshot below) 3 Look under the Windows Boot Loader section for your Windows 10 (description), and make note of its identifier (ex: " {current}").
How to disable or enable automatic restart?
How to disable automatic restart on system failure?
- Press the Windows key + R to open the Run prompt.
- Type in Sysdm.cpl and hit Enter to launch the System properties prompt.
- Click on the Advanced tab.
- Under Startup and Recovery, click on the Setting option.
- Under System failure, make sure to uncheck Automatically restart.
- Click OK to save your changed and close.
How do I fix automatic repair in Windows 10?
How to Repair Windows 10 Using Automatic Repair
- Open Windows Settings. Go to Start icon on the extreme bottom left and type Settings.
- Go to Update & security. Tap on Settings option and choose Update & security option from there.
- Restart from Advanced start-up. Tap on Recovery on left side option. ...
- Troubleshoot the PC. ...
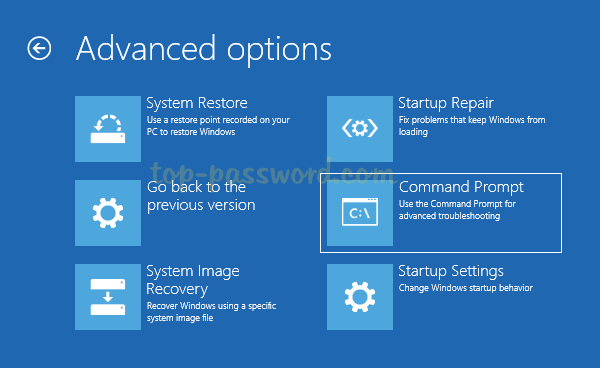
- Go to Advanced options. ...
- Click on Start-up Repair. ...
- Choose the option “Continue”. ...
How to disable Windows Automatic Restart on system failure?
What to Know
- Go to Control Panel and select System and Security > System > Advanced system settings > Startup and Recovery.
- Choose Settings.
- Uncheck the box next to Automatically restart.

How do I turn off automatic repair mode?
Click on “Advanced Options” Click on “Command Prompt” In the command prompt window, type “bcdedit /set {current} recoveryenabled No” and hit “Enter” (this command deletes problematic system files) Type “exit” and press Enter.
How do I fix automatic repair always?
0:2710:02How to Fix Automatic Repair Loop and Startup Repair in Windows 10YouTubeStart of suggested clipEnd of suggested clipLike a sudden power loss or power outage of your computer. Issues with your windows registry bootMoreLike a sudden power loss or power outage of your computer. Issues with your windows registry boot file corruption. Or even missing or damaged system files. But there's a few things you can try which
How do I bypass a repairing disk error?
What to Do on Stuck “Repairing disk errors” Issue in Windows 10?Let It Finish Overnight. First of all, “Repairing disk errors” is triggered by automatic CHKDSK on booting. ... Restart from Safe Mode. It is known that safe mode can solve myriad problems in computer. ... Automatic Repair. ... System Restore. ... Replace Drive.
How to disable auto repair on Windows 10?
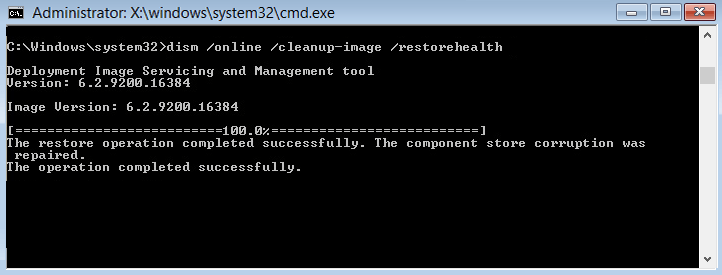
To disable the automatic repair feature on Windows 10, type the following command and press Enter: The major drawback of the automatic repair feature is that Windows 10 tells you nothing about what exactly it's trying to repair.
How to stop Windows 10 from auto repair?
Method 1: Disable Automatic Repair Before Windows 10 Fails to Boot 1 Open the Command Prompt as administrator and run the bcdedit command:#N#Make note of the identifier value under the " Windows Boot Loader " section. 2 To disable automatic repair at Windows 10 startup, execute this command:#N#bcdedit /set {current} recoveryenabled no 3 Now, the automatic repair feature will no longer run automatically after the third unsuccessful boot of your PC.
Does auto repair work after third boot?
Now, the automatic repair feature will no longer run automatically after the third unsuccessful boot of your PC.
Why does Windows 10 automatically repair?
The cause of Automatic Repair is if you PC crashes 2 times consecutively or fails to boot, Windows 10 will run Automatic Repair by default. Disabling automatic repair will only mean that you will have to manually run automatic repair if wanted or needed instead if it automatically being run when the above is true.
Is there a matter of when or not a device should be enabled or disabled?
There really isn't a matter of if when or not it should be enabled or disabled, but just a matter of personal preference.
Do you have to be an administrator to enable or disable automatic repair?
You must be an administrator to enable or disable automatic repair.
Why does Windows 10 have automatic repair?
Microsoft added automatic repair to Windows 10 as a feature that troubleshoots and tries to fix common problems that may be preventing system from loading correctly.
How to run cmd as administrator?
Search for Command Promptor type cmdin the Windows search field, right-click on the console application (cmd), and select Run as administrator.
How to stop auto repair?
Here is a step-by-step guide on how to stop automatic repair on Windows 10: 1 Open Start 2 In the list of programs, search for Command Prompt, right- click it and choose Run as Administrator. 3 Type the command “bcdedit” and press the Enter button. 4 Under the Windows boot loaders section, look for the identifier and recoveryenabled values. They should read:
Where to find recovery enabled values in Windows boot loader?
Under the Windows boot loaders section, look for the identifier and recoveryenabled values. They should read:
Can you deactivate auto repair?
If you do not want to go the command prompt way, you can also deactivate the automatic repair from the control panel. However, this method will involve changing some values. So, here is how to go about it:
How to disable automatic repair loop?
Disable automatic repair loop. To disable the automatic repair loop, you need to run a command in Command Prompt. Getting to a Command Prompt window might be difficult if you’re stuck in a repair loop. Hold down the power button and force shut down the system.
How long does it take for an auto repair screen to work?
When you see the automatic repair screen, you should allow it to work for a while. The repair can complete within seconds and sometimes it can take hours. Just because you’ve been looking at the screen for ten or twenty minutes doesn’t mean you’re system is caught in a loop. Some repairs do take a long time.
How to shut down a computer?
Hold down the power button and force shut down the system.
Is the repair loop bad?
The repair loop isn’t all bad. In fact, it shows that a repair failed and Windows 10 is still trying to fix it. If nothing else, it indicates something is wrong with your system. If you keep it disabled, you may think a repair has been successful when it has not been.
Does Windows 10 auto repair work?
Windows 10 is self-healing. sometimes. If it runs into trouble, it will initiate an automatic repair which normally doesn’t fail. It can fix all sorts of problems but sometimes, it does fail. You can troubleshoot it and finish the repair but if you’re stuck in a repair loop where your system reboots and each time it does you get the repair tool, troubleshooting it might be a bit difficult.