How to disable automatic repair on Windows 10
To disable automatic repair during the third unsuccessful boot of Windows 10, use these steps:
- Open Start.
- Search for Command Prompt, right-click the top result, and select Run as administrator.
- Type the following command and press Enter: bcdedit.
- Make note of the reoveryenabled and identifier values under the "Windows Boot Loader" section.
- Type the following command to disable automatic repair and press Enter: bcdedit /set {current} recoveryenabled...
Full Answer
How to disable Windows 10 automatic repair at startup?
Enable or Disable Automatic Repair in Command Prompt in Windows 10. 1 Open an elevated command prompt. 2 Type bcdedit into the elevated command prompt, and press Enter. (see screenshot below) 3 Look under the Windows Boot Loader section for your Windows 10 (description), and make note of its identifier (ex: " {current}").
How to disable or enable automatic restart?
How to disable automatic restart on system failure?
- Press the Windows key + R to open the Run prompt.
- Type in Sysdm.cpl and hit Enter to launch the System properties prompt.
- Click on the Advanced tab.
- Under Startup and Recovery, click on the Setting option.
- Under System failure, make sure to uncheck Automatically restart.
- Click OK to save your changed and close.
How do I fix automatic repair in Windows 10?
How to Repair Windows 10 Using Automatic Repair
- Open Windows Settings. Go to Start icon on the extreme bottom left and type Settings.
- Go to Update & security. Tap on Settings option and choose Update & security option from there.
- Restart from Advanced start-up. Tap on Recovery on left side option. ...
- Troubleshoot the PC. ...
- Go to Advanced options. ...
- Click on Start-up Repair. ...
- Choose the option “Continue”. ...
How to disable Windows Automatic Restart on system failure?
What to Know
- Go to Control Panel and select System and Security > System > Advanced system settings > Startup and Recovery.
- Choose Settings.
- Uncheck the box next to Automatically restart.

How do I turn off preparing automatic repair?
At the Preparing Automatic Repair window, press the power button three times to force the computer to shut down.
Why is my computer stuck on preparing automatic repair?
If your Windows cannot boot because of the "Preparing Automatic Repair" or "Diagnosing your PC" error, you can do a hard reboot. Remove the battery and AC adapter. Press and hold the power button for 20 seconds and see if it will boot up normally.
How do I turn off automatic repair in Windows 11?
What can I do if Windows 11 is stuck on automatic repair loop?Remove problematic files. ... Access the boot menu through the Command Prompt. ... Boot your device in Safe Mode. ... Reset your device. ... Run the Windows Startup Repair. ... Restore Windows Registry. ... System Restore your device. ... Hard Reboot Windows.More items...•
How do I bypass automatic repair on Windows 10?
To disable Windows 10 automatic repair tool, follow these steps:Open the Windows boot troubleshooting menu.Select See advanced repair options > Troubleshoot > Advanced options > Command Prompt.Type the following command and press Enter: bcdedit.Check the values for identifier and recoveryenabled.More items...•
How do I fix the automatic repair loop in Windows 10?
2:047:27How to Fix Automatic Repair Loop in Windows 10 - YouTubeYouTubeStart of suggested clipEnd of suggested clipThe second fix would be to use the startup repair tool this is a default tool provided in Windows toMoreThe second fix would be to use the startup repair tool this is a default tool provided in Windows to help fix problems that keep your windows from loading. So while on this blue screen where it says
How long does automatic repair take on Windows 10?
2. Click Startup Repair. Windows will take anywhere from a few seconds to a few minutes to attempt to fix the problem.
How to disable auto repair on Windows 10?
To disable the automatic repair feature on Windows 10, type the following command and press Enter: The major drawback of the automatic repair feature is that Windows 10 tells you nothing about what exactly it's trying to repair.
How to stop Windows 10 from auto repair?
Method 1: Disable Automatic Repair Before Windows 10 Fails to Boot 1 Open the Command Prompt as administrator and run the bcdedit command:#N#Make note of the identifier value under the " Windows Boot Loader " section. 2 To disable automatic repair at Windows 10 startup, execute this command:#N#bcdedit /set {current} recoveryenabled no 3 Now, the automatic repair feature will no longer run automatically after the third unsuccessful boot of your PC.
What Causes the Preparing Automatic Repair Error?
Hardware failure is usually the primary reason behind this error. However, there are other reasons that may also lead to the problem, such as:
Simple Methods to Fix Preparing Automatic Repair Windows 10 Error
Here are some easy-to-use solutions to fix the Automatic Repair Windows 10 error.
Why does Windows 10 have automatic repair?
Automatic Repair is a built-in feature in Windows 10 to deal with some system problems when the computer cannot boot properly. However, in some cases, Automatic Repair may not work and get stuck in the infamous Windows Automatic Repair loop.
How to force restart a computer?
- Force restart your computer by removing the battery and the AC adapter. Then plug the power back in and hold the power button for 20 seconds to see if the computer starts normally.
How to fix auto repair loop?
8 Solutions - Fix Preparing Automatic Repair Loop Windows 10 1 Remove the battery and AC adapter. 2 Press and hold the power button for 20 seconds and see if it will boot up normally.
How to fix a computer that won't boot?
If your Windows cannot boot because of the "Preparing Automatic Repair" or "Diagnosing your PC" error, you can do a hard reboot. Remove the battery and AC adapter. Press and hold the power button for 20 seconds and see if it will boot up normally.
How to re-build a boot record?
Step 1. Insert the Windows bootable installation disk into your PC that has "Preparing Automatic Repair" or "Diagnosing your PC" error message. Step 2. Boot your PC from the installation disk. Step 3.
What happens when an auto repair fails?
When an Automatic Repair fails, your computer will get a blue screen with "Your PC did not start correctly" or "Automatic repair couldn't repair your PC." If you click "Restart", the computer will go through the same process, resulting in the Automatic Repair loop.
What happens when the registry is corrupted?
When Registry corrupts, it may lead to serious problems like the Automatic Repair loop. The good news is that the registry makes a backup of configuration data automatically. You can use the backup to restore the Windows registry to a working version. Step 1.
How to change boot sequence in BIOS?
For most users, it works well when they restart their computer and press F2 at the same time to enter BIOS. Set to boot the PC from "Removable Devices" (bootable USB disk) or "CD-ROM Drive" (bootable CD/DVD) beyond Hard Drive. Press "F10" to save and exit.
What to do if your computer is black?
Perform a Hard Reboot. When the computer doesn't respond with a black screen, warning "Preparing Automatic Repair", perform a hard reboot first. A hard reboot is a way or restarting your computer manually instead of using the operating system controls (soft reboot). Step 1.
How to make a bootable disk with easeus partition master?
To create a bootable disk of EaseUS Partition Master, you should prepare a storage media, like a USB drive, flash drive or a CD/DVD disc. Then, correctly connect the drive to your computer. Step 2. Launch EaseUS Partition Master, find the "WinPE Creator" feature on the top.
What is Windows startup repair tool?
The Windows Startup Repair tool is an excellent feature to fix problems that are preventing the PC from starting in the normal mode. Although it may not resolve issues related to hardware, it is an excellent place to begin the troubleshooting procedure. The steps include:
How to fix Windows installation error?
Prepare one and then proceed with the following steps: 1. Use the installation media, whether a DVD or USB drive, and connect to the system. 2. From the options, select boot from the installation media. 3.
How to fix boot loop of death?
The steps include: 1. Right-click on the Windows symbol at the bottom and select "Command Prompt (Admin)" from the list. 2.
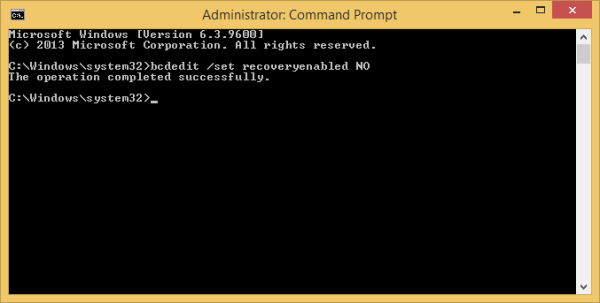
How to set bcdedit to current?
Follow the steps below to proceed: 1. Search command prompt in the search window and open the application as an administrator. 2. In the command prompt screen, enter the following command and hit the "Enter" key: " bcdedit /set {current} recoveryenabled No ". 3.
