[Solution] Disable Automatic Repair before Windows 10 Fails to Boot
- Open the Command Prompt as administrator and run the bcdedit command:Make note of the identifier value under the "...
- To disable automatic repair at Windows 10 startup, execute this command:bcdedit /set {current} recoveryenabled no
- Now, the automatic repair feature will no longer run automatically after the third unsuccessful boot of your PC.
Full Answer
How to disable automatic repair on Windows 10?
So, here is how to go about it:
- Open the Control Panel, choose System, and then select Advanced System Settings.
- Look for the Advanced tab and head into the Startup and Recovery section. ...
- In the dialog box that will appear, head on down to the System failure section and proceed to uncheck the Automatic Restart checkbox.
- Click OK to apply and save the changes.
How to fix Windows 10 not booting?
Windows 10 Not Booting After Update
- Revert Installed Updates. Wait patiently for the Windows 10 booting procedure to begin after turning on your machine. ...
- Recover Using Startup Repair. Windows 10 will not start can be fixed by running automatic startup repair in the recovery environment.
- Boot in Safe Mode. ...
- Checking For Errors Using Command Prompt. ...
- Check Errors in Hard Drive. ...
What you should do if Windows fails to start?
What to do when “Windows fails to start” issue appears?
- ▌ Solution 1. Remove any hardware you recently installed. ...
- ▌ Solution 2. Verify your PC detects the boot disk and is booting from it. ...
- ▌ Solution 3. Use the Last Known Good Configuration to start Windows. ...
- ▌ Solution 4. Launch Startup Repair. ...
- ▌ Solution 5. Fix “Windows failed to start” with BCDEDIT command. ...
- ▌ Solution 6. Fix damaged MBR. ...
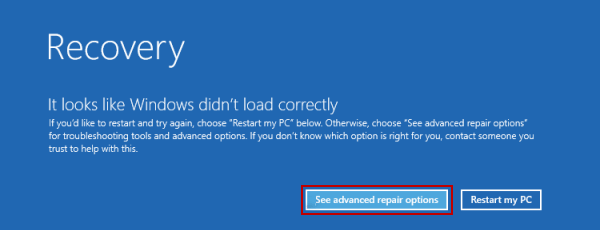
What to do when automatic repair fails?
When all else fails, disable the automatic repair tool using the following steps:
- Insert a Windows installation disc/media in your PC
- Select your language preferences, and click “Next”
- Click on “Repair your computer”
- Click on “Troubleshoot”
- Click on “Advanced Options”
- Click on “Command Prompt”
- In the command prompt window, type “bcdedit /set {current} recoveryenabled No” and hit “Enter” (this command deletes problematic system files)

How do I turn off automatic startup repair?
How to Disable Windows 10 Automatic Repair at StartupOpen the Command Prompt as administrator and run the bcdedit command: ... To disable automatic repair at Windows 10 startup, execute this command: bcdedit /set {current} recoveryenabled no.More items...
How do I stop the startup repair loop in Windows 10?
1:567:27How to Fix Automatic Repair Loop in Windows 10 - YouTubeYouTubeStart of suggested clipEnd of suggested clipBut if that fails or if you keep getting such errors over and over again then you can proceed withMoreBut if that fails or if you keep getting such errors over and over again then you can proceed with your the solutions in the video. The second fix would be to use the startup repair tool this is a
How do I turn off repair?
6:327:43How to Disable Automatic Repair in Windows 10 - YouTubeYouTubeStart of suggested clipEnd of suggested clipAnd now we show it it is disabled so it won't show that recovery enabled again if you want to showMoreAnd now we show it it is disabled so it won't show that recovery enabled again if you want to show it back on there you will do the same thing but instead of typing no you'll type in yes.
Why is my PC doing automatic repair?
There are many reasons why the tool gets stuck in the dreaded automatic repair loop. This could be due to missing or corrupted systems files, including problems with Windows Registry, incompatible hard drives, file corruption in Windows Boot Manager, or even a faulty Windows update.
How do I bypass automatic repair in Windows 11?
Disable Automatic Repair Tool Open the Windows boot troubleshooting menu. Select Advanced repair options and choose Troubleshoot. Then click on Advanced options and select the Command Prompt. Check the values for identifier and recoveryenabled.
What is Startup Repair?
Description. Startup Repair. Fixes certain problems, such as missing or damaged system files, that might prevent Windows from starting correctly. System Restore. Restores your computer's system files to an earlier point in time without affecting your files, such as e‑mail, documents, or photos.
How do you fix the automatic repair loop 2022?
0:564:18【2022】How to Fix Automatic Repair Loop in Windows 10/11? - YouTubeYouTubeStart of suggested clipEnd of suggested clipIf it detects errors it will automatically repair them while windows can't boot you can still forceMoreIf it detects errors it will automatically repair them while windows can't boot you can still force windows to boot to a command prompt window using the advanced. Options menu.
How do I bypass a repairing disk error?
What to Do on Stuck “Repairing disk errors” Issue in Windows 10?Let It Finish Overnight. First of all, “Repairing disk errors” is triggered by automatic CHKDSK on booting. ... Restart from Safe Mode. It is known that safe mode can solve myriad problems in computer. ... Automatic Repair. ... System Restore. ... Replace Drive.
What happens when Windows 10 Startup Repair Fails?
If you are unable to perform a startup repair, then your next option is to try using your Windows 10 installation media to fix the boot error. If you don't have installation media, you will need to go to a working computer and Create a Windows 10 USB Bootable Flash Drive.
What do I do if Windows Startup Repair doesn't work?
If you cannot use Startup Repair, then your option is to disable automatic restart, run chkdsk and rebuild bcd settings....Type following command lines and press Enter after each to fix Startup Repair stuck issue:bootrec /fixmbr.bootrec /fixboot.bootrec /rebuildbcd.
How to disable auto repair on Windows 10?
To disable the automatic repair feature on Windows 10, type the following command and press Enter: The major drawback of the automatic repair feature is that Windows 10 tells you nothing about what exactly it's trying to repair.
How to stop Windows 10 from auto repair?
Method 1: Disable Automatic Repair Before Windows 10 Fails to Boot 1 Open the Command Prompt as administrator and run the bcdedit command:#N#Make note of the identifier value under the " Windows Boot Loader " section. 2 To disable automatic repair at Windows 10 startup, execute this command:#N#bcdedit /set {current} recoveryenabled no 3 Now, the automatic repair feature will no longer run automatically after the third unsuccessful boot of your PC.
Does auto repair work after third boot?
Now, the automatic repair feature will no longer run automatically after the third unsuccessful boot of your PC.
Why does Windows 10 automatically repair?
The cause of Automatic Repair is if you PC crashes 2 times consecutively or fails to boot, Windows 10 will run Automatic Repair by default. Disabling automatic repair will only mean that you will have to manually run automatic repair if wanted or needed instead if it automatically being run when the above is true.
Is there a matter of when or not a device should be enabled or disabled?
There really isn't a matter of if when or not it should be enabled or disabled, but just a matter of personal preference.
Do you have to be an administrator to enable or disable automatic repair?
You must be an administrator to enable or disable automatic repair.
How to use startup repair?
While in the Advanced startup environment, use the following steps to use Startup Repair: Click the Troubleshoot button. Click the Advanced options button. Click the Startup Repair button. Select your account. Type your account password. Click the Continue button. Quick Tip: If your computer is loading correctly, using this tool, ...
How to fix a computer that won't start?
While in the Advanced startup environment, use the following steps to use Startup Repair: 1 Click the Troubleshoot button. 2 Click the Advanced options button. 3 Click the Startup Repair button. 4 Select your account. 5 Type your account password. 6 Click the Continue button.#N#Quick Tip: If your computer is loading correctly, using this tool, you'll get the "Start Repair couldn't repair your PC" message because there's nothing that needs fixing.
Why is my computer saying "Start Repair couldn't repair my PC"?
Quick Tip: If your computer is loading correctly, using this tool, you'll get the "Start Repair couldn't repair your PC" message because there's nothing that needs fixing. Once you've completed the steps, the Start Repair feature will proceed to scan, detect, and fix any problems that may prevent your device from loading correctly.
How to stop boot sequence?
As soon as the Windows logo appears on your screen, press the power button. (This will immediately interrupt the boot sequence.)
Where is the repair link on my computer?
Click the Repair your computer link in the bottom-right corner.
How to fix a loading problem?
If you have access to the desktop, you can use these steps to access the recovery environment to use the Startup Repair tool: Open Settings. Click on Update & Security. Click on Recovery. Under the "Advanced startup" section , click the Restart now button. After completing the steps, you can now continue with the steps below to fix loading problems ...