DIY Bicycle Repair Stand
- Parts and Tools. The materials and tools necessary to build this repair stand are readily available, easy to work with, and best of all, pretty inexpensive.
- Building the Base - Step 1. We begin by grabbing the tee fitting and two (2) of the ten (10) inch lengths of pipe. ...
- Building the Base - Step 2. There's your completed stand! Just kidding. That'd be lame. That would also mean each piece cost about ten dollars.
- Build the Base - Step 3. It's time to put the base components together. Obtain the piece from Build the Base - Step 1. ...
- Up We Go! - Install the Vertical Pole. What's that extra port on the tee, you ask? That's for the big 60" length of pipe. ...
- Ummm...Add the Other Thing! We will now add the arm that will hold the clamp that will hold the bike. ...
- Clamp the Clamp. Grab your two hose clamps and the spring clamp. ...
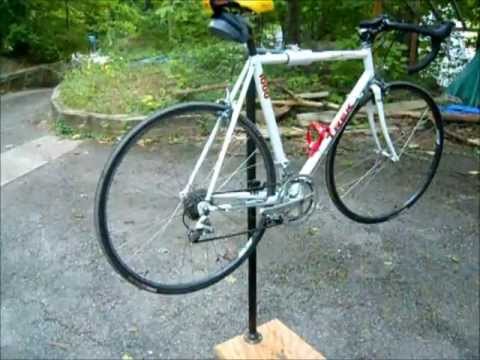
- Voila! Throw Your Bike Up There! If you are certain all joints that have rotational stress on them are tight (this would include the lower tee and two ...
- Improvements. As with any project, this is version 1.0. There are some improvements that could definitely do some good.
Full Answer
What is the best bicycle repair stand?
The Bike Repair Stand
- Bikehand Pro Mechanic Bicycle Bike Repair Rack Stand. The Bikehand Pro Mechanic Bicycle is our top pick and the best choice of bicycle repair stand. ...
- Sportneer Bike Repair Stand. The Sportneer Foldable Bike Repair Workstand is the perfect and dependable companion for all bike enthusiasts.
- Feedback Sports Sport Mechanic Bike Repair Stand. ...
How to make a bike repair stand DIY?
Step 1 – Position the flange near a corner of the plywood square, one inch from each edge. With a pencil, mark the four holes. Step 2 – With the 1/4″ bit, drill two of the holes for the flange. Temporarily insert two of the bolts and the flange. This will allow you to accurately drill the other two holes. Step 3 – Assemble the pipes and fittings.
How to use a bicycle repair stand?
What Do You Use a Bike Stand For Anyway?
- A Lesson On Wheel Truing Using – A Bike Repair Stand. Bicycle wheels need truing from time to time – simply from constant use, or following a bike crash. ...
- Another Lesson On Wheel Truing – But Using A Truing Wheel Stand. In this video, Daniel Lloyd explains how to straighten your wheels using a Truing Wheel. ...
- Building A Bicycle Using A Bike Stand. ...
What is the best bicycle repair kit?
The Best Bike Repair Kit
- Lumintrail Bike Repair Tool Kit. This entry-level bike repair kit comes with 42 commonly used tools and is ideal for most maintenance and repair jobs.
- Crank Brothers Bicycle Tool. ...
- Park Tool AK-3 Advanced Mechanic Tool Kit. ...
- BIKEHAND Bicycle Repair Tool Kit. ...
- Aim High Pro Bike Repair Kit with Pump. ...
- Bicycle Repair Bag & Bicycle Tire Pump. ...
How do you make a homemade bike repair stand?
1:144:11How To Build Your Own Bike Work Stand in Just 30 Minutes - YouTubeYouTubeStart of suggested clipEnd of suggested clipWe're going to take our long pipe and screw the connecting elbow to one end so it looks a littleMoreWe're going to take our long pipe and screw the connecting elbow to one end so it looks a little something like this. Next we'll take the 12 inch pipe and screw it into the other end of the elbow.
What can I use as a bike repair stand?
9:1711:12How to use a bicycle repair stand and what features to look for - YouTubeYouTubeStart of suggested clipEnd of suggested clipI like to do it with the bike on the ground. And then just take an old toe strap or a velcro strapMoreI like to do it with the bike on the ground. And then just take an old toe strap or a velcro strap or something and tie the back wheel and tire assembly to the side of the repair.
How do you make a wood bike repair stand?
6:4711:27DIY Bike Repair Stand made out of wood - One 2x4 and one 4x4YouTubeStart of suggested clipEnd of suggested clipEnough now put some boards across here. I cut two 14 piece or 14 inch pieces. Too by far. So gotMoreEnough now put some boards across here. I cut two 14 piece or 14 inch pieces. Too by far. So got this whole thing up susana put two boards which are gonna just hold the seat.
How do you make a wooden bike stand?
0:177:09How to Build a Wood Bike Stand! - YouTubeYouTubeStart of suggested clipEnd of suggested clipAlright guys start out you're going to need a 2x4 that is roughly. Three or four feet long and you'MoreAlright guys start out you're going to need a 2x4 that is roughly. Three or four feet long and you're going to need a piece of two by six that's roughly.
How do you make a bike stand?
0:003:39How To Make A Bike Repair Stand DIY - YouTubeYouTubeStart of suggested clipEnd of suggested clipIt's one quarter inch and it is screwed to the base. With nuts on the backside which your counterMoreIt's one quarter inch and it is screwed to the base. With nuts on the backside which your counter sunk into the wood. This is what the bolts look like on the bottom side for the hold the flame.
How do you make a PVC bike Stand?
0:267:36DIY PVC Bike Rack - YouTubeYouTubeStart of suggested clipEnd of suggested clipYou will need about 45. Feet of three-quarter inch PVC pipe. This is typically sold in 10-footMoreYou will need about 45. Feet of three-quarter inch PVC pipe. This is typically sold in 10-foot sections. Although I asked an employee at the hardware store to cut mine in half.
How do you make a bike storage rack?
1:006:03DIY Bike Rack for $20 / Bike Storage Stand & Cabinet for GarageYouTubeStart of suggested clipEnd of suggested clipThe upper 2x4 should be placed at 14 inches above the lower 2x4. Your hook placement should beMoreThe upper 2x4 should be placed at 14 inches above the lower 2x4. Your hook placement should be roughly 24 inches from the next hook on the same row.
How do you make a road bike stand?
0:597:50How To Build A Bike Stand | Easy DIY Road Bike Storage - YouTubeYouTubeStart of suggested clipEnd of suggested clipIt's actually going to work by holding each individual wheel in place so the bike doesn't fall overMoreIt's actually going to work by holding each individual wheel in place so the bike doesn't fall over so for this I'm gonna need six individual bits to help that rack start to work.
How do you use a mountain bike without a stand?
Just hang the front of the seat on any convenient "peg", or rig hooks or a rope to suspend the bike from. All you need to do is somehow get the rear wheel off the ground while having the pedals clear to turn.
How do you make a simple bike rack?
0:122:21How To Make A D.I.Y. Bike Rack - D.I.Y. At Bunnings - YouTubeYouTubeStart of suggested clipEnd of suggested clipSuper simple and really handy you can make your bike rack any size you like to accommodate as manyMoreSuper simple and really handy you can make your bike rack any size you like to accommodate as many bikes as you wish I'm going to make mine into accommodates through these are all the tools and
How do you make a 2x4 bike rack?
0:318:19How to Build a Bike Rack Out of 2x4s For Your Garage - YouTubeYouTubeStart of suggested clipEnd of suggested clipTake a level make sure your 2x4 is level drill a pilot hole. And a screw on your opposite. SideMoreTake a level make sure your 2x4 is level drill a pilot hole. And a screw on your opposite. Side against the other leg. Drive that in to have a second screw on each leg.
How do you make a wooden stand?
0:265:02DIY Tool Stand made from 2x4s | Evening Woodworker - YouTubeYouTubeStart of suggested clipEnd of suggested clipI first cut all of my two by fours to length with the miter. Saw. I then cut off the rounded cornersMoreI first cut all of my two by fours to length with the miter. Saw. I then cut off the rounded corners on all of them with a table saw this step isn't necessary.
How do you make a road bike stand?
0:597:50How To Build A Bike Stand | Easy DIY Road Bike Storage - YouTubeYouTubeStart of suggested clipEnd of suggested clipIt's actually going to work by holding each individual wheel in place so the bike doesn't fall overMoreIt's actually going to work by holding each individual wheel in place so the bike doesn't fall over so for this I'm gonna need six individual bits to help that rack start to work.
How do you make a motorcycle stand?
0:036:47Build a Wooden Dirt Bike Stand // Inexpensive & Bullet Proof! - YouTubeYouTubeStart of suggested clipEnd of suggested clipOn here to raise the bike for the wintertime. So we'll build one for this bike I'll show you how toMoreOn here to raise the bike for the wintertime. So we'll build one for this bike I'll show you how to build wooden motorcycle stand for this bike.
How do you make a dirt bike stand?
0:506:13How to Make a Dirt Bike Stand - YouTubeYouTubeStart of suggested clipEnd of suggested clipAnd two piece this cut at six inches. So I'm gonna do that all here and can be very simple just makeMoreAnd two piece this cut at six inches. So I'm gonna do that all here and can be very simple just make sure you square up your bling.
How do you mount a bike wall?
2:0911:00DIY Wall Hanging Bike Rack With Storage - YouTubeYouTubeStart of suggested clipEnd of suggested clipAnd first i really wanted to start by laminating. Some of these walnut pieces together to create aMoreAnd first i really wanted to start by laminating. Some of these walnut pieces together to create a bottom shelf for the wall mounted bike rack. And i did this by sanding down the edges super smooth.
DIY Bike Repair Stand – The PVC Option
As usual, Instructables has some nicely designed bike repair stands. This one is a really sweet-looking bench-mounted repair stand, made of PVC.
The Alternate PVC Bike Repair Stand Option
Here’s the second design from Instructables. It’s a free-standing PVC bike repair stand. This is a pretty clever design that uses no clamp to hold the bike in place.
The Wooden Bench Mounted Repair Stand
This wooden bench-mounted repair stand looks like a straightforward build. You’ll need a workbench and some pipe clamps. This one uses a bit of plumbing polyurethane in place of the foam pipe insulation of the previous builds.
The Pipe Based Option
This fine-looking pipe-based bike repair stand uses simple and easily obtainable raw materials. The clamp looks a little overbuilt, though I bet you could use one of the PVC clamps from above without much ill effect.
The Wood Based Stand
This is a really simple design for another bench-mounted bike repair stand and might be just the thing if you’ve got a workbench. The site has nice plans for the build.
Freestanding Wooden Repair Stand
This next one is pretty interesting. I found a reference to it in various search engines, but the site was gone. Wayback Machine to the rescue!
Step 1: Materials and Tools
10' length of 1 1/2" EMT (electrical metallic tubing) - $12.45 from Home Depot electrical dept.
Step 2: Clamping Mechanism
The clamping mechanism consists of modified locking pliers welded to the 1" steel pipe section. Steel pipe was selected due to its stiffness.
Step 3: Rotating Clamp Mechanism Support
The support for the clamp mechanism allows the clamp to rotate 360 deg. The 1" steel clamp pipe fits loosely into the 1 1/4" EMT. I cut a 4" length of 1 1/4" EMT to hold the clamp pipe. I cut a slot down the length of the 4" long EMT with a cut-of blade in the angle grinder and then made the slot a little wider.
Step 4: Base Stand
The base stand is made of 1 1/2" EMT. I cut a length about 4' long for the base post. and drilled (5) 3/8" holes about 3" apart near the top of the post. The holes allow for height adjustment of the clamp support post. I then cut two other pieces about 30" long for legs. The two legs project to the front at about 45 degrees on each side.
Step 5: Ready for Paint
I ran into some issues during painting due to cold, humid weather, so am posting the almost finished pictures for now. As you can see in the photos, the repair stand works for holding the bike by the top tube as well as by the seat tube.
Step 6: Final
Painted the whole thing blue. After paint I added the 3M heavy-duty double sided tape to each side of the clamp angles and adhered the rubber pads. I cut the pads so that they slightly overhang each edge of the angles. You can see how the placement of the T-handle bolts and the addition of the 1" steel spacer help the handles from interfering with each other and the side of the clamp support. All done.
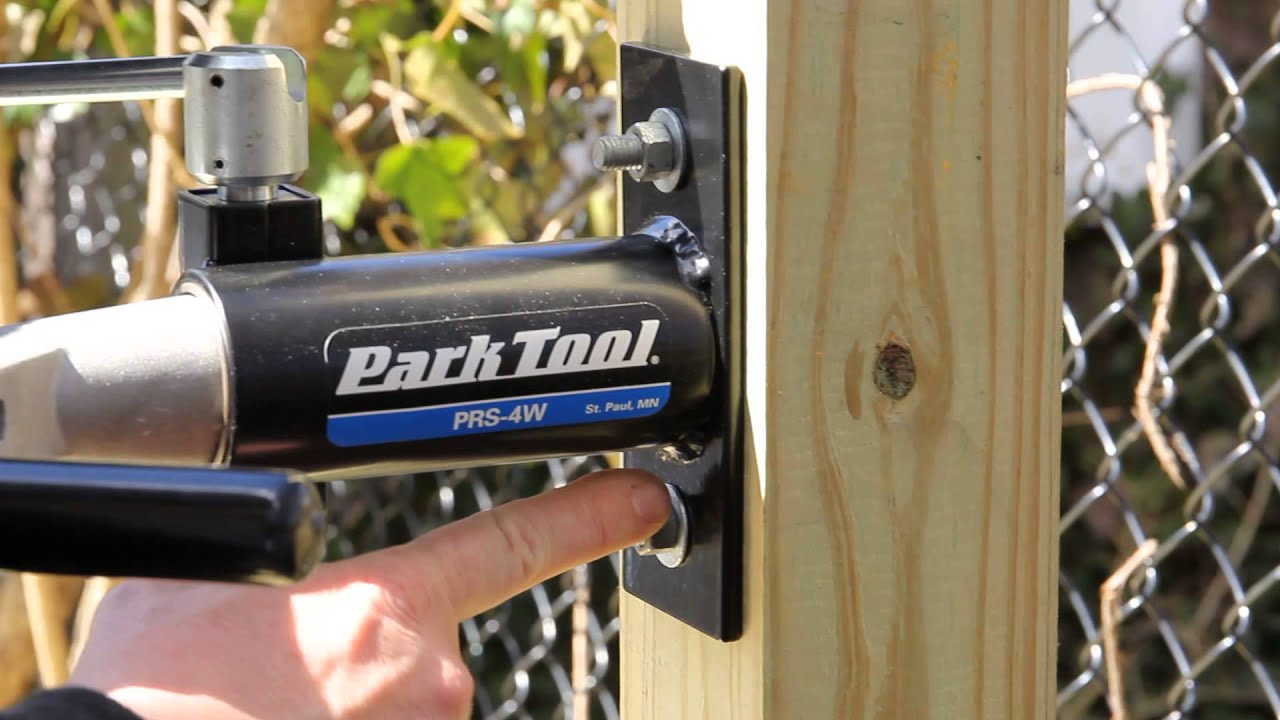
What is the support arm for a clamp?
The support arm that holds the clamp was made from a piece of 1 3/4" by 1/4" thick angle iron, a scrap piece of metal tubing, and a pair of washers.
How to make a carriage bolt pivot?
The holes on the top and bottom pieces for the carriage bolt were drilled using a drill press, and then enlarged using a rotary tool with a small carbide grinding bit. The hole in the upper arm was elongated so the carriage bolt could pivot and remain at 90 degrees to the top arm in any position. The lower hole was made square-ish to keep the carriage bolt from spinning, and the front edge of the carriage bolt was trimmed off (shown in a later step), which allows the bolt to pivot front-to-back as needed.
Where is the main clamp mechanism on a golf ball?
The main clamp mechanism swivels within the support arm and can be locked in position using the threaded golf ball handle on the back end.
Is a vise stand a stand?
Well, technically it's not a stand; it's more of a bicycle clamp-arm-apparatus-thing, which is held in my portable vise stand to use.
Can you add weights to a vise stand?
In my case, this option seemed the most useful as it takes advantage of a heavy tripod base I already have in my shop. Extra weights can be added to the vise stand for more stability if needed.
How long to let a X-ray machine sit?
Hold the parts together for at least 30 seconds more. Then let the cemented assembly sit for at least 2 hours. After at least 2 hours, you will lay the X down on the work surface & sprinkle some of the PVC shavings into the gap in the crotch of the X on one side. Then dribble a small amount of cement into the shavings.
What tools are needed to cut PVC pipe?
There is also some shaping of some of the pipe & fittings, so some carving & shaping tools are required. Tools: - hack saw ( or alternately a P VC tubing cutter) - tape measure. - wood chisel (or alternately a dremel tool with a carbide bit) - pencil & dry-erase marker. - file. - sand paper.
Can you use a level on a stand?
You can use a level to make sure (as long as you are sure you are working on a flat level surface). Once you are satisfied that the stand is perfectly upright & the base is stable with no rocking, you should put alignment marks in the upright portion of the T-fittings & the 34" legs near the T-fittings.
Can you dribble cement into a fitting?
You can also coat the other parts of the cemented joint with another coat of cement to make sure it is strong. Just be certain not to dribble cement into the branches of the fitting that will later need to have pipe inserted. Now you're done with the most tedious & time-consuming part of the build.
How to fit a bike on a stand?
To fit your bike on the stand, you need to use a pony clamp. This should be installed at the end of the pipes per the instructions provided. When the clamp is in place, you should place two wooden blocks in the jaws and tighten the clamp.
What happens if you don't have a bike stand?
If you do not have a bike stand, you are making your life harder. Trying to repair or clean your bike without a stand can be a nightmare. The problem is that bike stands can be very expensive and you can feel overwhelmed when trying to choose one. If none of the stands on the market appeal to you, you can always make your own.
How to tighten hex nuts on bike stand?
Using a wrench and socket, you can tighten hex nuts on the protruding bolts. To fit your bike on the stand, you need to use a pony clamp. This should be installed at the end of the pipes per the instructions provided. When the clamp is in place, you should place two wooden blocks in the jaws and tighten the clamp.
What kind of pipes do you use for a bike stand?
If you want a metal bike stand, you should use threaded pipes. There are a few designs that you can try, but there is one that will be fast and inexpensive to complete.
How many bolts to install on a pipe?
You can now install four ¼” bolts with flat washers and install the pipe assembly over the bolts. When you install the pipes, you need to ensure the cross pipe points at the opposite corner of the plywood. You should then tighten all the pipe joints then fix everything in place. Using a wrench and socket, you can tighten hex nuts on the protruding bolts.
How to stop a bike from rocking?
Once the base and legs are set, you need to put end-caps on the ends of the base to stop it rocking. You can then assemble the support tubes and the rests for the bike. You will need a 16” length of 1 ½” diameter pipe that you attach to the cross fitting with the bike rest on it. This fitting also needs to be attached to the legs of the frame. The other rest will be placed on the other end of the 16” pipe.
How many lengths of pipe do you need for a stand?
After the rests have been made, you will turn to the legs and base of the stand. For the legs, you need two 34” lengths of 1 ½” diameter pipe. These pipes will need to be placed in T-fittings. If the fit is correct, you can cement the pieces together.