Nintendo 3DS XL Circle Pad Replacement.
- Hold the device so that the cover is facing up.
- Using a plastic opening tool, pry off the cover starting at the top right corner.
- Hold the edge of the cover to ensure it does not reattach.
- Look for the small section below the stylus compartment. Pry off the cover at that point if it is still attached.
- Take off the cover of the device and set aside.

Can you repair a broken circle pad on a 3DS XL?
This guide will allow you to repair a broken circle pad on your 2015 Nintendo 3DS XL. If your circle pad no longer functions well or doesn't function at all this is the guide for you. All you will need is a new circle pad, a few screwdrivers and with a little patience your 3DS will once again have full functionality.
How do I replace my circle pad?
So you managed to break your circle pad and can't play your favorite games? Don't fear, the circle pad can be replaced! Loosen the two 4.2 mm-length screws located at the top of the back cover. The screws have locking washers that prevent the screws from falling off of the back cover.
How do I Fix my 3DS that won't turn on?
All you will need is a new circle pad, a few screwdrivers and with a little patience your 3DS will once again have full functionality. Ensure device is turned off and the stylus and game card are removed. Turn the device so that the back cover is facing you and locate the two screws at the top of the back cover.
How do I fix a circle pad joystick that keeps falling off?
Lift the Circle Pad joystick off the motherboard. Start 2022 by pledging to fix more and buy less. To decrease the chance of losing it during repairs, you may want to remove the two thin pads underneath the Circle Pad joystick. Use a spudger or screwdriver to lift the pads up and remove them from the device.

Can you replace a 3DS Circle Pad?
Hold the device in one hand and turn it over. Grab the top edge of the back cover with your opposite hand so that the cover does not fall back into place. Flip the 3DS over again so that the back cover is facing up. Pull the back cover up and away from the rest of the device to remove it.
How do you reattach a 3DS Circle Pad cover?
0:545:38How to Repair a Circle Pad Cover on Your Nintendo 3DS - YouTubeYouTubeStart of suggested clipEnd of suggested clipIt's not as comfortable. So um a basic fix for this is to just have a hot glue gun here on the desk.MoreIt's not as comfortable. So um a basic fix for this is to just have a hot glue gun here on the desk.
Why is my Circle Pad not working?
It may be necessary to calibrate the Circle Pad. Go to SYSTEM SETTINGS in the HOME Menu of your Nintendo 3DS system, select OTHER SETTINGS and then CIRCLE PAD. Confirm the messages on the screen until you are asked to move the Circle Pad two or three times in a large circle.
How long does a 3DS Circle Pad last?
around 480 hoursThe upcoming Circle Pad Pro accessory for the Nintendo 3DS will last for around 480 hours off a single AAA battery, it has been revealed.
How does the 3DS circle pad work?
The Circle Pad uses a single AAA battery to operate and communicates with the 3DS via the system's infrared feature. Battery life is pegged at 480 hours. The Circle Pad Pro was released specifically for Monster Hunter Tri G in Japan, but a handful of other games also support it.
How do I replace the C stick on my new 3DS?
2:205:41How To Replace The New 3DS C-Stick With The PSP 1000/1001 GripYouTubeStart of suggested clipEnd of suggested clipYou will now see that the c-stick is located right here use the same screwdriver head and unscrewMoreYou will now see that the c-stick is located right here use the same screwdriver head and unscrew the three screws that hold the c stick on the 3ds. Next pry up the housing and take the old C stick.
How do I fix my 3DS buttons?
If you are using a screen protector on the touch pad and multiple buttons are not responding, remove the screen protector. Clean around the Touch Screen to ensure it is free of any debris or smudges. If the touch screen is registering as being pressed, then it may cause the buttons to act unresponsive.
How do you fix a broken 3DS cartridge?
0:438:58How to Fix a Faulty Nintendo DS / 3DS Game Card - YouTubeYouTubeStart of suggested clipEnd of suggested clipNow if they were bashed too much what could happen is the contacts from the actual Nintendo 2ds orMoreNow if they were bashed too much what could happen is the contacts from the actual Nintendo 2ds or the S or 3ds. Might not make a a good connection with the gold contacts in there.
Is there a Circle Pad Pro for new 3DS XL?
This Nintendo 3DS XL Circle Pad Pro provides the user with an additional analogue stick, for games where you need to move the character and camera together.
How does the C stick on the new 3DS work?
0:071:25Proper use of the New 3DS C-stick - YouTubeYouTubeStart of suggested clipEnd of suggested clipNo what you want to do is when you want to control it you rest your thumb on the C stick and justMoreNo what you want to do is when you want to control it you rest your thumb on the C stick and just press down on the direction do you want it to go. That way you're not overexerting your thumb.
Is there a Circle Pad Pro for new 3DS XL?
This Nintendo 3DS XL Circle Pad Pro provides the user with an additional analogue stick, for games where you need to move the character and camera together.
Does the Circle Pad Pro work with 2DS?
It's not the best looking mod but it works and I'm happy with it. It's actually surprising how the 2DS has no compatibility problem at all with the circle pad pro as if Nintendo intended at some point to release a 2DS version.
Introduction
So you managed to break your circle pad and can't play your favorite games? Don't fear, the circle pad can be replaced!
Step 1 Battery
Loosen the two 4.2 mm-length screws located at the top of the back cover.
Step 3
Insert the plastic opening tool into the opening located on the right side of the battery.
Step 4 Circle Pad Joystick
Using tweezers pull out the rubber bumpers that are located at the top of the device on either side of the game cartridge compartment.
Step 6
Remove the 2.3 mm screw located above the game cartridge slot with a Phillips #00 screwdriver.
Step 7
Make sure the SD card has been removed. With a plastic opening tool pry off the lower case starting at the bottom edge and working around the perimeter.
Step 8
Remove the ribbon cables located underneath the left and right bumpers by prying up the base of the cables with a plastic opening tool.
Introduction
Is your 3DS not responding correctly to your Circle Pad inputs? Replace the bottom joystick mechanism and get moving again.
Step 3 Battery
Insert a plastic opening tool into the notch in the lower case above the battery.
Step 6 Circle Pad Joystick
Remove the two 7.7 mm Phillips screws securing the back of the Circle Pad to the motherboard.
Step 7
Use the flat end of a spudger to pry the back of the Circle Pad off the motherboard.
Step 8
To reassemble your device, follow these instructions in reverse order.
Introduction
This guide will allow you to repair a broken circle pad on your 2015 Nintendo 3DS XL. If your circle pad no longer functions well or doesn't function at all this is the guide for you. All you will need is a new circle pad, a few screwdrivers and with a little patience your 3DS will once again have full functionality.
Step 2
Turn the device so that the back cover is facing you and locate the two screws at the top of the back cover.
Step 3
Remove the microSD card by pushing it in, the card should automatically pop out.
Step 4
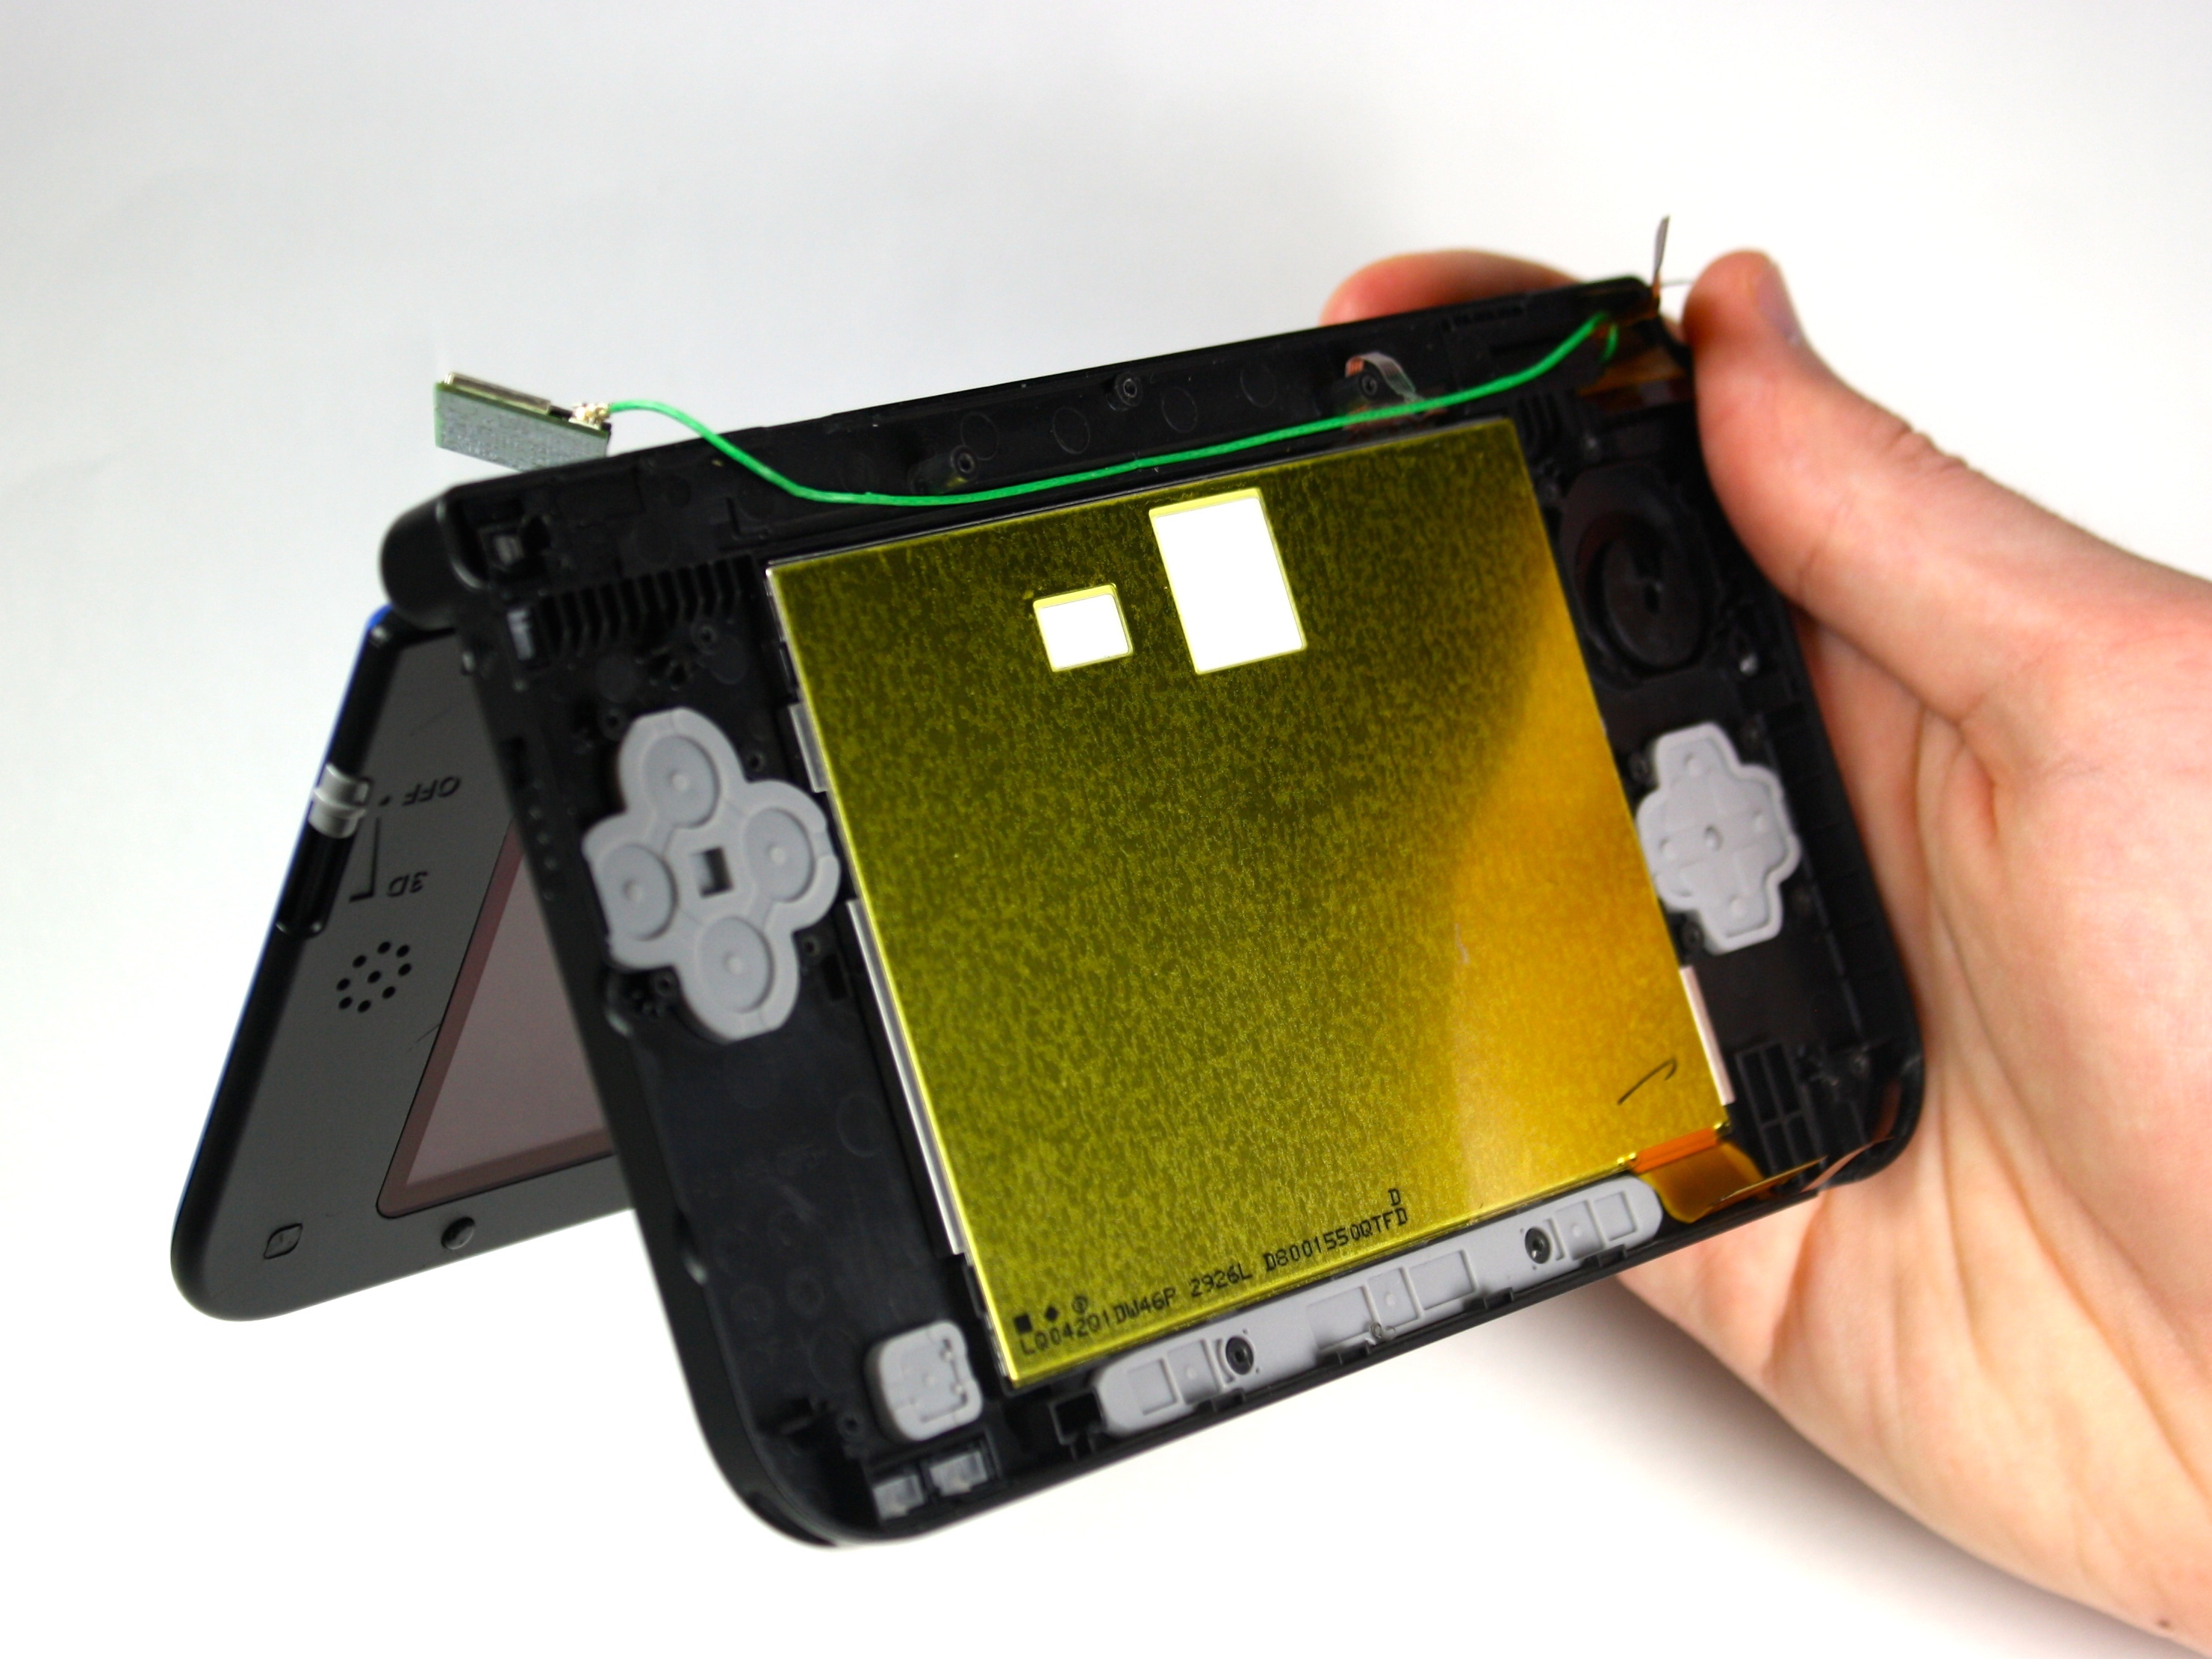
To remove the battery, hold the device with the battery facing up in one hand, with a finger securely gripping the lid of the device, and gently flip the device over to your other hand. The battery should fall into your hand.
Step 5
Remove the two rubber bumpers on the back of the device with a thumb tack.
Step 6
Using the Phillips #00 screwdriver, remove the two screws holding the circle pad in place.
Step 7
Using the tip of the spudger, gently lift off the lid of the ZIF connector to release the circle pad cable.
