- You can use waterproof silicone caulk to make repairs to cracks. It comes in a variety of colors, including the traditional red clay color.
- Cracks can be repaired by wiring the cracked edges together. This method takes time and patience, but it provides a durable and lasting solution.
- Rather than wiring the pot where it has been cracked, you can also wrap thin wire strands around the entire pot to hold it together and prevent further damage.
- Step 1 – Clean and Dry the Surfaces to Be Joined. ...
- Step 2 – Pre-fit Parts to Be Joined and Mark Them for Easy Alignment. ...
- Step 3 – Prepare the Adhesive. ...
- Step 4 – Apply Glue to Broken Edges or Crack. ...
- Step 5 – Clean Up Dry Glue.
What is the best way to repair a clay pot?
Step 1: What You Will Need for Pottery Mending Steps?
- Two-part clear 5 minutes PC Clear epoxy ***
- Wooden stick or a pin-tool for applying adhesive
- A container with PVC pebbles / pellets, rice or sand
- Clay
- Razor blade
- Denatured or 91% Alcohol
- Rug
- Paper pad to mix Epoxy on
How to waterproof a clay pot?
a Vinyl Latex Emulsion, to seal and waterproof clay pots. This sealer is completely and easily with water. It has the consistency of milk, and I pots. Once its' totally dry after a few hours, it's totally safe for plants, and is sealed from moisture for many years.
How do you clean clay pots?
You’re going to need the following :
- Water
- Vinegar
- Dish soap
- Scrub Brush
How to fix a broken clay pot?
- Instantaneous drying
- Versatile for different types of clay
- No clamping required
- Long-lasting indoor fix
- Impact resistance

How do you fix a crack in a clay pot?
Repair a cracked clay roasting pot by immersing it in milk. Clay roasting pots are used to seal nutrients into food and keep its natural juices and flavors intact, creating dishes that are low in fat and high in flavor.
What is the best glue to repair a clay pot?
A glue that contains marine epoxy is best for terracotta pots. The epoxy is strong and durable which will increase the lifespan of your terracotta pots. This epoxy is also waterproof so it will not get washed away when it rains or when watering the plant.
Can you repair cracks in terracotta pots?
You can use waterproof silicone caulk to make repairs to cracks. It comes in a variety of colors, including the traditional red clay color. Cracks can be repaired by wiring the cracked edges together. This method takes time and patience, but it provides a durable and lasting solution.
How do you fix a hairline crack in a terracotta pot?
My Ceramic Planter Is Cracked You can use epoxy glue for this repair, and it shouldn't take longer than half an hour. Clean the pot and allow it to dry. Then, run the glue down the crack until it covers all of it. Smooth it out with an edge of a piece of cardboard, and secure it with clamps until the glue dries.
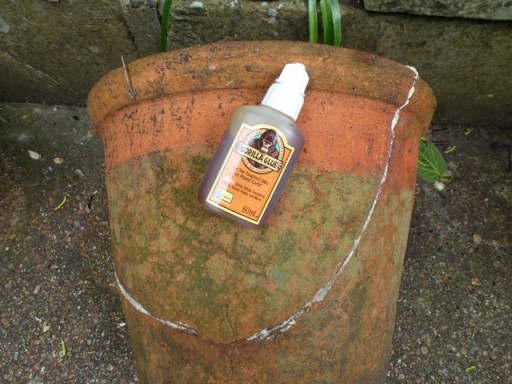
Does Gorilla Glue work on clay pots?
Recommended Glue for Clay Pots: GORILLA Clear Glue This crystal-clear glue by the Gorilla brand offers an extremely strong, water-resistant, and non-foaming product for bonding your clay pots and pottery. You can use this glue with the greatest ease on both indoor and outdoor items.
Can you repair clay pots?
Can Terracotta Be Glued Back Together? Most terracotta pots and garden features can be repaired fairly easily using modern adhesives, as they produce very structurally sound glue joins in this material. Two different types of adhesives are be used for repairing terracotta, and each has its advantages and disadvantages.
Why does my clay pot crack?
Clay pots may look sturdy and strong, but they're often fragile and easy to chip or break. Because they're porous, they absorb moisture like a sponge. Changes in the temperature, or freezing rain and snow can cause them to crack as the clay expands and contracts.
How do you fix a crack in a garden pot?
0:261:37How to Repair a Flower Pot [Cracked / Leaking] - YouTubeYouTubeStart of suggested clipEnd of suggested clipThis is really easy to apply just get some on her brush. And bring it in and then this will seal upMoreThis is really easy to apply just get some on her brush. And bring it in and then this will seal up the cracks. Alright. So you saw how easy that was to apply the rubber flex liquid rubber coating.
Why does my clay roaster crack?
Though clay roasting pots are a helpful addition to the kitchen, they can break easily if certain precautions are not taken. Sudden changes in temperature, especially from hot to cold, can cause the pot to crack. Examine the pot before throwing it out to see if it is fixable. The fix for a crack in a clay pot is done with common household items.
Why do you use a clay roasting pot?
Clay roasting pots are used to seal nutrients into food and keep its natural juices and flavors intact, creating dishes that are low in fat and high in flavor. The secret behind clay roasting pots is the steam that evaporates from the pores in the clay when baking in the oven, cooking the food without removing the flavor.
How long to boil milk in a roasting pot?
Turn the burner on low to medium heat to bring the milk to a slow boil. Allow the cracked roasting pot to simmer in the boiling milk for about an hour.
How to make a clay roaster?
Step 1. Place a pot or pan large enough to hold the clay roasting pot on a burner on the stove. Select a pot deep enough to fill with milk after the clay pot with the crack in it is placed inside.
Can you put a clay roasting pot on a cold surface?
Products containing harmful chemicals pose the risk of seeping into food during the cooking process. Do not set a clay roasting pot on a cold surface immediately after removing it from the oven. The drastic change in temperature may cause the clay to crack.
How to fix a cracked pot?
Another easy fix exists unless pieces of the pot are missing. You can use epoxy glue for this repair, and it shouldn’t take longer than half an hour. Clean the pot and allow it to dry. Then, run the glue down the crack until it covers all of it.
How to repair a terra cotta flower pot?
If your pot has started to crumble or crack, begin repairs with a flat-edge screwdriver and some fine- and medium-grain sandpaper. Use the edge of the screwdriver to remove any crumbling material. Do so gently, removing only the material that flakes off without much pressure. Be careful not to dig into the clay. Now, you can use the sandpaper to remove any other areas of rot, continuing to work slowly and carefully.
How long does it take for two part epoxy to cure?
Once you mix them up, however, they harden quickly, so you need to work fast. Two-part epoxy dries clear, forms a strong bond and must cure for at least 24 hours.
Can you use sandpaper to repair a terra cotta pot?
Now, you can use the sandpaper to remove any other areas of rot, continuing to work slowly and carefully. According to writers from Deep Green Permaculture, cracked terra cotta flower pots are easy to repair with the right adhesives. The two main categories of adhesives are landscape block adhesives and two-part epoxies.
Can clay pots be glazed?
It's normally not glazed and is prized for its durability, versatility and affordability. All types of clay pots can decay or crack after time, but unless they are really broken or shattered, you should be able to repair them with minimal fuss.
Can you paint over a ceramic pot?
If you want to paint over a terra cotta or glazed ceramic pot after repairing it, the experts from Ceramices recommend using acrylic, latex or epoxy paint – some are available in spray paints. Before starting, clean the pot with water and a stiff brush, and put it in the sun to dry. Use a foam brush or the spray to apply the paint, ...
What to do if terra cotta pots crack?
You can use waterproof silicone caulk to make repairs to cracks.
Can you use waterproof caulk to repair cracks?
You can use waterproof silicone caulk to make repairs to cracks. It comes in a variety of colors, including the traditional red clay color. Cracks can be repaired by wiring the cracked edges together. This method takes time and patience, but it provides a durable and lasting solution.
Do terra cotta pots increase curb appeal?
Whether inside or artfully arranged around the exterior of your house, terra-cotta planters and pots are an attractive addition to any home and can significantly increase curb appeal. Source: MorgueFile. In most cases, you have to do very little to care for and maintain your terra-cotta pots, especially if you display them indoors.
Can you keep terra cotta pots outside?
In most cases, you have to do very little to care for and maintain your terra-cotta pots, especially if you display them indoors. But those kept outside are exposed to weather abuse, and they can show wear and tear and fracture over time. This is especially true if the pots are left outside year-round. The summer heat and winter cold can wreak ...
How long do terracotta pots last?
Unlike plastic pots which degrade over time with exposure to sun’s UV rays, terracotta pots can last for decades, and are a natural material, making them far more sustainable to use. The disadvantage of terracotta is that it is brittle, and can crack if dropped or exposed to freezing temperatures.
How to clean terracotta?
If dirt remains on the surfaces to be glued together and can’t be removed by washing, scrub them with a soft nylon brush while washing. Don’t use a wire brush, as terracotta is soft, and the wire brush will remove material , destroying the tight fit between parts.
How long to mix epoxy glue?
Mix both parts together thoroughly. Depending on the formulation, the instructions on the label may recommend leaving the mixed glue for 5-10 minutes, then mixing it again before applying. Check the instructions for the product being used, as faster drying epoxy glues set faster also, with less working time.
What is terracotta used for?
Terracotta is a hard, fired clay that’s reddish-orange in colour, and is commonly used for making pots and garden features. This material has been used by human civilisations for centuries, dating back to the times of ancient China, Greece and Egypt, a testament to its usefulness.
How to prepare two part epoxy?
How to prepare two-part epoxy adhesives: Syringes – snap out cap from plunger and carefully cut the sealed tips at the end of the syringe tip. Tubes – pierce each tube with spike found in top of its own cap. Dispense equal parts of both liquids onto a clean disposable surface.
How long does it take for epoxy to cure terracotta?
For cracked terracotta, use epoxy! When using two-part epoxy, choose the super-strength formulations that take 24 hours to cure, they create a far stronger bond than the faster curing 5-minute varieties.
How to reposition a bond?
To reposition the bond once cured, check that the item is heat resistant. If safe, heat the item slowly, e.g. in an oven, to at least 150°C. The product will soften and liquify slightly. Scrape off any excess then reposition the joint carefully using appropriate safety equipment.