How to Repair or Replace a Leaky Hose Bib
- Try a Simple Fix First. Inspect your hose bib to understand how it works and what the problem is. ...
- Buy an Appropriate Spigot. You have several choices when buying a new spigot. ...
- Replace. Threaded pipes are the simplest to work with when adding a new hose bib. ...
- Call in the Pros. ...
Full Answer
How to repair a dripping outdoor faucet?
To replace an outdoor faucet washer:
- Turn the water off to the faucet.
- Unscrew the packing nut by turning it counterclockwise.
- Pull the handle and stem out of the faucet housing.
- Remove the screw on the end of the stem that holds the rubber washer.
- Replace the rubber washer on the stem with one of the same size.
- Tighten the screw holding the washer back up.
How to repair a leaking fuel line?
How to Fix Leaking Fuel Lines. Put on mechanic gloves and goggles before getting started with the mechanical work. Use a screwdriver or socket wrench and appropriate socket to release fuel line fittings that you find while working on a leaking line. Use a flat-tip screwdriver to lever off a stubborn fuel line if it is stuck.
How do you fix a leaking hose?
Unscrew the coupling at the end of the hose with either a pair of pliers or wrench, if this is where the leak is coming from. If the tear is in the middle of the pipe, use a hose mender to fix the leak. A flat, rubber circle inserted in the hose connector, the gasket helps to create a waterproof seal.
How to repair a leaking buried pipe?
Materials
- Replacement water line service pipe (usually 1-inch diameter)
- Twine or string
- Wood stakes
How do you fix a leaky outdoor hose bibb?
How to Fix a Leaky Hose BibTurn off the water supply. Before replacing the packing washer, turn off the water supply. ... Remove the handle assembly. ... Remove the packing screw inside the handle assembly. ... Replace the packing washer and screw. ... Reassemble the faucet handle and tighten the packing nut. ... Restore the water supply.
What causes a hose bib to leak?
Another common issue that causes leakage is frost damage. Frozen-water damage can cause huge plumbing problems, like broken spigots and ruptured pipes. The best way to handle frost damage is to try to prevent it. If you live somewhere cold, it might be a good idea to invest in a frost-proof faucet.
How do you seal a hose bib?
2:446:14How To Seal An Outdoor Hose Bibb - YouTubeYouTubeStart of suggested clipEnd of suggested clipAnd you just kind of press it up against there so there's a nice seal make sure you're getting uh.MoreAnd you just kind of press it up against there so there's a nice seal make sure you're getting uh. All of the uh crevices.
How do you rebuild a hose bib?
InstructionsShut off the Water. Begin by shutting off the water to the hose bib. ... Remove the Handle. ... Unscrew the Packing Nut. ... Remove the Valve Stem. ... Replace the Stem Washer. ... Replace the Packing String. ... Reassemble the Faucet. ... Test the Faucet.
How much does it cost to replace a hose bib?
Replacing a hose bib, also called a spigot or sillcock, averages $175, or between $100 and $300. New installation raises the price to $200 to $500 depending on the spigot's proximity to existing plumbing.
How do you replace an outdoor hose bib?
0:378:14How to replace a hose bib - YouTubeYouTubeStart of suggested clipEnd of suggested clipYou can use paste if you choose then we're going to screw a hose bib on here. And tighten it downMoreYou can use paste if you choose then we're going to screw a hose bib on here. And tighten it down reasonably tight approximately two and a half threads will remain. Outside of the faucet.
Can you cap a leaking spigot?
This winterization involves draining the water, shutting off the valve and installing an outdoor water faucet cap. A cap shouldn't cost you more than $20, and you should drain the line and install the cap before the first freeze of the season.
How do you seal a spigot hole?
How to Air Seal Holes around PlumbingUse caulk or canned spray foam to seal piping holes through the top plates, bottom plates, rim joists, and subfloor. ... For faucet pipes through exterior walls, install a rubber gasket or flashing around the pipe on the exterior wall, if possible, in addition to caulking.More items...•
Shut off the Water
Begin by shutting off the water to the hose bib. Usually, you will find a shutoff valve inside the house, controlling the water flow to the outdoor hose bib. Close this valve by turning the handle fully in the clockwise direction. If your hose bib does not have a shutoff valve, you can shut off the water supply to the entire house.
Remove the Handle
Use a screwdriver to remove the screw that holds the handle of the hose bib to the valve stem, then pull the handle off—a bit of wiggling may be required. Carefully set the handle and screw aside.
Unscrew the Packing Nut
Next, use a channel-lock pliers or adjustable wrench to unscrew the packing nut (sometimes called a bonnet nut) that secures the valve stem to the faucet body.
Remove the Valve Stem
Remove the valve stem from the faucet body. Usually this involves unscrewing the stem from the threaded body of the faucet; on some types, unscrewing it may require turning the stem in a clockwise direction rather than in the traditional counterclockwise fashion.
Replace the Stem Washer
Inspect the rubber or neoprene washer at the end of the valve stem. If it is hardened, cracked, or deformed, this is very likely the cause of your leaky faucet. Unscrew the brass screw holding the washer in place on the stem. Brass is a soft metal, so use care when unscrewing it.
Replace the Packing String
Unwrap the old graphite or Teflon packing string from around the valve stem beneath the packing nut, then wrap several loops of new strong around the stem in a clockwise direction (as you look down at the stem from above). Alternately, you can use a fiber packing washer, which serves the same function as packing string.
Reassemble the Faucet
Thread the valve stem back into the body of the faucet, then thread the packing nut onto the top of the faucet. Tighten the packing nut slightly with a wrench, then put the faucet handle back onto the stem and check the operation of the faucet. Tightening the packing nut too much may make the handle hard to turn.
What is the problem with a hose bib?
Wrench. New hose bib. Teflon tape. One of the most common problems homeowners have with their hose bib —or the exterior faucet that connects a garden hose to water—is leaking. Many homeowners will ignore the leaking unless it is particularly dramatic, seeing it a minor annoyance and not something to be concerned about.
How much does it cost to replace a hose bib?
In general, using a pro to replace your hose bib will cost around $50, plus the cost of the new hose bib. Although you should certainly attempt to complete the task yourself, $50 is a small price in comparison to the costs of repairs if you make a mistake and end up compromising your plumbing. And, of course, in many cases, ...
What is the simplest way to add a hose bib?
Threaded pipes are the simplest to work with when adding a new hose bib. In essence, all you must do is unscrew the faulty fixture, wrap Teflon tape around the threaded pipe (sometimes referred to as the 'nipple'), and then screw your new hose bib onto it. However, there are a plethora of ways that your hose bib can be connected to your pipes, ...
Can a hose bib leak?
However, a leaky hose bib can be more than an occasional irritation. They waste a great deal of energy, even if they are small. In addition, they can cause water damage over time to your foundation. So, rather than wait for this leak to cause a real problem, nip it in the bud and repair the hose bib as early as possible.
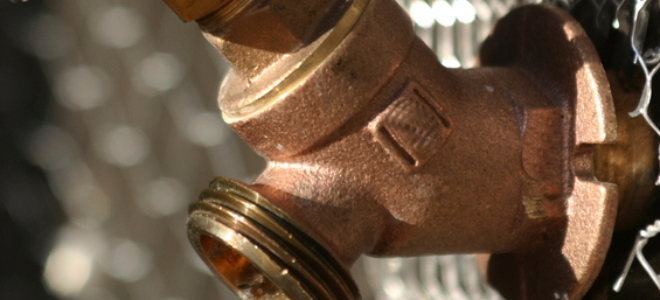
What is a Hose Bib?
A hose bib is another name for a faucet. However, this special kind of faucet has a threaded spout, which allows it to connect to hoses for a garden, washing machine, or another device.
Tools & Materials to Fix a Leaky Hose Bib
The only tools you need are a screwdriver and an adjustable wrench. You also will need the following materials, which can be purchased at any hardware store.
How to Fix a Leaky Hose Bib in 8 Steps
If your hose bib is leaking from the handle, try tightening the packing nut before replacing the washers. Here’s how to handle a repair:
Final Thoughts
It might seem intimidating to learn how to fix a leaky hose bib. But once you do it, you’ll realize how easy it actually is.
Call 1-Tom-Plumber
Don’t hesitate to contact us here or call us at 1-Tom-Plumber (1-866-758-6237) if you need help repair or replacing a leaky hose bib.
How to get water back on a hose bib?
Push the valve stem back into the hose bibb housing. Tighten the packing nut on the hose bibb until snug. Use the cut-off key to turn the water back on at the meter. Turn the spigot back on to remove any air from the line. Check for leaks around the packing nut on the valve stem. Turn the faucet off and check the spigot for leaks.
How do I fix a leaky outdoor faucet?
Most leaky outdoor faucets can be repaired with a simple turn of the wrench, but if the faucet still leaks after you’ve tightened the packing nut, you’ll need to replace the rubber washer on the end of the valve stem. Turn the water off at the water meter using a cut-off key.
Can I repair a leaky outside faucet?
Easy Repairs for Your Outdoor Faucet. Over time, outdoor faucets, also known as hose bibbs, begin to drip or leak around the handle, and it’s important to repair them as soon as you notice the problem. Another common problem on outside spigots is leaking around the valve stem when you turn the water on. You can easily repair both of these problems.
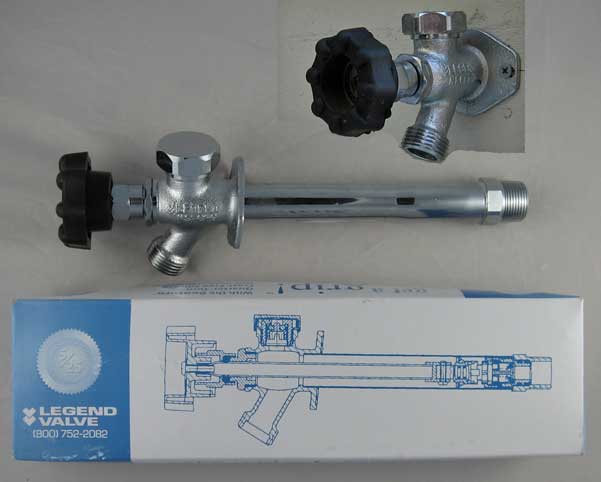
How Do Hose Bibs Work?
Hose bibs – also known as outdoor faucets – use older designs that are similar to regular compression-style faucets. They use threaded stems with a neoprene washer or a rubber to control the water. This stem presses down the opening of a metal valve seat, stopping the flow of water.
Why Are Hose Bib Leaks Dangerous?
Research has shown that the average household loses 10,000 gallons of water on leaks. About 10% of homes lose more than 90 gallons of water daily! Many of these leaks come from outdoor faucets, as homeowners pay less attention to them.
The Bottom Line
If you wanted to know how to fix a leaky hose bib, the above steps should be enough. By replacing the stem and the packing string, you have replaced two of the main culprits for this issue. Of course, inspect other parts of your outdoor water system, such as the hose.
How to fix a hose bib leak?
Always turn off the water supply line for the bib you are repairing. Try to tighten the packing nut as your first attempt to fixing the leak. Replace the washers in your hose bib if tightening the packing nut doesn't work first. Use a pair of needle nose pliers to remove any of the old packing material inside the valve - this is usually more common ...
Can a plumber inspect a faucet?
While you have a plumber at your house, ask him to inspect any other outdoor faucets to check for leaks. Save yourself the additional trip fee and get everything fixed all at once so you can enjoy those summer days running through the sprinkler, gardening, and enjoying your beautiful green grass.
Can a hose bib freeze?
If you live in a state that has cold winters, the hose bib can freeze and burst in the winter. Some homeowners will brush off a leaking hose bib as nothing more than an annoyance, but leaky hose bibs waste a large amount of water for being such a small leak.

Step 1 - Try A Simple Fix First
Step 2 - Buy An Appropriate Spigot
- You have several choices when buying a new spigot. In order to determine which one is right for you, you must take a look at your piping; materials should be matched up whenever possible. It is more important to note, however, that different kinds of piping will require different hose bib fittings. Gray plastic, steel, and copper pipes need compression fittings. If you cannot determin…
Step 3 - Replace
- Threaded pipes are the simplest to work with when adding a new hose bib. In essence, all you must do is unscrew the faulty fixture, wrap Teflon tape around the threaded pipe (sometimes referred to as the 'nipple'), and then screw your new hose bib onto it. However, there are a plethora of ways that your hose bib can be connected to your pipes, many of them vastly more difficult t…
Step 4 - Call in The Pros
- If you are uncertain as to what kind of hose bib to buy and how to replace it once you have bought it, calling in a professional is your best bet. In general, using a pro to replace your hose bib will cost around $50, plus the cost of the new hose bib. Although you should certainly attempt to complete the task yourself, $50 is a small price in comparison to the costs of repairs if you mak…