How to repair iRobot Roomba
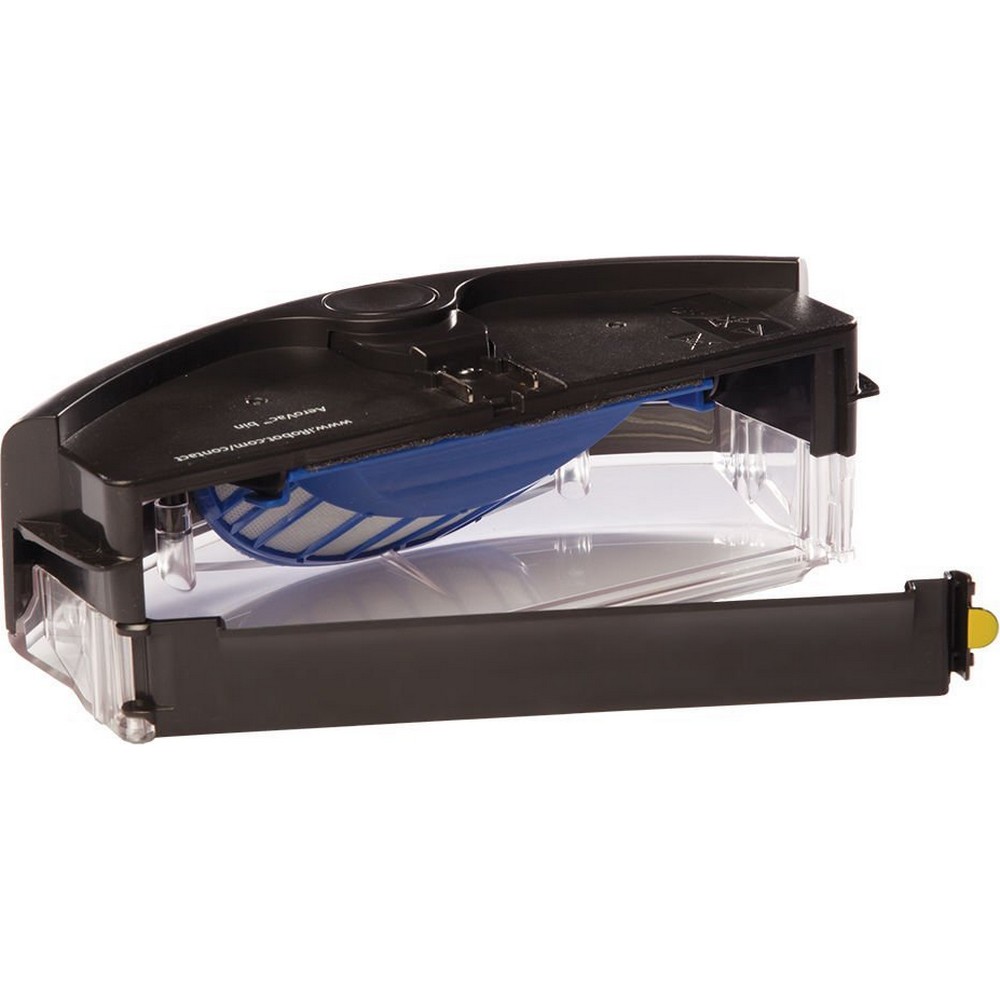
- Remove the dust bin. a) Remove the 4 screws from the bottom of the Roomba. b) Remove the screw from the bottom brush. c)...
- Remove the battery.
- Unscrew the 10 screws shown along the bottom edge of the bumper.
- Remove bumper edge.
- Carefully remove the bumper.
- Unscrew the 2 screws holding the virtual wall sensor, pay close attention not to lose the...
Full Answer
How to repurpose your swearing Roomba?
Part 1 of 3: Preparing the Room and Your Roomba
- Charge the Roomba overnight. To charge your Roomba, you need to dock it with the Home Base. ...
- Place the Home Base on a hard surface. The Roomba will return to the Home Base when it’s done cleaning, or if the battery begins to go flat.
- Set up Virtual Walls. ...
- Use sturdy material in place of Virtual Walls. ...
- Keep an eye on your Roomba near stairs. ...
How do you clean your Roomba?
What Tools to Use:
- A Standard Phillips screwdriver - A standard screwdriver should get the job done. ...
- Microfiber cloth - You need this to wipe dust and grime. ...
- Rubber gloves (optional) - These are perfect to avoid fingerprint marks on your Roomba.
- Alcohol wipes (optional) - Alcohol wipes can clean and disinfect effectively. ...
How does Roomba vacuum know when to stop?
So to answer the question, how does Roomba vacuum know when to stop, here is a quick recap:
- Multiple inbuilt sensors enable the robot to get a feel of your home and know how long to clean
- Full bin sensors can trigger the robot to stop the job
- A low battery charge will cause the vacuum to stop to recharge
How to clean the iRobot Roomba?
Part 1 Part 1 of 3: Vacuuming the Tray and Filter Download Article
- Empty your Roomba. On the rear of your Roomba there is a tray that fills with dirt and dust as it vacuums (also called the "bin").
- Remove the filter. You should be able to see a red semi-circle inside the tray (which may be covered with gray dirt and dust).
- Vacuum the tray and filter using a regular vacuum and the crevice tool. ...
- Switch to the brush tool. ...
Are roombas repairable?
Send or drop off your Roomba at our trusted repair service center and we will quickly repair your Roomba at a reasonable price.
What do you do if your Roomba stops working?
This can be solved by resetting and cycling the unit. For this process, firstly, you must remove the batteries and press down the clean button for 5-10 seconds. Then restore the battery and charge the Roomba until the indicator light becomes green again, or white, depending on the unit.
How many years does a Roomba last?
A Roomba vacuum clean can last you between 2 to 6 years. The period it lasts mainly depends on how you maintain it and the quality of the Roomba. If you manage it well, then it is likely to last you even longer than this.
How can I get my I Roomba fixed?
Please reach out to iRobot customer care at www.irobot.com (where you can email or live chat) or 800-727-9077. They'll ensure you have what you need.
How do I run a diagnostic on my Roomba?
Summary: Hold the spot and clean buttons down. Push the power switch. Keep holding spot and clean buttons down while the robot gives five ascending beeps, and five descending beeps. Release spot/clean and you are in diagnostic mode.
Why is Roomba not starting?
If your Roomba won't be turning on, check that the batteries are inserted correctly. If you're using second-party or compatible batteries, make sure that they're installed properly. If there's no improvement, you'll need to purchase a new battery.
Does Roomba have a lifetime warranty?
RobotShop announces today the offer of a lifetime warranty on all iRobot Roomba Robotic Vacuums for an undetermined period of time. The RobotShop Limited Lifetime Warranty is applicable on certain selected items only such as the iRobot Roomba for a normal, non-commercial use.
How do I know if my Roomba battery needs replacing?
I charged Roomba every time it runs out of battery. @Mokka We suggest you to verify our video for the battery reset procedure for the Roomba 500 series. If you still have a run time of 10-15 minutes, we suggest you to purchase a new battery.
When should I replace my Roomba?
Article DetailsPartCare FrequencyReplacement FrequencyFilterOnce per week (twice per week in homes with pets)Every 2 monthsFloor Tracking SensorOnce per month.-Front Caster WheelOnce every 2 weeksEvery 12 monthsFull Bin SensorsOnce every 2 weeks-7 more rows•Dec 7, 2021
Why is my robot vacuum not working?
If your robot vacuum features a remote control that isn't functioning, it might need new batteries. If the robovac itself isn't switching on, or is requiring more regular re-charging, you might need to replace the battery in the unit.
How do you fix a Roomba that won't charge?
If your Roomba is not charging, clean the charging ports with a soft cloth and some rubbing alcohol to remove dust, hair, or gunk accumulation. You may also have to reinstall or replace your battery or charging dock or even reset the Roomba to factory settings.
Why is Roomba not moving?
Front Caster Wheel Jammed The front caster wheel on the Roomba encounters debris before the brushes. If debris is lodged in the wheel or around its axle, it will no rotate freely. This will keep the Roomba from moving correctly. Removing the wheel and cleaning its components can help resolve this issue.
How do I know if my Roomba needs a new battery?
You can easily check the status of the battery in the iRobot® HOME App.A battery icon will be displayed in the top-right corner, indicating the current status of the battery.The CLEAN screen will display "Ready to clean. ... The CLEAN screen will display "Ready to clean.
How do I reboot my Roomba?
For all robots with the Dock and Spot buttons and no green dot: Press and hold HOME and SPOT Clean buttons on your robot for 10 seconds. When the button is released, Roomba will play the reboot tone.
Why is my robot vacuum not moving?
If your robot vacuum features a remote control that isn't functioning, it might need new batteries. If the robovac itself isn't switching on, or is requiring more regular re-charging, you might need to replace the battery in the unit.
Why is Roomba not moving?
Front Caster Wheel Jammed The front caster wheel on the Roomba encounters debris before the brushes. If debris is lodged in the wheel or around its axle, it will no rotate freely. This will keep the Roomba from moving correctly. Removing the wheel and cleaning its components can help resolve this issue.
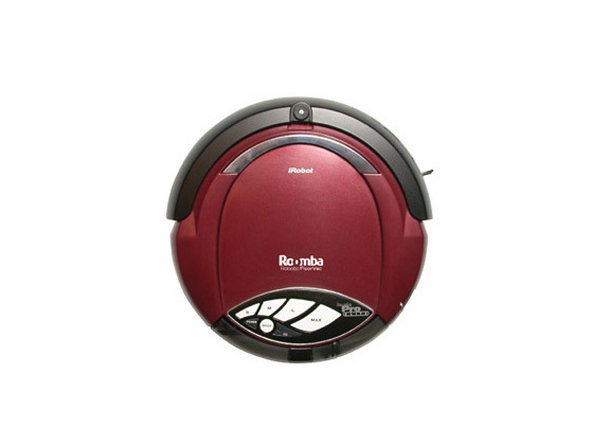
What is Roomba vacuum?
They are designed to vacuum as they move around, allowing users to keep their house clean without having to vacuum themselves. Roombas have various features depending on the model, including tangle-free brushes, increased vacuum power, obstacle avoidance, and performance maps visible from a smartphone app.
What is a roombas?
Roombas are autonomous vacuuming robots sold by iRobot. They originated in 2002, and numerous models have been released since. Roombas are designed to use a variety of sensors to detect obstacles and navigate the floor by themselves. They are designed to vacuum as they move around, allowing users to keep their house clean without having ...
Do Roomba vacuums have cameras?
Some newer Roomba devices have built-in cameras, enabling them to clean more effectively on their own. A common repair need in Roomba vacuums is for the battery. Battery longevity and reliability is a common complaint amongst Roomba customers.
Can you replace a Roomba battery?
A common repair need in Roomba vacuums is for the battery. Battery longevity and reliability is a common complaint amongst Roomba customers. While battery replacements from iRobot are expensive, Roomba batteries can be purchased separately and installed by Roomba owners themselves.
iRobot Roomba Repair Parts
All technological devices need repairing at some. It is a mandatory task in the case of Roomba because it is a robot and runs on software.
Service iRobot Roomba
There are several ways that you can repair your beloved cleaner. Some require the help of professionals,whereas; some can be solved without their presence.
Conclusion of iRobot Roomba Repair
Hope you have got what you were looking for from this article. Don’t procrastinate when you know you have to iRobot Roomba repair. Face the problem head-on and overcome the obstacle immediately. In this way, you can be a step ahead of the problem.
How many connectors does a Roomba 530 have?
Some 530 machines may only have 3 instead of 4 connectors. Unscrew the 5 screws shown, that secure the Main Processing Board. Flip the Main Processing Board vertically towards the front of the Roomba as shown. Now the Bumper Sensor Housing can be seen.
How to unscrew a virtual wall sensor?
Unscrew the 2 screws holding the virtual wall sensor, pay close attention not to lose the transparent half, it will fall out.
How to remove a sleeve cover?
Press in the button area with your thumbs and remove the cover straight up.
Does the below guide void warranty?
The below guide voids product warranty and our website is not be responsible for any consequences caused by using the guide. The information is provided as is.
Who owns iFixRobot?
iFixRobot.com is owned and operated by iFixRobot LLC.
Is ifixrobot.com affiliated with iRobot?
iFixRobot.com is not affiliated with iRobot Corporation or Neato Robotics Inc., and is an independent service and repair entity. iFixRobot and iFixRobot logo are trademarks of iFixRobot LLC, registered in the U.S. All other trademarks, logos, and brands used on this site are a property their respective owners.
Is Roomba a trademark of Neato?
iRobot, Roomba, Scooba are trademarks of iRobot Corporation. Neato Robotics, Neato Robot, Neato XV-11 are trademarks of Neato Robotics, Inc. Manufacturer names and logos are trademarks of their respective companies and are only used to identify their products. All rights reserved.
How to remove the bottom cover of a robot?
Using the same screwdriver, loosen the four (4) screws securing the bottom cover and battery door to your robot and remove the bottom cover
How many screws do you need to remove the bottom cover of a robot?
Next, loosen the five (5) screws securing the bottom cover to your robot and remove the bottom cover
How to remove a dislodged bumper?
Locate the area where the bumper is dislodged, and, using a smaller diameter cross head or Phillips head screwdriver, remove the three (3) screws on the dislodged side of the bumper.
What does it mean when your robot is tapping on the front of the bumper?
If your robot is experiencing a constant Error nine (9) or Error sixteen (16) and tapping on the front and sides of the bumper does not relieve the error, this could mean the bumper is dislodged and will need to be installed back into place.
How to tell if a robot is sticking out?
Flip your robot upside down and inspect the right and left sides of the bumper. If one side of the bumper is dislodged, you will see that it will be sticking out.
How to get bumper back into the slot?
Lift up on the bottom section of the bumper and place it back into the allotted slots
What to do if playback doesn't begin?
If playback doesn't begin shortly, try restarting your device.