How to Repair Terra-Cotta Pots
- Clean all the dirt away from the crack or broken area on the pot. Leave the pot to dry completely after cleaning.
- Apply silicone caulk into the crack or damaged area. If you have broken pieces, apply caulk along the edges of the shard.
- Press the cracked or broken area together so the caulk bonds, and bind the pot with string to hold it in shape.
- Leave the pot to dry upside down for several hours or overnight. If your caulk recommends waiting longer, then do so.
- Remove the string from around the pot once the caulk has dried completely.
- Scrape away any caulk that leaked onto the inside or outside of the pot with a scraper.
Can terracotta be repaired?
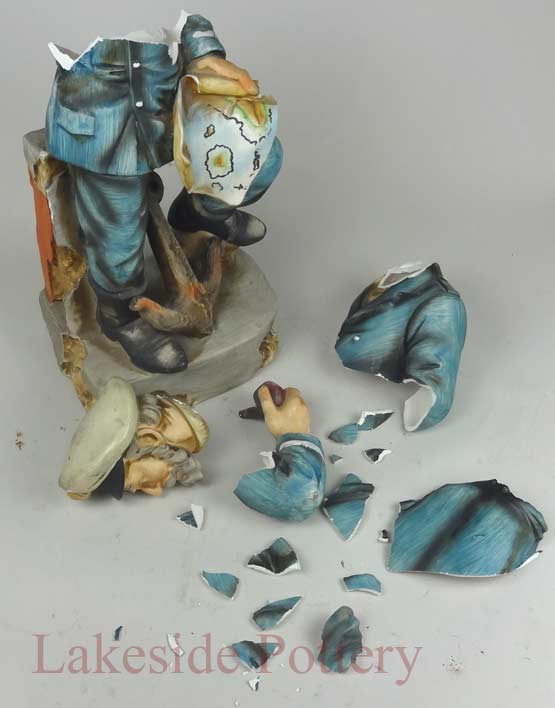
Terra-cotta is fragile when mistreated, but it can be easily repaired. When the piece is an expensive garden pot or a vase or figurine, the repair is well worth the effort. With a little art, a repair gives your terra-cotta new life. Putting broken terra-cotta back together can be like piecing together a puzzle.
Can you repair terracotta?
Terra-cotta is fragile when mistreated, but it can be easily repaired. When the piece is an expensive garden pot or a vase or figurine, the repair is well worth the effort. With a little art, a repair gives your terra-cotta new life. Putting broken terra-cotta back together can be like piecing together a puzzle.
How to resurface terra cotta pavers?
Sealing the Pavers
- Sand any chipped or flaked areas lightly with a medium- to fine-grit sandpaper to smooth the edges of the damaged pavers.
- Clean the floor with a dust mop and thoroughly vacuum the pavers before applying the new sealer.
- Roll the first coat of an exterior stone or terra cotta sealant onto the pavers according to the manufacturer's directions.
How to repair terracotta pot?
- You can use waterproof silicone caulk to make repairs to cracks. ...
- Cracks can be repaired by wiring the cracked edges together. ...
- Rather than wiring the pot where it has been cracked, you can also wrap thin wire strands around the entire pot to hold it together and prevent further damage.

What is the best glue for terra cotta?
A glue that contains marine epoxy is best for terracotta pots. The epoxy is strong and durable which will increase the lifespan of your terracotta pots. This epoxy is also waterproof so it will not get washed away when it rains or when watering the plant.
How do you repair an old terracotta?
0:387:53How to repair a broken terracotta garden pot - Part 1/3 - YouTubeYouTubeStart of suggested clipEnd of suggested clipSo um with a big pot like this how do you fix it. Well. This is going to be a two-stage process forMoreSo um with a big pot like this how do you fix it. Well. This is going to be a two-stage process for this big pot. One is using an epoxy glue we've decided to use uh gorilla epoxy sets for five minutes
How do you fix broken clay pottery?
The first step to fix broken pottery or a ceramic object is by mending the pieces with two-part epoxy adhesive. With modern adhesives, fillers, paints and cold glaze, it's possible to perform seamless repairs to damaged ceramic and pottery objects.
How do you fix crumbling terracotta pots?
Most likely you've cracked it, and if it's still holding itself together, this is a simple fix – so hold off breaking it up to use in the bottom of a new pot....STEP ONE: SAND OFF THE AREA AROUND THE CRACK. ... STEP TWO: FILL IN CRACKS. ... STEP THREE: SAND OFF ROUGH EDGES. ... STEP FOUR: PAINT AND TEXTURIZE.
What can I do with broken terracotta pots?
If you have a terracotta pot that's only slightly broken, lay it on its side in the garden and bury the broken part with soil. Then, plant flowers inside the pot, continuing out into the garden, so it looks like the flowers are spilling from the container.
Does Gorilla glue work on clay pots?
For broken pots I've used Gorilla Glue many times. Works great. It holds securely enough that I don't find that I need to wire the pot.
Can you glue clay back together?
To repair clay items such as broken outdoor pottery, you would need to use a glue like an epoxy. In order to glue clay back together with an epoxy, you will need to mix together the two substances that are included in the packaging.
What is the best glue for clay pottery?
For most minor home repairs of small ceramics and other items, we recommend both Gorilla Super Glue and Krazy Glue Home & Office Super Glue. Both products set nearly instantly, produce a durable bond, and are easy to apply.
Can you glue broken terracotta pots?
For cracked terracotta, use epoxy! The longer curing varieties give you more working time to glue everything together and align all the pieces together if they're not fitting perfectly. In contrast, with the fast setting epoxy adhesives, once you've mixed the glue, there isn't much working time before it hardens!
Why do terracotta pots crack?
Clay pots may look sturdy and strong, but they're often fragile and easy to chip or break. Because they're porous, they absorb moisture like a sponge. Changes in the temperature, or freezing rain and snow can cause them to crack as the clay expands and contracts.
Can clay pots be repaired?
Stir equal parts of epoxy and hardener together. Some glues might come pre-mixed, so you don't have to worry about stirring them together. Silicone caulk is also a good option for repairing a broken terracotta pot. You can also buy caulk in a color that best matches your pot!
How do you use Milliput on terracotta pots?
A Simple Guide To Repairing Terracotta PotsMake sure you scrub the pot to remove grease and dirt.Knead equal amounts of the two sticks for 5 minutes until the colours become uniform. ... Moisten the crack and firmly apply the Milliput, pressing with your fingers and thumbs.More items...
What glue works on clay pots?
Recommended Glue for Clay Pots: GORILLA Clear Glue This crystal-clear glue by the Gorilla brand offers an extremely strong, water-resistant, and non-foaming product for bonding your clay pots and pottery.
What can I use to repair a broken terracotta pot?
Silicone caulk is also a good option for repairing a broken terracotta pot. You can also buy caulk in a color that best matches your pot! Mix colored clay powder into the epoxy mixture so it matches your pot. Scoop a small spoonful of powdered clay and mix it in with the epoxy.
How do I repair a terracotta pot?
1. Dust off the pieces of your pot with a clean cloth. Go over the sides and edges of your terracotta pot with a rag, cleaning away any leftover dust and grime. Sometimes, dirt gets stuck in the broken cracks and makes the pot more tricky to repair. 2.
How to make a pot out of epoxy resin?
Stir equal parts of epoxy and hardener together. Pour a blueberry-sized amount of both epoxy resin and hardener on a paper plate or dish. Grab a toothpick and mix them both together before you start reconstructing your pot. Check the instructions on your epoxy packages beforehand.
How to fix a pot that is leaking?
1. Move your pot to a well-ventilated area. Epoxy fumes are no joke, and are no fun to breathe in. Find an open, well-ventilated space where you can repair your pot so you don’t have to inhale any nasty chemicals. A room with several open windows can work, or you can repair it outside. 2.
How to make a pot with copper wire?
Cut a length of copper wire into several 3 in (7.6 cm) pieces. Lay out a section of copper wire, measuring and marking every 3 in (7.6 cm). Snip off these short sections of wire with a pair of wire cutters, and set the pieces aside. This wire will be the “thread” that sews your pot back together.
How to make a pot smoother?
8. Sand down the surface with fine sandpaper to make it smooth and flat. Grab a sheet of super fine-grit sandpaper and rub along the glued seam of your pot. Work away any imperfections or inconsistencies, so your pot feels smooth and seamless.
How to fix a crack in a pot?
String the wire through 2 holes above and below the crack. Slide 1 end of the wire through the top hole, and the other end into the bottom hole. Keep the wire even while you thread it, so even pieces of wire are going through the pot. Repeat this process with each set of drilled holes along the broken seam. 7.
How to clean terracotta?
If dirt remains on the surfaces to be glued together and can’t be removed by washing, scrub them with a soft nylon brush while washing. Don’t use a wire brush, as terracotta is soft, and the wire brush will remove material , destroying the tight fit between parts.
How long does it take for epoxy to cure terracotta?
For cracked terracotta, use epoxy! When using two-part epoxy, choose the super-strength formulations that take 24 hours to cure, they create a far stronger bond than the faster curing 5-minute varieties.
How long do terracotta pots last?
Unlike plastic pots which degrade over time with exposure to sun’s UV rays, terracotta pots can last for decades, and are a natural material, making them far more sustainable to use. The disadvantage of terracotta is that it is brittle, and can crack if dropped or exposed to freezing temperatures.
What is terracotta used for?
Terracotta is a hard, fired clay that’s reddish-orange in colour, and is commonly used for making pots and garden features. This material has been used by human civilisations for centuries, dating back to the times of ancient China, Greece and Egypt, a testament to its usefulness.
How to prepare two part epoxy?
How to prepare two-part epoxy adhesives: Syringes – snap out cap from plunger and carefully cut the sealed tips at the end of the syringe tip. Tubes – pierce each tube with spike found in top of its own cap. Dispense equal parts of both liquids onto a clean disposable surface.
How to reposition a bond?
To reposition the bond once cured, check that the item is heat resistant. If safe, heat the item slowly, e.g. in an oven, to at least 150°C. The product will soften and liquify slightly. Scrape off any excess then reposition the joint carefully using appropriate safety equipment.
How to clean glued landscape material?
How to clean materials being glued with landscape construction adhesives: Clean and ensure surfaces to be glued are sound, dry and free from oil, grease and loose powdery material. If necessary, use mineral turps (turpentine) to clean the surface, then allow to dry.
What were the failures of Terra Cotta?
Failures that developed from these ingenious installations were often tied to errors in initial design and construction detailing, which is not surprising considering that they represented technologically challenging new usage. The National Terra Cotta Society published substantially different standards for installation between 1914 and 1927 after finding that initial recommendations did not adequately account for expansion, structural support and water migration. Mistaken or missing maintenance practices within the harsh variations of the North American climate frequently contributed to and increased the rate of failures.
When did Terra Cotta Society publish standards?
The National Terra Cotta Society published substantially different standards for installation between 1914 and 1927 after finding that initial recommendations did not adequately account for expansion, structural support and water migration. Mistaken or missing maintenance practices within the harsh variations of the North American climate ...
What is the clay body used in the backing of the units?
The clay body used in the backing of the units was found to be both inconsistently mixed and badly formulated, with a high proportion of grog and other inclusions. The material also appeared to have been unevenly vitrified during the firing process, leaving the clay vulnerable to expansion when it absorbed water.
Why is the Minton tile floor spalling?
The Minton tile ceiling within the Bethesda Terrace Arcade in New York City’s Central Park showed signs of spalling from the edge due to failing cast-iron backing.
Step 1: Check the Fit..
I didn't invent anything for this instructable, but it's a good idea to fit the pieces together for two reasons; to check if it is actually worth while fixing the pot. Secondly you get an idea how to put the pieces together, once you've applied glue.
Step 2: The Tool and Materials List
A broken clay (terracotta) flower pot that's worth fixing Glue; I used epoxy A shop brush or whisk Twine or something to firmly hold parts together while the glue cures. Bits O Wood Make sure the parts that are being glued are clean and dry, but that' common sense, isn't it?
Step 3: The Glueing
Um, forgot to take a picture for this!!! The basic process is to mix the glue according to the instructions of the manufacturer.
Step 4: Ta Da!
So, the epoxy cost 5 bucks or so. A new pot would have been fifteen to twenty bucks... Looking forward to any comments. Now that I've done my first instructable!
How to break terra cotta tile?
Hold the chisel at a 45-degree angle to the tile and use a hammer to drive the chisel under the pieces of terra cotta and break them free. Chisel out the entire tile, the mortar below it and the grout lines around it. Take care not to break the surrounding tiles.
How long does it take for terra cotta tile to dry?
Spread grout over the tile's edges to fill the joint between the replacement tile and the surrounding tiles with a grout float. Move the float back and forth from several directions to pack the grout in well. Wait 10 minutes, then clean the surface of the terra cotta with a grout sponge. Let the grout dry for 24 hours.
How to replace a broken tile?
Coat the back of the replacement tile with a thin layer of thin set mortar using a margin trowel. Set the replacement tile into the space created where the broken tile has been removed and press it firmly into place. Let the mortar dry for 24 hours.
What do people do when they find terracotta statues?
Every time people find the debris of Terracotta Army statues at the archaeological site, they will first bring them back to the laboratory, classify them into warriors and horses, and then take photos respectively as a record. If some pieces have colorful paintings, people on the spot will instantly spray protective agent to moisture their coatings, and then restorers will fix them in laboratory.
How long does it take to repair a statue?
Thus the time needed may vary a lot. However, even a statue with relatively fewer debris will take three restorers one to three months to repair. Not to mention that some difficult ones need the effort of several years.
What happens if you find two thirds of a statue's debris?
For example, during piecing the debris, if the restorers find that two thirds of the statue’s debris are lost, they will probably decide to pause the repair of this statue and go on finding its remaining pieces. That’s to say, only those Terracotta Army statues whose most debris are already collected are qualified to enter the next repair step.
Why is it necessary to piecing debris together?
In fact, the primary goal of piecing debris together is to check how badly the statue is damaged, and then restorers are able to determine the feasibility of the repair.
What part of the statue do restorers start?
Unlike the operational direction in Step 3, when sticking debris, restorers will start with the middle part of the statue and extend to its two sides. The reason is that no matter how carefully the people operate, some errors are inevitable because of the already jagged debris.
Is terracotta adhesive stronger than hardness?
Many restorers and experts have reached the consensus that the stickness of adhesive should be slightly weaker than the hardness of the terracotta pieces.