Repairing a Car Console Armrest
- Remove Armrest. This is pretty easy, as long as you have the correct tool. ...
- Disassemble Armrest. My armrest is made up of three layers of plastic parts; the part that screws into the base, the underside of the lid, which also include ...
- Remove Vinyl. ...
- Spray Mount Foam. ...
- Cut Vinyl. ...
- Staple Vinyl. ...
- Reassemble. ...
- Finished

How to repair a broken armrest on a car console?
Repairing a Car Console Armrest Step 1: Remove Armrest. This is pretty easy, as long as you have the correct tool. I believe I used a 10 or 15 torq bit... Step 2: Disassemble Armrest. My armrest is made up of three layers of plastic parts; the part that screws into the base,... Step 3: Remove Vinyl. ...
How do I remove the armrest from my car?
Yours may be held in place with different screws, but still likely easy to remove. My armrest is made up of three layers of plastic parts; the part that screws into the base, the underside of the lid, which also include plastic tracks that allow the armrest to slide forward, and the top cover (with the damaged vinyl).
How easy is it to reupholster a damaged armrest?
So here is how I reupholstered a damaged armrest in under an an hour, for less than US$5! This is pretty easy, as long as you have the correct tool. I believe I used a 10 or 15 torq bit to remove the three screws holding the armrest in place. Yours may be held in place with different screws, but still likely easy to remove.
What is my armrest made up of?
My armrest is made up of three layers of plastic parts; the part that screws into the base, the underside of the lid, which also include plastic tracks that allow the armrest to slide forward, and the top cover (with the damaged vinyl).
How do you fix a cracked leather armrest on a car?
Here's how:First, sand the clean, dry leather with a fine sandpaper.If the cracks are deep, apply leather filler with a palette knife to fill in the cracks. Remove any excess paste.Once the filler is dry, sand the surface again before you apply the leather dye.Let the dye dry. ... You can apply more dye if you need to!
How do you fix a cracked leather middle console?
Whether it happens on the furniture or the center console of your car, you should know how to fix a cracked leather armrest.Tip: Use a leather filler or leather patch. ... Step 1: Clean the Cracked Area. ... Step 2: Smooth the Cracks if Needed. ... Step 3: Cover the Crack with a Patch and Secure It.More items...
How do you repair cracked vinyl upholstery?
Grab your small spatula tool, typically included in the repair kit, and dip it into the liquid vinyl and dab it onto the cracked area. Spread the vinyl in an even, thin layer across the damaged area and extending slightly past the crack. You can also wet your finger tip to smooth the area. Apply layers if needed.
How do you fix cracks in plastic car interior?
9:5120:18How To Repair Broken Plastic Car Parts - YouTubeYouTubeStart of suggested clipEnd of suggested clipSet our broken plastic piece in and then go ahead and fill in our gaps with epoxy. Now we have thisMoreSet our broken plastic piece in and then go ahead and fill in our gaps with epoxy. Now we have this big opening up at the top i'm going to try. And set some epoxy over the top of this opening.
How do you fix a cracked center console?
0:242:24Car Detailing Videos | Repairing a cracked center console - YouTubeYouTubeStart of suggested clipEnd of suggested clipSo first things first we take our leather. And vinyl compound. And we fill in the cracks. And justMoreSo first things first we take our leather. And vinyl compound. And we fill in the cracks. And just being careful to force the compound into all the spots that we don't have any gap it gang.
How do you fill cracks in leather?
4:3820:23FIX CRACKING LEATHER - LEATHER REPAIR VIDEO - YouTubeYouTubeStart of suggested clipEnd of suggested clipWith a nice thin coat. On. And later once it's dried if you've missed a spot then it's not a problemMoreWith a nice thin coat. On. And later once it's dried if you've missed a spot then it's not a problem you can just apply some filler at that.
Does JB Weld work on vinyl?
This "no-heat-to-cure" solution provides an effective repair for most vinyl and leather surfaces with cracks and minor tears less than 2 inches in length or 1/2 inch wide.
How do you repair vinyl fabric?
Lay a sheet of cotton fabric over the patch to avoid direct contact with the iron and the vinyl. Using a low heat setting with no steam, apply pressure to the patch with your iron. Continue to iron for several minutes, until your fabric has adhered.
Can vinyl be repaired?
When your vinyl seat develops a tear, it is best to deal with it as soon as possible. The longer you wait to fix a torn vinyl seat, the larger the damaged area will become. Fortunately, with the help of a vinyl repair kit, you can fix the seat without paying a professional restorer.
How do you repair damaged plastic?
To fix broken plastic, start by getting some super glue or high-strength plastic glue. Then, apply some of the glue to the broken edges of the plastic. Next, press the broken edges of the plastic together and apply constant pressure for 30 seconds.
Does epoxy putty work on plastic?
Is Epoxy for Plastic a Good Choice? Yes, epoxy is a great choice when it comes to using on plastics, as it will create a strong adhesive bond. They augment the structural strength of the plastic and also provide, provide chemical resistance, and offer a certain amount of flexibility.
How do you fix plastic damage on a car?
2:013:43Repairing Broken Automotive Plastic Trim - YouTubeYouTubeStart of suggested clipEnd of suggested clipApply aluminium tape and well the pass of 18 inch round welding rod around the tab and over theMoreApply aluminium tape and well the pass of 18 inch round welding rod around the tab and over the crack. Smooth the weld using the airless welder. Allow to cool and then send using a rollout disc.
How do you replace leather in center console?
1:397:00How to Replace Center Console Leather Cover Honda Pilot 2009 ...YouTubeStart of suggested clipEnd of suggested clipThe bottom half from the top half to do that we'll take our right hand pull up on the lever thatMoreThe bottom half from the top half to do that we'll take our right hand pull up on the lever that usually locks it in place take our left hand slide it in between.
How do you fix a vinyl center console?
0:004:07How to repair cracked vinyl armrest. - YouTubeYouTubeStart of suggested clipEnd of suggested clipSo you want to use a putty knife to work it down all the way down into the cracks. The reason forMoreSo you want to use a putty knife to work it down all the way down into the cracks. The reason for doing this is to keep those cracks from transferring. Now you need to sand off all the edges.
Why Does Leather Crack?
Before exploring how to fix the leather armrest, let’s see why leather cracks first. As you may already know, it consists of numerous interwoven fibers that are packed firmly together.
How to Fix Cracked Leather Armrest in 5 Steps
First things first, you should gather some items and tools required. Here’s what you will need for this do-it-yourself task:
FAQs About How to Fix Cracked Leather Armrest
First, identify the crack to check whether it is only on the surface or it goes deeper into the leather. Cover the torn area with a piece of leather or repair patch and apply glue to the underside of the patch before placing it over that area. When buying a repair kit, make sure leather fits in with the center console.
Takeaway
Cracked leather can be an annoying problem to deal with. While cracks on leather can be fixed by a professional, you should try to get it done yourself. Whether the cracks occur on your center console or chair, follow these tips on how to fix a cracked leather armrest.
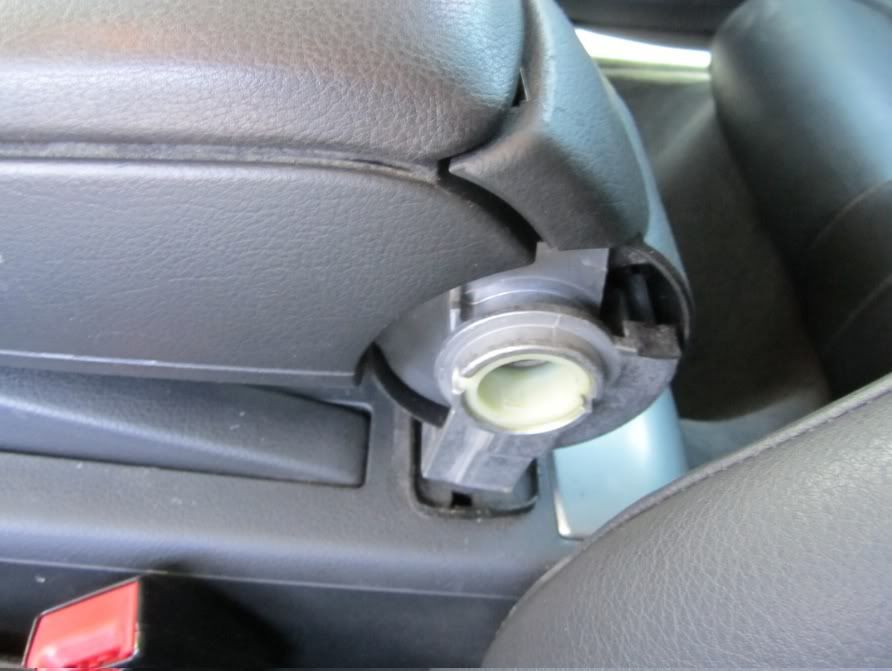
Step 1: Remove Armrest
This is pretty easy, as long as you have the correct tool. I believe I used a 10 or 15 torq bit to remove the three screws holding the armrest in place. Yours may be held in place with different screws, but still likely easy to remove.
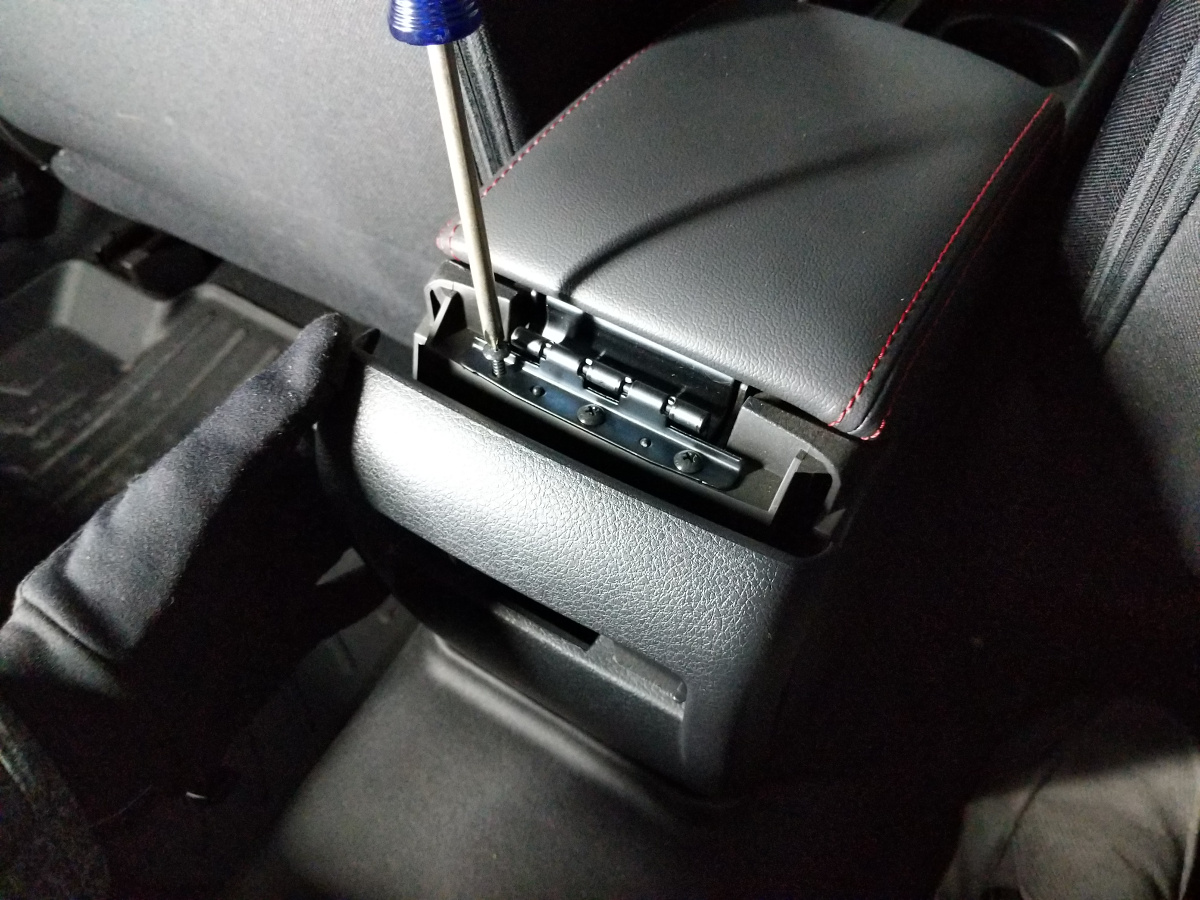
Step 2: Disassemble Armrest
My armrest is made up of three layers of plastic parts; the part that screws into the base, the underside of the lid, which also include plastic tracks that allow the armrest to slide forward, and the top cover (with the damaged vinyl). First remove the two screws that attach the base bracket to the underside of the lid, then remove the six screws that hold the remaining pieces together. (One of the plastic tracks on my armrest was broken, likely from a previous owner who tried to pull the lid open without first pushing the release button.
Step 3: Remove Vinyl
The vinyl cover is held in place with way too many staples. REmove these staples with a needle nose pliers or a small screwdriver.
Step 4: Spray Mount Foam
To give the armrest a bit of cushioning, I used a bit of packing foam that came with some electronic component I bought ages ago. Place the plastic lid on top of the foam, and then spray the lid with adhesive.
Step 5: Cut Vinyl
I decided to use a piece of vinyl that matched my car's interior, a light grey. But of course any material can be used; scrap leather denim, or your favorite old sweatshirt. But keep in mind that this piece will get a lot of wear, and vinyl is very easy to clean (and cheap! I paid about US$4 dollars for a half yard at a fabric store).
Step 6: Staple Vinyl
This I found to be the trickiest step in this process. The difficult part is getting the vinyl to wrap around the lid as tightly as possible.
Step 7: Reassemble
Once your done stapling the vinyl inside the lid, now you're ready to reassemble the whole cover, reversing the steps you used to disassemble.
