Steps
- Fill a bucket with sand that will serve as the potholder. It will help you in holding the pot in an angled way.
- Take the cracked pot and smoothen its rough edges. ...
- Clean the place using cotton soaked with 91% of alcohol. Then, wipe off the area properly and allow it to become dry for some time.
- Mix the 2-part epoxy glue properly by keeping it onto a plastic surface. Whisk the mix quickly, or else it can get dried.
- Let the adhesive set for some more time to get dried properly, and after 15-20 minutes once it is completely dry, scrape off the dried adhesive using a ...
- Finish it off by applying paint onto the cracked area of the pot. You can also use transparent acrylic gloss on the color for better finishing.
How can I repair chipped or cracked pottery?
Step 1: What You Will Need for Pottery Mending Steps?
- Two-part clear 5 minutes PC Clear epoxy ***
- Wooden stick or a pin-tool for applying adhesive
- A container with PVC pebbles / pellets, rice or sand
- Clay
- Razor blade
- Denatured or 91% Alcohol
- Rug
- Paper pad to mix Epoxy on
How to fix broken pottery?
- Using bees wax to hold the fragments in place
- Using two-component adhesive to glue the parts together
- Mixing baking powder with adhesive to fill missing spots
- Using a heat gun to remove the wax.
How to repair cracks with ultrafire brick oven repair kit?
Use a sturdy nylon type brush to dust off your oven from any debris and particles Heat your oven to at least 250C or 480F Using your paintbrush apply a generous amount of Ultrafire on to the visible cracks. (feel free to paint the entire oven)
How to fix broken terracotta pots?
Method 2 Method 2 of 2: Wire Download Article
- Dust off the pieces of your pot with a clean cloth. ...
- Fit the broken piece of terracotta into the correct spot. Arrange the broken shard carefully, lining up the broken edges exactly with the bottom of the pot.
- Pencil in dotted marks on both sides of the terracotta crack. ...
- Drill into the pencil marks with a 1⁄8 in (0.32 cm) masonry drill bit. ...
How do you fix cracked clay pottery?
Clay has a memory. So in an effort to erase the memory of a crack, score the area in question deeper and larger than the crack itself (2), then place a bit of scored soft clay into the space you've made and compress it with a rib (3, 4). This will heal a crack in most cases, depending on how dry the cracked clay is.
How do you fix broken pottery at home?
3:425:52How to Fix Broken Pottery | Kintsugi Repair - YouTubeYouTubeStart of suggested clipEnd of suggested clipStart by doing a dry fit placing your broken pottery pieces together so that you're aware of theMoreStart by doing a dry fit placing your broken pottery pieces together so that you're aware of the proper. Placement. Then depress the syringe to dispense a small amount of the two-part epoxy.
How do you fill cracks in ceramic?
7:3112:06How to Fill Cracks in Pottery and Broken Ceramic - YouTubeYouTubeStart of suggested clipEnd of suggested clipSo i'm just going to fix this bits here and then we're going to do these these bits here where they'MoreSo i'm just going to fix this bits here and then we're going to do these these bits here where they're missing. This part here in the middle is actually i'm not going to fill this in this was done
What is the best glue for repairing ceramics?
If you have a project that requires gap bonding or filling, surface repairs or laminating, the best glue for porcelain or ceramic repairs will be an epoxy. An epoxy consists of two parts: resin and hardener. When mixed together, they produce a durable, high strength bond.
Does milk fix broken ceramic?
You place your cracked piece in a pot and cover it with two cups of milk (or more if needed). Next, heat over low for an hour. Allow to cool in milk and then remove and rinse. Your piece, if the crack wasn't too far gone, should now have resealed itself!
Can cracked pottery be repaired?
Most pottery that was broken can be fixed! If you have all the pieces and a high-quality adhesive, you can put it back together. Repairing pottery requires high-quality ceramics glue. In cases with valuable pottery, you may want to take it to a professional.
How do you glue pottery?
Using ceramic adhesives: Simple stepsDry fit all the pieces. ... Add ceramic glue in a thin layer on both sides of the broken ceramic.Press the glued pieces back together and hold in place to secure the bond, as per the manufacturer's instructions. ... Remove any excess or spilled glue once it has fully cured.
Can you fix ceramic with super glue?
Loctite Super Glue Liquid Universal is ideal for repairing ceramic. It's a strong, versatile adhesive which is also waterproof and dishwasher safe. Perfect for fixing a broken plate!
What can I do with broken ceramics?
Donate: While just some facilities that recycle bricks and concrete can recycle ceramics, ceramics cannot be recycled at most standard facilities. In this case, you can donate them. Consider dropping your unwanted ceramic pieces off at a donation center or thrift store, so they can start a new life in a new home.
How to fix cracks in mug?
Place the mug so that the crack and the grinded channels are on the bottom before placing the mixed 2-part epoxy. After applying the epoxy, inspect the other side of the crack to verify that the epoxy went through the walls of the crack. Remove the razor blade while the epoxy is still very liquid. Place the clamp before the epoxy hardens and put back in the oven (120-140 degree F) for optimum cure strength.
How to fill gaps in epoxy?
After cleaning the excess epoxy with a razor blade, fill all gaps with 2-part filler epoxy and sand with a Dremel and than by hand graduating to a very fine sand paper.
What to do if playback doesn't begin?
If playback doesn't begin shortly, try restarting your device.
Is ceramic restoration food safe?
IMPORTANT: Ceramic restoration materials are not food safe, liquid or heat proof (over 190 degree F) and repaired items should not be used on cooking or food serving ware more...
How to fix broken pottery?
1. Fill a 1 gallon (3.8 L) bucket with sand to use as a holder. This won't be necessary for all repairs, but it can be really helpful for items that need to be fixed while held at an angle. Nestle the broken pottery piece into the sand so that the cracked section is facing up.
How to smooth out a chipped pottery?
2. Sand the edges of the chipped area to smooth ragged edges. Use fine sandpaper on both the edges of the broken-off piece and the main piece of pottery. Use a back and forth motion with light pressure until the edges are smooth.
How to fill cracks in a drywall wall?
Mix a 2-part epoxy adhesive to fill cracks and reattach broken pieces. [5]
What filler to use for chips in pottery?
Use 2-part epoxy filler to fill in chips in your pottery. [11]
How to distribute 2 part epoxy?
Some 2-part epoxies come in a container with a syringe that will distribute both parts equally for you. If yours doesn't come with that, disperse each part of the epoxy in lines so that you can gauge by eye that the 2 components are equal.
What to do with clay?
First, you should decide what you want to make with the clay. Think whether you are going to use it for artwork like making sculptures or for making pots. The clay that is good for throwing on the wheel may not work for making large outside sculptures. After that, you can choose the clay and clay formula. You can find the clay formulas in the ceramics monthly magazine. You can even buy commercial clay. They specify which clay is suitable for wheel throwing and which is good for building a sculpture.
What is the difference between clay and stoneware?
There are different types of clay depending on their firing temperature. Earthenware is a low-temperature clay , and mid-range clays are known as stoneware. Porcelain is a high fire range clay.
Repairing hairline cracks in clay
Spotting hairline cracks in clay is normally very difficult. But when you do find one, you want to fix them right away. So when you finish molding your clay, make sure to go over it carefully to check for any cracks.
Repairing hairline cracks in bone dry clay
If you missed any hairline crack in the wet clay, you might find one after the clay as dried.
Repairing hairline crack in ceramics: pegging method
There are several ways to repair hairline cracks in ceramics but the pegging method is the best way to restore the structural integrity of the piece.
Repairing hairline cracks in ceramics using super glue or epoxy
Depending on how bad the crack is, simply applying some super glue or epoxy might be enough to prevent your ceramics from deteriorating further.
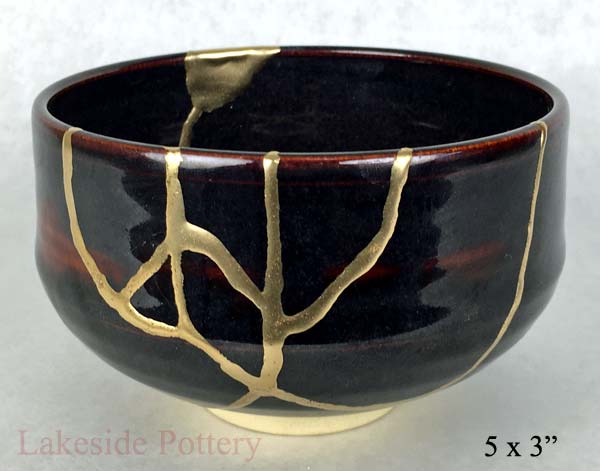
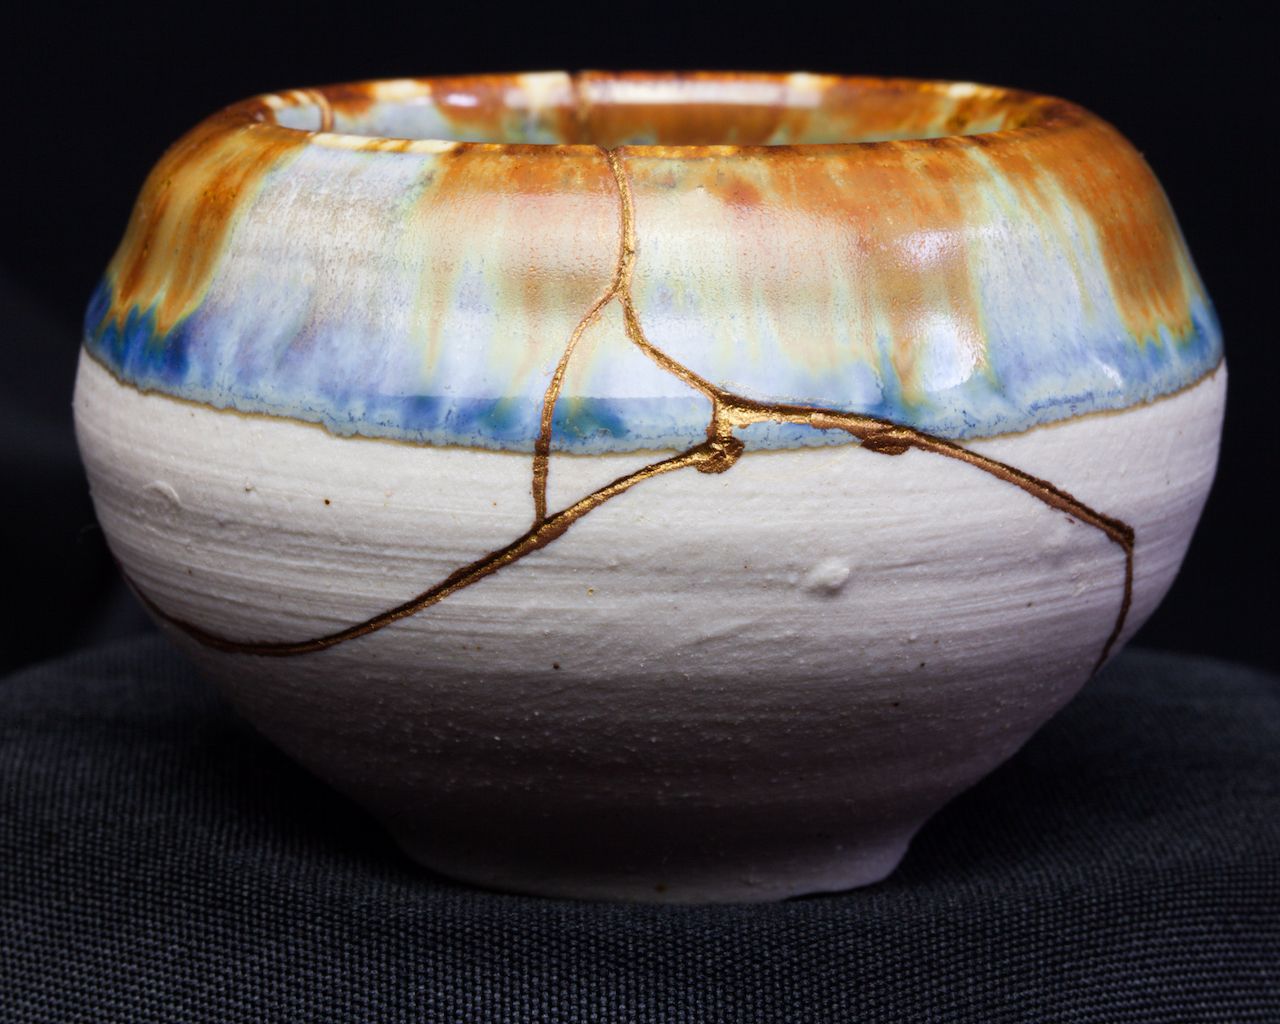
Repairing hairline cracks with Kintsugi
Kintsugi is an ancient Japanese art of repairing broken pottery and ceramics with lacquer mixed with precious metals such as gold, silver or platinum.
Is pottery food safe after repairing hairline cracks?
If you spot a crack early when the clay is still wet, you can repair the crack with clay and the resulting piece will be food-safe after firing and glazing. However, most methods to repair hairline cracks in ceramic pieces are not food-safe because they use some kind of glue or epoxy. If you find cracks in a mug or plate it’s best to buy a new one.
What is the difference between crazing and cracking?
At first glance crazing and hairline cracks look very similar. However, crazing normally results in a web of small interconnected lines, whereas cracking is normally one big line. Moreover, crazing is surface deep and only affects the glaze, whereas cracking goes through the entire ceramic piece.
How to fix a chipped piece of pottery?
Apply 2-part epoxy to 1 side and hold the pieces together. Mix together 2-part epoxy according to the directions on the packaging and then spread a thin layer on 1 side of the chipped pottery. Then, press the broken piece back into place and hold it for about a minute so it bonds.
How to clean a pottery piece?
Clean off the pieces with rubbing alcohol. Use rubbing alcohol and a clean cloth to wipe down the pottery. Remove any dust or dirt from the surface and scrub off any old adhesive that may be on the surface so the new adhesive can bond more effectively.
What glue to use to repair ceramic?
Super glue is the best glue to use for simple repairs. While you can use epoxy to repair ceramic, the simplest and best overall choice is super glue. It’s fast, it’s easy, and it’s effective. Choose a quality brand such as Gorilla Super Glue or Krazy Glue.
How to fix a crack in a wall?
Apply super glue to the crack and hold it in place for 1-2 minutes. If there’s a small gap in the crack, press both sides together. Use the applicator tip of the super glue to apply the glue directly into the crack. Wait for about 1-2 minutes to allow the glue to soak into the crack and form a bond.
How long does epoxy cure?
Allow the epoxy to cure for an hour and then scrape off the excess. When you press the chipped piece back into place, some of the epoxy may squeeze out between the crack. That’s okay. Allow the epoxy to fully cure and harden and then take a razor blade and scrape off the excess.
How long does it take for adhesive to dry?
Allow the adhesive to dry and then scrape off the excess. Wait about 10 minutes for the adhesive to dry and harden. Then, use a metal scraper or a kitchen knife to scrape off any adhesive that was pushed out of the crack so the surface is nice and smooth.
Can you repair cracked ceramic mugs?
Have you ever cracked your favorite ceramic mug or piece of pottery? You might be wondering what you can do to fix it. The good news is it’s actually pretty easy to repair cracked or chipped ceramic. You just need to use the right adhesive. To make it easier, we’ve answered some of the most common question that people have about repairing cracked ceramic.
1. Uneven Drying Is A Cause Of Cracks In Pottery
Uneven drying is the most common cause of cracks in pottery. Clay shrinks when it dries. The clay is stressed if one component of your pottery dries and shrinks faster than another. A drying gradient is what this is called.
2. Too Much Water Can Cause Cracks In Pottery
When throwing on the wheel, a pool of water will frequently form at the base of your pot. As you throw your pot, the small puddle will sit there, making the clay mushy as it lies in the base.
3. Clay Thickness Can Cause Cracks In Pottery
Thicker clay takes longer to dry than thinner clay. It will dry out more slowly if the base of your pot is thicker than the sides of your pottery. One side of the pot is thicker.
4. Type Of Clay Used Can Cause Cracks
The kind of clay you use can also influence whether your pottery breaks or cracks when it dries. Clay (organic matter in clay) with a high level of plasticity cracks more easily as it dries.
The Number One Solution To Prevent Cracks In Pottery
Here is what I do, and it works every time to prevent cracks in pottery.
Use Your Kiln As A Drying Chamber
Because electric kilns lack the airflow needed to remove surface water, a kiln-venting system should be considered not just for safety, but also for appropriate drying. Whether there is a vent or not, a gradual heat above boiling point is required to allow all pore water to leave before firing process can begin.
How To Repair A Pottery Crack
Word of caution: Ceramic restoration materials are not food safe, liquid proof, or heat resistant above 190 degrees F, so repaired items should not be used for cooking or serving food.
What do you take to repair broken pottery?
Once they have broken the pottery, the practitioner takes silver, gold, platinum, or lacquer to repair the broken pieces of pottery. Kintsugi’s beautiful message is to embrace the imperfect as part of the character of the piece.
How do you fix a broken ceramic vase?
The clear two-part Epoxy works best when repairing a broken vase. Take the broken pieces and apply the glue around the edges of the shattered pieces. Fast-drying epoxies aren’t advised if you want a precise fit. Make sure to use the right acrylic paint to match the repairs of the vase. Finding the right paint to match your ceramic vase takes time and research.
How long does it take for clear glue to dry?
Superglue and Clear glue are very similar. You may have mixed opinions about the use of these for repairing ceramics—some potters use them and some see it as a cheap and ineffective fix. Like an adhesive, they dry in 10 minutes and cure in 24 hours.
Why do Japanese people drop their ceramics on the floor?
Some people who practice the sublime art of Kintsugi will purposely drop their ceramics on the floor deliberately just so that they can repair it.
What glue do you use to repair pottery?
The most common types of glue to repair your pottery are superglue, clear glue, and epoxy. They have their pros and cons, so it’s important that you know the difference before deciding on which one to use in a particular situation.
Why put on safety glasses before repairing pottery?
Put on your safety glasses beforehand because you shouldn’t repair pottery without safety glasses.
How to put broken pieces of ceramic back together?
After you have mixed the epoxy, you will take the broken pieces from the pottery and put them back together. Squeeze them until you see excess glue. Don’t squeeze too hard because you want this to stick and fill the gaps of the broken ceramic piece.
How to fix a broken pot?
The only way to restore such an object is by using "cold materials and process". The first step to fix broken pottery or a ceramic object is by mending the pieces with two-part epoxy adhesive. With modern adhesives, fillers, paints and cold glaze, it's possible to perform seamless repairs to damaged ceramic and pottery objects. The tutorial below will address the first two steps which are a) mending the broken pieces and b) filling and sanding the visible break lines, chips and gaps using the best commercially available materials. This tutorial applies only to non-porous or slightly porous materials such as porcelain, stoneware, resin and glass.
How to fill cracks in a drywall wall?
Apply thin layer of filler while pushing in to fill cracks and missing fragments
How to apply epoxy mix to one side?
Apply epoxy mix to one side using a pintool, paper clip or a wooden stick
What is Lakeside Pottery?
About: Lakeside Pottery, a nationally recognized Ceramic and Sculpture Repair and Restoration studio, established in 2001 as a ceramic art and pottery teaching facility. We are also craft Kintsugi / Kintsukuroi Japan… More About lakesidepottery »
How hot should a sandpaper be to cure?
Verify that pieces can stay steady during the cure period (let it cure at 75 degrees F or warmer).
What can you use to match broken pieces?
We use PVC pebbles.
Can you hide repair lines?
To hide the repair lines for a seamless repair, painting and application of 'Cold Glaze' are required and more details can be seen in our Painting Lesson
