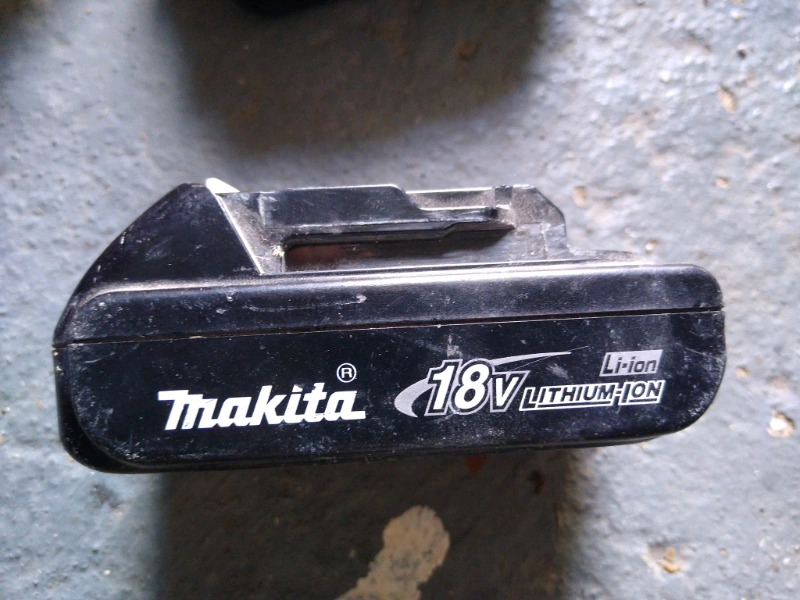
Makita 18v LXT Lithium-ion Battery Repair
- Dismantling & Inspection. Before we start with the dismantling, remember that even if your batteries do not work anymore they most likely still contain a significant amount of ...
- Testing the Batteries. I had four failed batteries, and checked the voltages of the batteries and cell pairs individually.
- Replacing the Control Board. The control board came with ok instructions on how to fit but they don't explain everything, this may be because it can be used ...
- Putting It to the Test! Next came the moment of truth, I put the battery on a charger and it charged. ...
Full Answer
Can Makita 18V batteries be repaired?
how to Fix Makita 18V Battery LiPo Not Charging Repair BL1830. Jump starting the battery with a different charger. Force charging lithium ion batteries that ...
How to recondition DeWalt 18V batteries?
- It saves money – If you don’t need to change your batteries then you’re conserving yourself a great deal of cash over the long term.
- It’s quick – Most people say that it just takes about 20 minutes to recondition a battery pack.
- It’s simple – All the instructions are plainly set out and easy to follow.
- It’s cheap – the whole course costs simply $47. ...
How to fix a dead Makita battery?
Makita 18v LXT Lithium-ion Battery Repair
- Dismantling & Inspection. Before we start with the dismantling, remember that even if your batteries do not work anymore they most likely still contain a significant amount of ...
- Testing the Batteries. I had four failed batteries, and checked the voltages of the batteries and cell pairs individually.
- Replacing the Control Board. ...
- Putting It to the Test! ...
How to recondition black and Decker 18v battery?
This is quite easy to fix but depends on the access to the connector terminals:
- Unplug the charger – this is important for safety.
- Use either a small screwdriver or wire wool to scrape the corrosion off the terminals.
- If access to the terminals is difficult, you can spray contact cleaner on them.
- Once cleaned, try to charge your battery again.

How do I bring my Makita battery back to life?
0:402:42Makita How to Save Dead battery bring back to life revive/ rejuvenateYouTubeStart of suggested clipEnd of suggested clipAnd we'll tap this for about five to seven seconds and it'll be a quick tapping and i'm gonna doMoreAnd we'll tap this for about five to seven seconds and it'll be a quick tapping and i'm gonna do that right now you should have safety glasses on while you do this.
Why do Makita batteries stop working?
There seems to be two main causes as to why your Makita 18v batteries die. The first is overheating which is due to several reasons. The second main cause is that the first two cells fail due to them being used to power the circuity of the battery management chip.
Can Makita batteries be rebuilt?
Our trained technicians work on Makita® brand batteries each day and have been working with many Makita® service centers for years. We rebuild all types of Makita® brand batteries including those used in diagnostic equipment. Don't wait any longer. Send your 1820 battery pack to us for repair today!
How do you fix an 18V battery that won't charge?
0:333:07How To Fix A Cordless Drill Battery That Won't Charge - YouTubeYouTubeStart of suggested clipEnd of suggested clipSo once you get these to where each one is touching. The positive the positive negative to negativeMoreSo once you get these to where each one is touching. The positive the positive negative to negative just let it sit for five minutes.
How do you fix a lithium-ion battery that won't charge?
1:275:45How to fix a lithium ion battery that won't charge - YouTubeYouTubeStart of suggested clipEnd of suggested clipSo that's the first thing you'd want to try is use some sandpaper. Use a shim use something to cleanMoreSo that's the first thing you'd want to try is use some sandpaper. Use a shim use something to clean the contacts.
How do you take apart a Makita battery?
2:0014:12How to disassemble recent Makita battery packs to salvage cellsYouTubeStart of suggested clipEnd of suggested clipThis is to pry the plastic shell the Philips screwdriver this is to remove the screw on the top ofMoreThis is to pry the plastic shell the Philips screwdriver this is to remove the screw on the top of the BMS of the battery. This drill bit this is to drill the hole.
How do you restore a 18V rechargeable battery?
1:003:24How to revive a dead rechargeable power tool battery easily - YouTubeYouTubeStart of suggested clipEnd of suggested clipBut you can give it a bit of a boost or I'm just using a pair of scissors here. And I'm just goingMoreBut you can give it a bit of a boost or I'm just using a pair of scissors here. And I'm just going positive terminal positive terminal.
Can you rebuild a lithium ion battery?
The charger sends a small amount of charge to the protection circuit so that it will get reactivated, and ideal cell voltage can be reached. So, this way, you can revive the Lithium-ion battery pack that has been lying in a sleeping state.
Why does my Makita battery not charging?
Plug the battery charger into a working electrical outlet. The battery charging lights will flash green, indicating the unit is receiving power. If the lights are not flashing, plug the unit into a different electrical outlet. If the unit still does not receive power, it is likely defective and should be replaced.
How do you bring a lithium battery back to life?
When you take it out of the freezer, let it thaw for up to eight hours to restore it to room temperature. Place the Li-ion battery in the charger and charge it fully. Hopefully, its performance will improve, it will take a charge again and last longer between charge cycles.
How do you reset a lithium-ion battery?
How to Reset Lithium-Ion BatteriesUse the device containing the lithium-ion battery until the battery is completely discharged. ... Plug the device's power cord into an electrical outlet. ... Remove the lithium-ion battery from the device if the device has an external lithium-ion battery charger.More items...
How do you wake up a lithium battery?
Using an appropriate charger, connect the battery for some minutes while keeping an eye on it to detect if there are any signs of damage and healing. Use a charger with the ''boost'' or ''wake up'' feature. Keep in mind that it is not advisable to boost a lithium-ion battery that has a voltage of 1.5 and below.
How long does Makita battery last?
–3 yearsBosch, DeWalt, Metabo HPT (Hitachi), Makita, Milwaukee Tool, and Ridgid all warranty their Lithium-ion batteries for 2–3 years. That's a real good indicator of their minimum expectations for those packs. If you take care of your batteries, there's no reason not to expect them to last at least that long or longer.
Why does my Makita battery not charging?
Plug the battery charger into a working electrical outlet. The battery charging lights will flash green, indicating the unit is receiving power. If the lights are not flashing, plug the unit into a different electrical outlet. If the unit still does not receive power, it is likely defective and should be replaced.
How do you charge a dead Makita battery?
2:3527:41How I Fixed My Faulty Makita Battery - YouTubeYouTubeStart of suggested clipEnd of suggested clipSo basically what the Sutter line is to get a wire. And connect it from your good battery to yourMoreSo basically what the Sutter line is to get a wire. And connect it from your good battery to your bad battery.
How do I test my Makita battery?
Genuine Makita batteries are black in color, have the Makita trademark logo with Lithium-Ion identification on both sides, and have the Makita trademark logo on the bottom of the battery. "Knock-off" batteries may appear to be similar to genuine Makita batteries but have no Makita branding on them.
Step 1: Dismantling & Inspection
Before we start with the dismantling, remember that even if your batteries do not work anymore they most likely still contain a significant amount of energy. Be careful in how you handle them and above all make sure you do not short them out.
Step 2: Testing the Batteries
I had four failed batteries, and checked the voltages of the batteries and cell pairs individually. I found the following:
Step 3: Replacing the Control Board
The control board came with ok instructions on how to fit but they don't explain everything, this may be because it can be used with all of the models of 18v LXT battery Makita have made. Providing you have a bit of common sense you should be ok.
Step 4: Putting It to the Test!
Next came the moment of truth, I put the battery on a charger and it charged. I then fully discharged the battery and once again recharged the battery and that also worked. Eight month on the battery is still preforming perfectly.
Step 1: Why Batteries Fail
As with many types of cell chemistry, once the voltage of lithium cells falls below a certain point they are likely to become irreversibly damaged.
Step 2: Dismantling & Testing
Makita batteries are usually held together with a set of four T10H screws. Due to the narrower recess that the screws are in, you'll need either a dedicated T10H screwdriver or a micro screwdriver bit set. Standard 1/4" bits will be too wide for the hole. One of the holes may have a resin cap which will need to be drilled out first.
Step 3: Soldering New Tabs
After re-wrapping any cells with slight amounts of surface corrosion from other cells that had leaked onto them, I arranged the stack of cells in a 5x4 arrangement and secured them temporarily with duct tape.
Step 4: Extending the Case
3D printing is one option available for creating spacers to extend a battery's case by the height of one or two rows of cells, however, using a strip of 3mm acrylic was far quicker, stronger, and has much better transparency than 3D prints.
Step 5: Painting & Future Modifications
As a finishing touch, to hide the residual epoxy and theme the new extension into the old battery case I masked off the centre of the acrylic and cut a jagged pattern on each side to give the impression the two halved had been "torn apart" as if by the sudden arrival of 10 new cells. While this project used almost everything from the old and broken batteries, I still have several empty cases and dead charging boards which I plan to use for future projects such as a smaller 1x5 row Makita battery, as well as experimenting with a USB-C socket and 5v boost converter PCB to allow the broken charging boards to be used again (Even if only for their 18v terminals). I also plan to add a battery life indicator to the front of this battery, though with less granularity than the standard 4-bar gauge on most power tool batteries.
Step 1 Dismantling & Inspection
Before we start with the dismantling, remember that even if your batteries do not work anymore they most likely still contain a significant amount of energy. Be careful in how you handle them and above all make sure you do not short them out.
Step 2 Testing the Batteries
I had four failed batteries, and checked the voltages of the batteries and cell pairs individually. I found the following:
Step 4 Putting It to the Test!
Next came the moment of truth, I put the battery on a charger and it charged. I then fully discharged the battery and once again recharged the battery and that also worked. Eight month on the battery is still preforming perfectly.