How to Repair a Picture Frame:
- Purchase new hardware. I ordered these 1″ Fasteners on Amazon- a box of 100 was less than $9. ...
- Secure the fastener. I temporarily attached the 1″ lever fastener to the back of the frame using scotch tape. ...
- Secure the teeny tiny screw. The screws that work with these fasteners are miniscule. ...
- Hammer the darn thing into place! It goes against all common sense to hammer in a screw. ...
- Tighten it down with a small screwdriver. It needs to be just loose enough so that the lever can move to the side to change out the artwork, but ...
Full Answer
How to reinforce picture frames?
Steps on Joining The Picture Frame Corners
- Step # 1: Choose A Wood Color That Matches The Grain Pattern. ...
- Step # 2: Align Miter Joints Using V-Nails or biscuits. Clamping and aligning miters is a daunting task. ...
- Step # 3: Glue the Frame. Once you made sure that the joints of the frames are perfectly mitered, you can have them securely fit together.
- Step # 4: Support and Reinforce the Joints. ...
How can I repurpose old photo frames?
- Hang it up. As is. ...
- A frame within a frame. If the previous idea is too unconventional for you, do the same trick, but with something in the middle of the frame.
- Display jewelry. Another option is to hang jewelry inside of an empty frame. ...
- Use fabric. Instead of purchasing new glass, use fabric to fill an empty frame. ...
- Light switch art. ...
How do you fix a warped picture frame?
- Remove the picture and the glass from the frame.
- Cut an absorbent rag into long strips, using scissors.
- Arrange 8 C-clamps evenly around the perimeter of the frame and clamp the frame to the plywood.
- Moisten the rags daily with a spray bottle of water, and each day, tighten all the clamps about a quarter turn.
How to build perfect picture frames?
The formula is pretty common sense:
- There will be 8 ends (4 rails x 2 ends).
- You’ll need an additional stock measurement to compensate for the outside rail measurement, and that’s based upon the width of the molding.
- If the molding width is 3 inches, you’ll lose 3 inches on a 45-degree miter cut. ...
- The formula, then, is 8 ends x 3” molding width, or 24 inches. ...

How can I restore an old photo frame?
0:031:37How to Fix and Restore Ornate Picture Frame Antique Frame RestorationYouTubeStart of suggested clipEnd of suggested clipAfter you've melted the impressive putty in the microwave until it's do--like let it sit until it'sMoreAfter you've melted the impressive putty in the microwave until it's do--like let it sit until it's cool enough to touch we can simply press it onto the object you want to make a mold.
How do you refurbish a wooden frame?
0:522:51How To Refurbish An Old Window Frame - YouTubeYouTubeStart of suggested clipEnd of suggested clipApply window putty into the frame around the glass to get a perfect finish hold the putty knife atMoreApply window putty into the frame around the glass to get a perfect finish hold the putty knife at an angle to the frame. And draw it over the putty bead to get a smooth even finish.
How do I restore my art frame?
0:363:33Art Frames Conservation - YouTubeYouTubeStart of suggested clipEnd of suggested clipThe missing elements are recreated by molding similar design motifs from adjacent sections a layerMoreThe missing elements are recreated by molding similar design motifs from adjacent sections a layer of talcum powder keeps the clay mold from sticking to the frame.
How do you fix a scratched picture frame?
0:241:17How to Touch Up Wood on a Picture Frame - YouTubeYouTubeStart of suggested clipEnd of suggested clipAnd just kind of color on top the putty will kind of also help even out if there's a divot. You justMoreAnd just kind of color on top the putty will kind of also help even out if there's a divot. You just want to rub it a little bit just to kind of even out the area. And then the frame will be repaired.
How do you clean an old wooden picture frame?
How to clean an ornate wood frameRemove the frame from the towel.Wipe dust and dirt off with a clean, soft cloth.Using a dry toothbrush, gently scrub the frame to get into the crevices.Wipe the frame with a fresh clean cloth again to get rid of any debris loosened by the scrubbing.More items...
What kind of paint do you use on picture frames?
There are numerous types of paint available, including acrylic, latex, alkyd (synthetic) oil paint and natural (e.g. linseed) oil paint. Natural oil paint works best on wood picture frames, as it dries slightly softer and can thus expand and contract with changing temperatures.
Can picture frames be repaired?
Spread a thin line of wood glue on the inner edge of each joint and press the pieces together. Wipe any excess glue from the frame with a damp cloth and use a clamp to hold the joints together until the glue is dry. After the glue has completely dried, replace the glass, the photo, and the back of the frame.
Are old picture frames worth anything?
Antique picture frames can fetch a considerable price, because of its rarity and inherent value. As such, if you plan on buying an antique picture frame, you should carefully scrutinize the item (as well as its seller) to ensure that you are buying 'the real deal' and not a forgery.
How do you clean old plaster picture frames?
Place the picture frame on a flat surface and wash it down with a little soap and water. Do it gently. Use only enough to get it clean because if the plaster gets too wet, it will get soft. If you still have the glass in it, use that blue tape to mask around the edges.
How do you paint a wood picture frame?
We'll show you how easy it is to fix a broken picture frame with Aleene's Wood Glue....How to Fix a Broken Picture FrameApply glue to unpainted or stained surfaces of clean, dry wood.While wet, remove excess glue with a damp cloth.Press or clamp together for approximately 30 minutes.Let dry for 24 hours.Aleene's Original Glues - How to Fix a Broken Picture Framehttps://www.aleenes.com › project › how-to-fix-a-broken-...https://www.aleenes.com › project › how-to-fix-a-broken-...Search for: How do you fix a chipped wood picture frame?
Can I paint my wooden bed frame?
Paint a Picture FrameBegin by wiping off your frames with a damp rag to make sure the surface is clean. ... Use a 3-in-1 tool to gently open the paint cans and then lightly stir the paint.Use the Purdy 1" XL Dale brush to apply the first coat of paint. ... Be sure to read the label on your paint can to see dry time.More items...
How do you finish a picture frame?
The best paint for a wooden bed frame tends to be alkyd oil-based paints that harden over time. This type of paint will mean your painted bed finish will be more durable for longer and you won't be reaching for that brush again anytime soon!
Introduction
Have you ever broken that favorite picture frame you just couldn't simply throw away and get rid of? My guide will accomplish the fix of a picture frame, and repairing the broken piece to make it brand new.
Step 1 How to Repair a Wooden Picture Frame
Pull back the metal clips that hold the frame, you may use the pliers to pull them back if needed.
Step 2
After clamps are lifted, carefully remove glass out of the frame. You may use the pliers for this step to lift the clamps
Step 3
Begin to pull apart any loose joints that may be embedded in the frame with the needle nose pliers
Step 4
Begin to sand off the finish with the sandpaper if the frame appears to be scratched or damaged in any way
Step 5
If you proceeded to sand the frame, or not, restoring the color of the wood gives it a great finish and shine.
Step 6
Using carpenter glue, glue the joint (s) back together and apply pressure when pressing sides together using your hands.
How to salvage a picture from a glass?
Carefully and gently separate all parts. Remove and set aside the backing, the filling or padding, the photo or picture, and the glass. Keep everything because you might be able to reuse the backing and most often the glass is salvageable. ...
How to clean a wood frame?
Clean the frame. Turn the frame over and examine it. Use a slightly dampened rag to wipe away grime and dust. Take a stiff bristle paint brush and go over the surface of the frame, especially if there is carving or ornate portions. Wipe it down and decide how much you want to alter it.
What is the best tool to use to attach glass?
An electric staple gun is a great tool, but worth buying only if you plan to use it a lot. It uses heavy duty staples and makes stapling a breeze. Thin, framer's nails are the most common way to attach the glass. A tool especially designed for pushing nails is a big asset, but only works on flat frames.
How to make a paper frame?
Run a tiny bead of white glue all around the frame's edges. Go underneath the wire and place the paper lightly against the wood of the frame. Press paper down against the glue. When dry, cut remove excess, overhanging paper by cutting along the frame's outer edge with a craft knife or scissors.
How to fix scratches on wood?
For simple wood frames, fix scratches. If they are deep, fill them with wood filler or purchase a kit of wax sticks in various colors designed for fixing furniture to smooth out scratches. Paste shoe polish works well and is cheap, easy to obtain, and comes in many colors.
Is it fun to shop for frames?
Shopping and selecting the best frames is so much fun and allows provides a wild and eclectic array to chose from . Use care, however, not to let the frames overtake your living space. Revamping them is addictive and they are so readily available and cheap you might find your self overrun with them.
Can you use Phillips and standard on the same frame?
If more than one screw is needed in the hardware, use matching ones, don't mix standard and Phillips on the same frame. Just be consistent and neat. If you don't have a dedicated punch, simply use a slightly larger nail, tap gently and remove to make the pilot holes. Metal eyelets work well in many smaller frames.
1. Purchase new hardware
I ordered these 1″ Fasteners on Amazon- a box of 100 was less than $9. I probably could have found them at our local hardware store in a smaller pack size for less, but I went with what I could find easily.
2. Secure the fastener
I temporarily attached the 1″ lever fastener to the back of the frame using scotch tape. Make sure that you position it close enough to the inside edge of the frame so that when the lever is turned, it will hold the frame back firmly in place.
3. Secure the teeny tiny screw
The screws that work with these fasteners are miniscule. And trying to hold one in place in order to screw it into the back of the frame is darned near impossible. I tried using a electric drill with a small magnetic bit, I tried holding it…. nothing worked. It is just too small. So here's where things get a little goofy….
4. Hammer the darn thing into place!
I know! It goes against all common sense to hammer in a screw. But with an object this teeny-tiny coming into contact with such a hard piece of wood as is on the frame, it is impossible to properly start and then tighten down the screw. That is… until you hammer it nearly 90% of the way into place!
5. Tighten it down with a small screwdriver
It needs to be just loose enough so that the lever can move to the side to change out the artwork, but tight enough so that the lever stays firmly in place once you are done.
How to clean plaster on a picture frame?
1. Clean the Frame. Place the picture frame on a flat surface and wash it down with a little soap and water. Do it gently. use only enough to get it clean because if the plaster gets too wet, it will get soft. If you still have the glass in it, use that blue tape to mask around the edges.
How to make a plaster frame?
3. Make the Mold 1 The first thing to do is to thoroughly spay the part of the frame being used to make the molds with cooking spray. Take a piece of the clay and make a small block with it. Then flatten it till it reaches a size that will cover the plaster decoration. Press in over the section and press really hard. Remove the clay. Now you have the mold for the missing parts 2 It will take a little practice to get molds that will be the right size. They must be thick enough to duplicate the design but thin enough so that you don't have a really thick molded piece. If the molded piece is too thick, it won't match the rest of the frame. Eventually, you will get the hang of it and get a clay mold that will be a good fit.
How to remove plaster from a mold?
Pour in the plaster. Now here comes another use for the chop stick. Use it to level the bottom edge of the mold. You want it to be as even as possible so it will fit snug onto the frame. Now let it dry overnight.
How to make a mold for a plaster wall?
The first thing to do is to thoroughly spay the part of the frame being used to make the molds with cooking spray. Take a piece of the clay and make a small block with it. Then flatten it till it reaches a size that will cover the plaster decoration. Press in over the section and press really hard.
How to clean an antique frame?
An antique frame is old -- a bit loose in the joints and worn around the edges. Clean it up carefully, to avoid further damage, by dusting the frame with a clean paintbrush, then wiping it down with a soft cloth dampened with nonflammable solvent. Test the cleaner on an unobtrusive part of the frame first to be sure you won't remove or damage the finish. Label the pieces of the frame and then gently disassemble it so you can scrape off the dried, useless glue, reapply clear carpenter's glue and fit the pieces back together. Measure to be sure the frame is perfectly square; frame clamps will hold the corners in place as the glue dries. Heavier frames might need brass corner braces to reinforce them -- brass won't discolor the old wood.
How to fix a stained wood frame?
Dust and clean the frame, and then dab matching wood stain or a liquid scratch remover on any distress to the varnish or lacquer. Use a fine artist's brush or a cotton swab to apply the fix; cover your finger with a clean cloth to wipe off excess finish.
How to clean gold leaf art?
Proceed cautiously, working the solution into cracks, corners and carvings with a delicate brush. Shake the frame over a trash bin to release any dirt. Go over the cleaned spot with another brush and plain water, and shake it again. Rubbing gold leaf could remove it from the frame, so let the cleaned frame dry naturally. Dab wax gilt finish from the art supply store on any scratches to cover them. Extensive scratches may require a reapplication of the gold leaf, probably a job for an expert. If you can handle it yourself, be sure to match the antiqued quality of the gold color as closely as possible with new gold leaf.
What happens if you own a Rembrandt?
If you happen to own an original Monet or Rembrandt, any damage to the frame is priceless evidence of the work's history and should be conserved -- never restored. But less auspicious old frames are not so precious and will gain in appeal, not lose value, when you restore them to attractive condition.
Step 1
Pressing the clay onto the frame makes a mold of the undamaged detail you want to duplicate.
Step 6
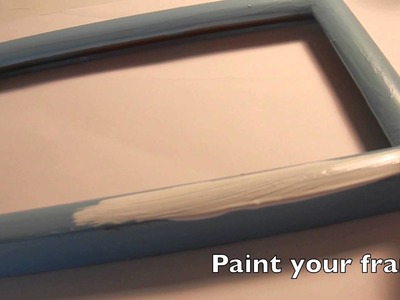
Paint or gild your final finish so that the new segment matches the original color and finish. Your frame is now finished and ready to be rehung.
