Check the blades to see if they’re dull by running your fingers across them. If they are, then replacing them is an easy fix as long as you buy the right blender blade for your Oster blender. To get started, unplug the blender, and unscrew the base from the jar. Next, check the seal below for wear and tear, and replace as well if necessary.
Full Answer
What to do if your Oster Blender is leaking?
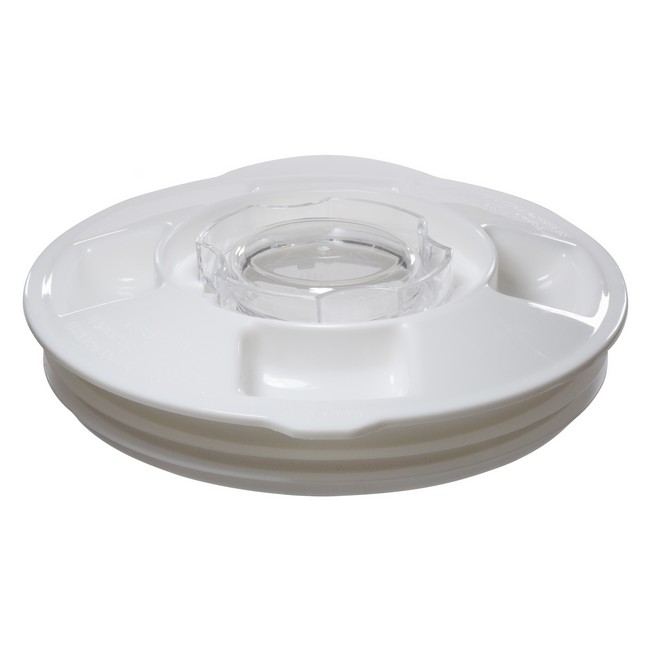
A leaky Oster blender can make a big mess, but a few heads-up tips can prevent a messy cleanup. The gray sealing ring must be intact in the blade assembly to form a leak-proof seal. When you wash blender parts, make sure to replace this ring.
How much does it cost to fix an Oster Blender?
There are several things you can do to fix your Oster blender if it is not working. Whether you paid $30 or $500, all blenders have the potential for not working quite right, regardless of the brand and model. If you have an Oster blender, Consumer Reports notes that this brand offers budget pricing for its models, which typically max out at $100.
Why won't my Oster Blender turn on?
Another easy solution if your Oster blender won't turn on is to make sure that the jar is correctly positioned on the base. If the jar is not properly positioned, the blender's safety feature ensures that it will not turn on. Another safety feature prohibits operation if the blade assembly is not properly tightened.
How long does it take to reset an Oster Blender fuse?
The 15-minute wait time resets the fuse and allows the blender to work again. If you have a digital Oster blender, you may notice the display panel lights flashing if the power to the electrical outlet was interrupted.

Why is my Oster blender not working?
Another easy solution if your Oster blender won't turn on is to make sure that the jar is correctly positioned on the base. If the jar is not properly positioned, the blender's safety feature ensures that it will not turn on. Another safety feature prohibits operation if the blade assembly is not properly tightened.
How do you take apart an Oster blender?
1:092:47Oster Pro 1200: How To Remove Blender Cap-Addendum - YouTubeYouTubeStart of suggested clipEnd of suggested clipBut all you have to do is with your other hand the hand that won't be turning it is to take yourMoreBut all you have to do is with your other hand the hand that won't be turning it is to take your thumb or a finger whatever is comfortable for you and hold that lever down against the blender glass.
Can electric blender be repaired?
Food blender repairs include servicing a multispeed switch, replacing a fuse, servicing a motor, tightening a drive stud, and servicing a blade assembly. Servicing the Multispeed Switch: It's easy to see why the multispeed switch is a critical component to the operation of your food blender.
What to do if blender stops working?
Blender not working? Here's how to fix itCheck for power connectivity. You can check for power connectivity if blender not working. ... Clean the terminals. Another thing you can do to fix a blender which is not working is to clean the terminals. ... Check the fuse. ... Make sure the blender is not jamming. ... Do a final check.
How do you know if your blender is broken?
5 Signs It's Time to Replace Your BlenderIt stops midway through blending. This is pretty much an obviously sure sign it's dead. ... The motor is slow or inconsistent. ... The cord is starting to fray. ... It's leaking. ... You want a blender that does more.
How do you fix the bottom of a blender?
0:481:40Replacing the Container Bottom (Oster Part # 148381-000-090)YouTubeStart of suggested clipEnd of suggested clipI'll begin by removing the jar from the blender and unscrewing the container. Bottom. Here I haveMoreI'll begin by removing the jar from the blender and unscrewing the container. Bottom. Here I have the new container bottle I'll swap the agitator and seal assembly over to the new container bottle.
How long does a blender last?
How long do blenders last? In general, less-powerful blenders will last three to five years, while more expensive models with a powerful motor will last about 10 years. However, how often you use your blender will impact its lifespan.
Why is blender not spinning?
Most of the time when your blender is powered on and the blades will not rotate, it is because you have overfilled the container. Remove some of the food/liquid and try to power on your blender again.
Can you burn out a blender?
Blending lots of ice can also cause the blades to fail, resulting in an overworked, burnt-out motor. The most common reason to replace the motor is if the motor brushes are worn out. The failure of other parts in your blender can cause the motor to fail as well, resulting in a burning or electrical smell.
Where is the fuse in a blender?
Fuse: Many models of blenders have a fuse that is inline or even located on the circuit board. A burned-out fuse will cause your blender not to turn on. To check if the fuse is blown, remove the base cover and inspect either the motor switch or circuit board for a blown fuse.
Why is my blender not blending?
Possible Solution There may be times when an air pocket is created around the blade, causing the ingredients to miss the blending blade. Unplug the power cord. Remove the Blender Jar from the base, and use a spatula to rearrange ingredients in the Blender Jar. Turn the Blender on to continue use.
Why is my blender stopping?
If Blender stops while blending: The Blender becomes overloaded or jammed when blending heavy ingredients. It will automatically shut off to prevent damage to the motor. Unplug the power cord. Remove the Blender Jar from the base and use a spatula to rearrange ingredients in the Blender Jar.
How do you dismantle a blender?
Step-by-Step InstructionsTake the Blender Apart. ... Wash the Jar. ... Wash the Other Small Pieces. ... Run the Blender for Stuck-on Items. ... Clean the Motor Housing. ... Reassemble the Blender and Store It.
How do you clean an Oster blender?
Combine warm water and 1 – 2 drops of liquid dishwashing detergent in blender jar and run on lowest speed for 10 – 15 seconds. Empty jar of soapy water into sink. Rinse jar thoroughly with clean water. Use a damp, soft sponge with mild detergent to clean the outside of the blender base.
Why won't my Oster blender turn on?
By the time you notice that your Oster blender won't turn on, you've likely already filled its jar with delicious ingredients to make your favorite smoothie, for example. So if you flip the switch and nothing happens, first check for the obvious — that it's actually plugged into an electrical outlet. You may have unplugged your blender while cleaning your kitchen counters and simply forgot to plug it back in.
What happens if you overfill an Oster blender?
Also, if you overfill your blender with the item (s) you're blending, exceeding the jar's filling capacity, you may be mopping up a mess on your kitchen counter when the jar leaks. Check the Oster Pro 1200 blender manual, or the manual that matches your blender's model, for correct filling capacity. Advertisement.
Why does my Oster blender light flash?
Simply unplug your appliance, wait a few minutes, and plug it in again to reset the digital display and stop the blinking lights.
Why does my blender stop working?
When this happens, the blender's thermal fuse became activated, which stopped the blender from working to allow the motor to cool down.
What happens if a blender is not properly positioned?
If the jar is not properly positioned, the blender's safety feature ensures that it will not turn on. Another safety feature prohibits operation if the blade assembly is not properly tightened. Advertisement.
Can an Oster blender leak?
Oster Blender Leaking. A leaky Oster blender can make a big mess, but a few heads-up tips can prevent a messy cleanup. The gray sealing ring must be intact in the blade assembly to form a leak-proof seal. When you wash blender parts, make sure to replace this ring.
What is Oster blender brush?
The brushes used in Oster blender are designed to transfer electricity to the armature inside the motor. This over time results in brush wear and tear, and eventually seize to come in contact with the armature inside the motor. All Oster blenders are fitted with couplers, which connect a flexible power cord with the blender.
Why does Oster blender have a burning smell?
Couplers are designed to fail in the event the blades of the Oster blender get overloaded. This can cause the couplings to melt and harden, resulting in a burning or electrical smell.
How long should I pulse my blender?
But not for too long, as it may overwork the motor. If you’re going to use the pulse function, pressing the button for max 30 seconds should do the trick, and any longer can cause motor burnout.
How to remove a rubber foot from a circuit board?
First, remove the rubber feet at the base with a screwdriver, and then remove the Phillips head screws located under them. After you remove the base, you will see a green circuit board, and a yellow and black wire attached to it. Detach these two wires by firmly pulling on the metal lead attachment.
Can you smoke in an Oster blender?
Using the wrong speed can also cause smoke emission in your Oster blender. Oster blenders such as the Oster Classic Series Whirlwind Blender PLUS offer two speeds to choose from, and a pulse function. You should always start the blender at the lowest speed, and work your way up.
Do blender blades have a seal?
Next, check the seal below for wear and tear, and replace as well if necessary. The blender blade package does include a seal, so you won’t have to buy one separately. Remove the damaged blender assembly, and replace with the new one, and screw it on tight.
Is it normal for a blender to smoke?
So, short answer is Yes and No — it is not normal per for a blender to smoke, and in fact even the slightest sign of smoke means that there may be one or more underlying issues with the appliance.
Step 3
Unscrew the 16mm screws located on the plastic bottom from the blender base using a Phillips #2 screwdriver.
Step 5
Holding the center of the fan, grip the knob in the center of the top of the blender with a wrench and twist the wrench counterclockwise.
Step 7
Now, gently pull the white wire that is connected to the base and the motor.
Step 9
Now de-solder the yellow wire from circuit board. De-solder the wire following these instructions.
Step 1: Taking It Apart
Technically, the first step to repair was waiting for a while. There might have been a self-resetting safety mechanism inside the case, so I waited a few hours and then powered on the motor. Nothing happened, which gave me some confidence that there was an actual break somewhere.
Step 2: Examining and Testing Internal Components
With the top cover off, the first thing noticed was a small yellow block. Searching for the part number identified it as a capacitor. It didn't look to have any physical problems (distortion, holes, smoke stain) so I checked it with a meter and it looked OK. Time to push on.
Step 3: Accessing and Testing the Fuse
To get access to the fuse required removal of the switch. To remove the switch required access to two screws right inside the base of the casing. To get access to those screws required removal of the control knob. To remove the control knob, about four hands were required to bend and stress various plastic catches at the same time, which is why there is no photograph of that..
Step 4: Replace Fuse, Insulation and Case
After an afternoon of driving around, I sourced a replacement. Thank you Jaycar! (Other suppliers are available. They just don't carry 2A slow-blo)