There are seven basic steps to repairing the tent material on your pop-up camper trailer. Measure the damaged areas Locate the correct repair kit Prepare the tent material for the repair Cut the repair material Apply the adhesive and the patches Allow the adhesive to cure Weatherproof the patches
Full Answer
How to lift a tent trailer?
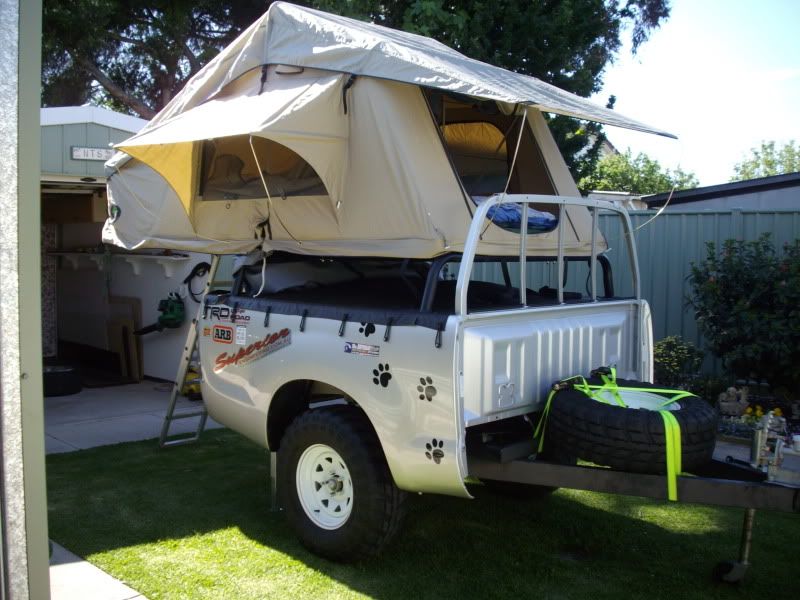
Trailer Frequently Asked Questions
- What size trailer will the tent fit on? The tent has a steel frame underneath that has been designed to fit a number of different sized trailers. ...
- How can I fit the tent to my 8x5 trailer? ...
- What are the dimensions of the steel frame that attaches to the trailer? ...
- My trailer is an unusual size (e.g. ...
- How do I fit the tent to my 6x4 trailer? ...
How to winterize your tent trailer?
- Remove any inline water filters as well as the bypass before completely draining the fresh water holding tank. ...
- Assuming the hot water is off, drain your tank. ...
- Open all hot and cold faucets before draining them using the water pump. ...
- Bypass your hot water tank by using the onboard bypass kit. ...
How to repair a torn tent?
Small Tear Repair
- So find your rip/tear, and cut some of this Tenacious Tape, rounding off the edges; and
- Make sure the tape is larger than the the rip, by at least 2cm on all sides.
- Peel off the backing on the Tape, and press it over the small rip/hole on the fabric that is inside the tent, pressing down firmly and smoothing out any bumps ...
What is the best roof top tent?
Rooftop tents for cars are one stage of commitment down from shelling out for a campervan — with the satisfaction (unusual in camping) of heading upstairs at bedtime. This three-person model is towards the larger end of Thule’s range, with a detachable ...

How do you fix a sagging roof on a pop up camper?
Solutions for a pop-up camper sagging roofRemove the outer frame to assess the damage.Disassemble the canvas and remove the roof.Remove rotten and water-damaged pieces.Rebuild the roof structure with new pieces.Reapply the roof and canvas to the RV.Seal holes and seams to prevent future leaks.Repair the ceiling.
How do I repair my trailer roof?
1:493:06How to Repair a Torn or Punctured RV Roof - YouTubeYouTubeStart of suggested clipEnd of suggested clipPress down firmly start in the center. And work towards the outside edges removing any bubbles. YouMorePress down firmly start in the center. And work towards the outside edges removing any bubbles. You want to prevent any openings or tunnels in the edges of the patch for the patch to work effectively.
How do you repair a roof on a pop up camper?
0:5914:55Pop Up Camper Roof Repair - Replacing Roof Side Walls - YouTubeYouTubeStart of suggested clipEnd of suggested clipAnd then you strip down the the old caulk. And use this nice caulking tool it's got a sharp edge toMoreAnd then you strip down the the old caulk. And use this nice caulking tool it's got a sharp edge to it that'll that'll dig out some of the cracks.
How do you repair a canvas in a tent trailer?
1:5814:23Pop Up Camper Canvas, Vinyl, & Screen Repair - YouTubeYouTubeStart of suggested clipEnd of suggested clipIf you have a larger tear or hole in your canvas is to pick up one of these iron-on. Patches so thisMoreIf you have a larger tear or hole in your canvas is to pick up one of these iron-on. Patches so this of course you put on the area where you have that hole. Apply high heat with an iron.
Does Flex Seal work on camper roofs?
We recommend using Flex Seal on an RV roof only in an emergency – if you don't have the appropriate products on hand and Flex Seal is what you have for your time-sensitive repair. We choose to keep Dicor and EternaBond on hand, but if Flex Seal is your choice, then we certainly wish you the best with it.
How do you fix a rubber roof?
2:554:22How to Patch a Leaking Rubber Roof | This Old House - YouTubeYouTubeStart of suggested clipEnd of suggested clipSo when we put the contact cement on it it will stick to a real clean surface. All right lauren youMoreSo when we put the contact cement on it it will stick to a real clean surface. All right lauren you hold the patch back and i'll apply the rubber to rubber cement on the roof.
How much does it cost to replace a pop up camper top?
Generally, it's $300-$325 per linear foot. So if you're replacing the entire roof on a 36-ft rig, it will cost around $7,000-$12,000. Also, consider that they could find more damage underneath the roof, which requires additional cost and repairs.
What are pop up camper roofs made of?
What are pop-up camper roofs made of? Pop-up camper roofs are made of 1” x 2” boards that form the pop-up ceiling frame. On the inside, there is a thin sheet of luan (plywood) attached to a foam core. This soft roof is what allows the pop-up camper to have its “pop” properties.
How do you fix a pop top canvas?
3:525:49VW California Camper Repair: Fixing a Hole in the Pop Up Roof - YouTubeYouTubeStart of suggested clipEnd of suggested clipAll right I've been very careful to try not to put the iron in direct contact with the fabric of theMoreAll right I've been very careful to try not to put the iron in direct contact with the fabric of the pop. Top it's recommended anyway to use a tea towel. So you don't burn the new patch.
How do you repair torn canvas?
0:371:58How to fix a torn painted canvas - YouTubeYouTubeStart of suggested clipEnd of suggested clipAnd use a flat brush to evenly distribute the glue lay the patch over the area place a sheet of waxMoreAnd use a flat brush to evenly distribute the glue lay the patch over the area place a sheet of wax paper over the patch. And then wait the area with a number of books.
How do you replace a pop-up canvas?
2:2514:41Changing the canvas on the pop-up camper and some interior updates!YouTubeStart of suggested clipEnd of suggested clipBut some of these have screwed these little screws right here that hold the canvas on those gotta goMoreBut some of these have screwed these little screws right here that hold the canvas on those gotta go. So that's what we're gonna do how long this bottom part all of this also goes into a groove.
What type of plywood is used for RV roofs?
Walnut plywood is a great choice for RV roof repair because it is extremely strong and durable. This type of plywood is often used in construction because of its strength and ability to withstand heavyweights.
What is the best RV roof material?
The Best RV Roof Material is Affordable EPDM is an economical solution, and in its liquid form it is even more affordable and easy to install.
How much does it cost to put a new roof on a camper?
The cost of replacing an RV roof will be around $300-$325 per linear foot. If your RV is 36 feet long, it would cost between $7,000 and $12,000 to replace the roof of your RV.
What happens if you don't inspect your RV roof?
If you do not inspect your seams regularly and take care of your rig, you will end up with expensive-to-repair water damage.
How long does a rubber roof last?
Other than wash with soap every so often, these roofs should be trouble-free for at least ten years. Using any petroleum-based products on these roofs will cause major damage that is irreparable. If you spot an RV with a rubber roof that looks loose or swollen, the owner most probably used petroleum products to clean it.
What is EPDM roofing?
EPDM is an extremely durable synthetic rubber roofing membrane. EPDM roofs start to look chalky and some streaks may appear on the sides after it rains. This chalky layer protects the rubber from degradation. It is oxidized EPDM. If your roof begins to degrade, there are some products you can use to reseal it, sort of like sealing asphalt on your driveway. EPDM comes with an activator that you need to mix with the sealant.
What is the best way to get wax off a roof?
Use a de-waxer to get all the wax off your roof. Toluene also works fine.
What is the best product to seal a metal roof?
Household roof coatings will seal a metal roof just fine, but the best product by far, for metal roofs, is Kool Seal . If you need to repair structural damage, not just seal a roof, Eternabond seam tape is the product for you. Eternabond comes in four-inch rolls that you apply over your roof’s seams.
How to restore gloss on roof?
In order to restore the gloss, you first must clean your roof thoroughly. Use warm water to sponge the surface clean, then let it dry. In order to get the best results, the surface must be free from any oil or grease. You can use MEK (Methyl Ethyl Ketone) or acetone to remove any grease stains.
How much does a rubberized roof stopper cost?
The rubberized leak stopper is also great for RV roof repair. It sells for $17 per gallon, and seeps into cracks and crevices to bond with the metal and create a permanent seal. It will ruin your clothes, so be careful not to spill any, as it does not wash off. Wear gloves! An old paint brush or trowel can be used to coat the roof evenly. An extra inch on all sides wouldn’t hurt either.
How do I put a canvas on a camper roof?
First, we unscrewed the canvas from the inside of the camper. Basically, the canvas is attached to metal strips that are then screwed into the sides of the roof. I made sure to take pictures of the brackets around the entire inside perimeter of the roof so when it was time to put everything back together, I had a visual model to help me.
How do I unscrew vinyl trim on a camper?
In order to unscrew the trim, the first step is to take out the vinyl trim insert that covers the screws. If your camper looks anything like mine, the vinyl trim is probably cracked, broken, moldy, or all of the above. This trim should just pop out as you pull on it. Then, it’s time to remove the screws. As I was taking out the screws, this gave me ...
Why seal up holes and seams?
Seal Up Holes and Seams to Prevent Future Leaks
Why remove exterior trim?
Remove the Exterior Trim to Assess Damage
How to remove 1x2 from ceiling?
To remove the 1 x 2 pieces that were still attached, I used a small, 4-1/2″ compact circular sawto cut from the bottom right along the edge of the 1 x 2. The only thing that was holding those pieces in place was that the interior ceiling was still attached to them. It’s important to make sure you don’t saw deep enough to go right through the aluminum skin! This will add a lot more work to repair the skin in order to keep out those water leaks.