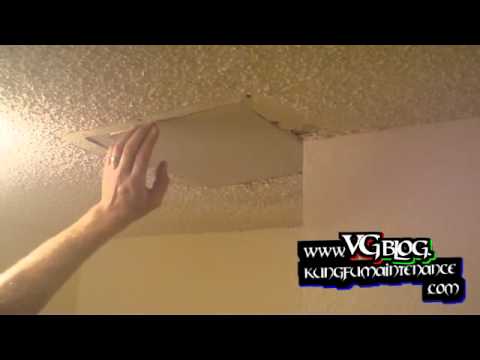
- Preparation. Repairing a textured ceiling can be a very messy job. ...
- Sanding. Sand down the areas around the damaged patches which have now been removed. This will ensure that the repair will stick securely to the existing ceiling.
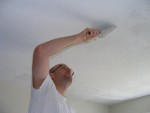
- Filling the Crack. Apply drywall compound to the damaged areas of the ceiling by using a putty knife. ...
- Sanding the Compound. After allowing the compound to dry you then need to sand the area down slightly by using a piece of sandpaper.
- Dealing with Stains. If you are repairing water stain damage then you should apply a coat of stain sealant to the repair.
- Re-Texturing. Use a spray texture repair kit to repair the look of the texture. ...
- Repainting. Choose the right paint color to suit your ceiling. ...
- Cleaning up. After you have finished the job you can now take away the dust sheet. ...
Full Answer
What is the best way to repair a textured ceiling?
Wall and Ceiling Repair Simplified: 11 Clever Tricks
- Cure for Chronic Cracks. Some cracks keep coming back no matter how well you repair them. For those pesky recurring cracks, we prescribe Good-Bye Cracks.
- Whole Wall Cover-Up. Some walls are so bad that the best fix is to tear them out and install new drywall. ...
- Chair Rail
- Bigger Cover Plates
- Texture in a Jar to Repair Cracks in Ceiling
How to repair a textured ceiling the right way?
The benefits of a textured ceiling
- A unique style
- Easy coverage of imperfections
- Great for repairs
- Adds dimension
- Better sound proofing
- Many design choices
- An elegant look (in certain cases)
How to retexture a textured ceiling?
Texture additives can be mixed into most oil-based and latex paints. Touch up spray is available for repairing acoustic or popcorn ceilings. Powdered texture compounds are best for heavy-duty texturing jobs. Smooth eggshell or satin paint can be applied on top of the textured wall or ceiling to highlight the depth of the effects.
How to get rid of a textured ceiling?
METHOD 1: Soak and Scrape Unpainted Texture
- To prep and protect, cover the floor with a canvas drop cloth and tape up exposed trim. ...
- Fill a pump sprayer with water and spray the entire wall evenly to soften the texture. ...
- Starting at the top of the wall, scrape the softened texture. ...
- Continue spraying and scraping until you’ve removed all the texture. ...
How do you repair textured ceilings?
6:489:59Amazing trick to match knockdown texture on a ceiling repair! - YouTubeYouTubeStart of suggested clipEnd of suggested clipYou basically want to dab. And pull and that brings the the mud down to where it's gonna lay outMoreYou basically want to dab. And pull and that brings the the mud down to where it's gonna lay out like the knockdown texture. So you just rapidly dab and pull add more mud.
How do you fix a peeling textured ceiling?
How To Fix Peeling Paint On A Ceiling In 4 StepsScrape off peeling paint on the ceiling with a putty knife. Use 150-grit or higher sandpaper. ... Patch the peeling area with a thin layer of patching compound and putty knife. Let dry. ... Prime the area with an oil-based primer. Let dry.Paint with a flat acrylic paint.
Can you touch up a textured ceiling?
The easiest way to get the exact same color is to cut out a small section of the texture and take it to a paint center for a color match. You can also repaint the entire ceiling, which is a great idea if there are several water stains or if the ceiling is in need of a fresh coat of paint.
Can you Retexture a textured ceiling?
It is possible to texture over existing textured walls and ceilings as long as your existing texture has not been heavily applied. A heavily applied texture must be sanded before retexturing so that you cannot see it through the new application. Two common texture types are orange peel and knockdown.
Why is my textured ceiling peeling?
Because the texture is applied over the existing dry wall on the ceiling, it can peel off over time due to moisture, impact damage or simply old age. Repairing a peeling popcorn ceiling involves removal of the damaged portions and reapplying a new coat of texture.
How do you repair a water damaged textured ceiling?
1:3210:18How to repair texture on a water damaged drywall ceiling step by stepYouTubeStart of suggested clipEnd of suggested clipDown any little edges along the perimeter that way it's going to be a nice blend to the originalMoreDown any little edges along the perimeter that way it's going to be a nice blend to the original texture. Take a knife to apply the mud.
How much does it cost to smooth a textured ceiling?
Contractors tend to charge an upfront cost of $100 for smoothing out textured walls and ceilings. They also charge around $1 to $3 per square foot. That's because it takes a lot of time to remove textured walls depending on the texture in question.
How do you touch up textured ceiling paint?
0:525:14How to Fix your Textured Ceiling with Homax Texture Spray - YouTubeYouTubeStart of suggested clipEnd of suggested clipYou're better off with the boxes of all-purpose mud rather than like one of those little tins ofMoreYou're better off with the boxes of all-purpose mud rather than like one of those little tins of spackle. Or dry decks the all-purpose mud will go on a lot nicer.
How do you touch up a stippled ceiling?
0:131:05How To Repair Ceiling Stipple - YouTubeYouTubeStart of suggested clipEnd of suggested clipWell how do you fix it how do you repair it well you could use the stipple fix that comes in a 1MoreWell how do you fix it how do you repair it well you could use the stipple fix that comes in a 1 litre can. Complete with sponge. And this dab it on that way you get the stipple effect the match.
Can you sand down textured ceiling?
If the push broom doesn't penetrate the paint, you have two options: Sand off the texture with a drywall sander and create clouds of dust, or skim coat over the texture with fresh joint compound to make a smooth surface. After you remove the texture, you might have to refinish the drywall seams.
How much does it cost to remove textured ceiling?
The labor cost varies from community to community, but homeowners can expect to pay an average of $1 to $2 per square foot of ceiling to have popcorn texture removed.
How to make a texture on a ceiling?
1. Soak Ceiling Texture Brush. With the exception of the orange peel and popcorn ceilings, all of the other textures use joint compound and corresponding brush to create the pattern. For brush textures, soak the brush in warm water for at least an hour, or overnight.
How much does it cost to smooth a ceiling?
Materials required to make ceilings smooth is about $100-150, including stripper, scrapers, and sanding materials. However, this job can be extremely labor intensive if the ceilings have been painted multiple times. Truthfully, in a few cases, I have considered re-drywalling easier than removing the texture because it can be so labor intensive.
How is popcorn ceiling different from other textured ceilings?
Popcorn ceilings are different from other textured ceilings because popcorn is usually sprayed on, whereas textured ceilings are created from applying plaster in a pattern with a decorative brush.
How to smooth knockdown ceiling?
If you have a knockdown ceiling, you will have to use a large putty scraper to go across the texture to smooth it to the knockdown texture. Wait a few minutes after the applied texture is set before knocking-down.
How do I apply joint compound to drywall?
3. Apply Joint Compound 1 Mix the joint compound with a paddle and drill or small portion with a paint stick or large spoon to loosen and remove bubbles. 2 Test out your pattern on a spare board or extra piece of drywall until you get the right texture. I find that first working the compound into the brush makes the pattern more even when applying. 3 Once your ready to move on to the real area, spread the joint compound on with a putty knife across the area to be patched. Try to blend any edges with the existing texture. You aren’t trying to create texture yet, just get it up on the ceiling relatively smooth. Don’t be shy with it either, put it on at roughly as thick as the existing texture. 4 Using your texture tool, stomp the texture into the applied joint compound in the same fashion as the practice board. 5 If you have a knockdown ceiling, you will have to use a large putty scraper to go across the texture to smooth it to the knockdown texture. Wait a few minutes after the applied texture is set before knocking-down.
How to remove plaster from paint?
Remove any loose plaster by scraping off with a dry putty knife. If you have stains, use a stain blocker like this spray stainblocker to keep the damage from bleeding into paint.
How to get bubbles out of a joint?
Mix the joint compound with a paddle and drill or small portion with a paint stick or large spoon to loosen and remove bubbles.
How to repair drywall texture?
Wet the drywall repair texture on the edges of your patch and allow it to soak in for several minutes before you scrape. Tape the joints and then reapply texture.
How to cut framing on a breakout?
Probe with a nail to find the framing on either side of the breakout. Mark the cut between the framing, then make those two cuts until you hit the framing. Then cut alongside the framing at the sides.
Can you patch a textured ceiling yourself?
But you can learn how to patch a textured ceiling yourself for a lot less. You’ll have to paint the entire ceiling afterward, and even then the patched area won’t match perfectly; even a pro can’t achieve that. Perfection calls for scraping off and retexturing the entire ceiling after the patch is complete.
How to mask a ceiling?
Speed up and simplify your masking job by applying the tape along the ceiling first. Leave the lower edge of the tape loose. Then roll out a length of lightweight poly along the floor, pull one edge up to the ceiling, and stick it to the tape.
How long does it take to spray a ceiling?
Once the room is masked off, the ceiling prepped and the texture mixed, it’ll only take you about 15 minutes to spray the ceiling. If any of the paper drywall tape is loose or the drywall is soft or damaged, you’ll have to repair and sand these areas first.
How to spray a wall with a gun?
Start by spraying the perimeter (Photo 6). Hold the gun about 18 to 24 in. from the ceiling and aim so that about two-thirds of the spray hits the ceiling and the rest hits the wall. Move quickly around the room, paying special attention to the inside corners where walls meet.
How to remove white residue from poly?
When you’re satisfied with the consistency of the texture, you can clean up the gun, hopper and hose with water and pull down the poly. If your masking job was a little off and there’s texture on the wall or flooring, wait for it to dry. Then carefully scrape it off and remove the white residue with a wet sponge.
How to make spray texture?
The key to a successful spray-texture job is mixing the texture to the right consistency. Don’t mix it too thick. Use the amount of water recommended on the bag as a starting point. Then adjust the thickness by adding more water or powder. Mix slowly using a mixing paddle mounted in a 1/2-in. drill (Photo 4). Mix thoroughly, adding water until the material reaches the consistency of runny yogurt—or thick paint—with tiny lumps in it. Let the texture sit for 15 minutes, then remix, adding more water if necessary.
How to minimize rental costs?
Minimize rental costs by getting all the prep work done before you pick up the compressor and hopper gun. Start by removing everything you can from the room. If you must leave large furniture in the room , stack it in the center and cover it with plastic. Cover the floor with sheets or a canvas drop cloth.
Can you spray texture on a stained ceiling?
If your spray-textured ceiling is just dingy or stained, you can renew it with a coat each of sealer and paint. But if the texture is falling off or missing in spots, you’ll have to reapply texture to fix the problem. For small areas, say less than a foot in diameter, you could try using an aerosol can of repair texture.
12 Ways on How to Fix a Bad Ceiling Texture Job
Put a light coat of texture on, and immediately after it has been applied, take the brush and hold the bristles flat in one hand.
How To Patch a Textured Ceiling?
As you know, painting is one of the most frequent home improvement tasks. And it’s not surprising because by painting your walls you can make a room brighter and more modern.
What Is the Best Way to Fix a Bad Ceiling Texture Job?
A bad ceiling texture job is not just unsightly; it can be hazardous to your health. Blobs of drywall compounds and lumps of lumpy texture could rupture a water line or conceal cracks in the ceiling that allow water, electrical wiring, and even rodents to penetrate inside.
Conclusion
If you’re wondering how to fix a bad ceiling texture job, the first step is identifying what needs to be fixed.

Scrape and Prep The Ceiling, Then Texture
Required Tools For This Project
- Have the necessary tools for this DIY project lined up before you start—you’ll save time and frustration. 1. Air compressor 2. Air hose 3. Bucket 4. Corded drill 5. Dust mask 6. Paint roller 7. Paint scraper 8. Paint tray 9. Paintbrush 10. Putty knife 11. Roller sleeve 12. Safety glasses 13. Shop vacuum 14. Stepladder 15. Taping knife 16. Utility knife
Required Materials For This Project
- Avoid last-minute shopping trips by having all your materials ready ahead of time. Here’s a list. 1. 4 mil poly 2. Cardboard 3. Painter's plastic 4. Painter's tape 5. Primer 6. Spray texture 7. Stain-blocking sealer