What to do if automatic repair is not working?
Resolution
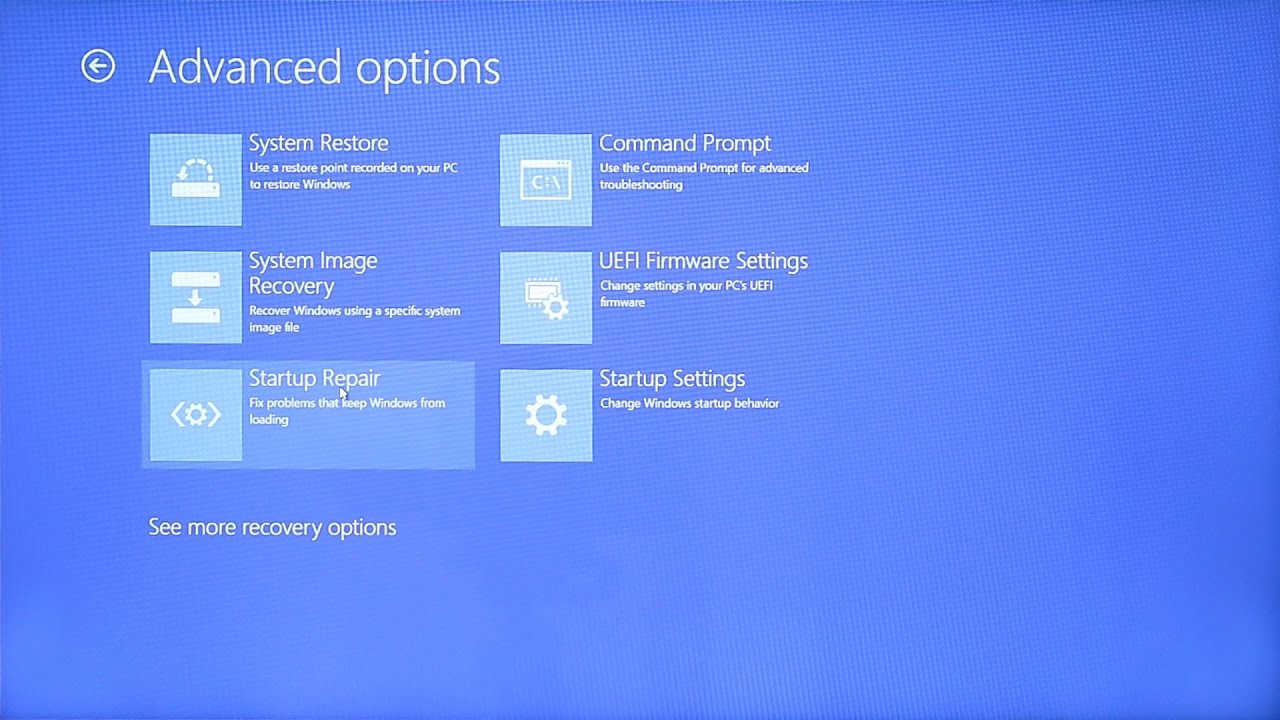
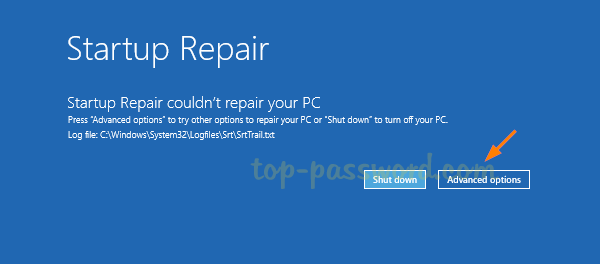
- After Automatic Repair fails to repair your PC, select Advanced options and then Troubleshoot.
- Select Advanced options and then select Command Prompt.
- If prompted, enter in the password for the user name.
- At the Command Prompt, go to the \windows\system32\config folder by typing the following command: Console cd %windir%\system32\config
How to disable Windows 10 automatic repair at startup?
Enable or Disable Automatic Repair in Command Prompt in Windows 10. 1 Open an elevated command prompt. 2 Type bcdedit into the elevated command prompt, and press Enter. (see screenshot below) 3 Look under the Windows Boot Loader section for your Windows 10 (description), and make note of its identifier (ex: " {current}").
How to stop auto resizing of windows in Windows 10?
Step 2: Under the Snap section, you will get the following options:
- Arrange windows automatically by dragging them to sides or corners of the screen.
- When I snap a window, automatically size it to fill available space.
- When I snap a window, show what I can snap next to it.
- When I resize a snapped window, simultaneously resize any adjacent snapped window.
How to disable automatic repair on Windows 10 [Guide]?
So, here is how to go about it:
- Open the Control Panel, choose System, and then select Advanced System Settings.
- Look for the Advanced tab and head into the Startup and Recovery section. ...
- In the dialog box that will appear, head on down to the System failure section and proceed to uncheck the Automatic Restart checkbox.
- Click OK to apply and save the changes.

What to do when your computer is stuck on the "Preparing Automatic Repair/Diagnosing your PC"?
When the computer is stuck on the "Preparing Automatic Repair/Diagnosing your PC" screen or the computer's screen goes black and stops respond ing, you can run the PC from Windows installation CD/DVD and boot into Safe Mode to fix this issue.
What happens when an auto repair fails?
When an Automatic Repair fails, your computer will get a blue screen with "Your PC did not start correctly" or "Automatic repair couldn't repair your PC." If you click "Restart", the computer will go through the same process, resulting in the Automatic Repair loop.
How to create a bootable disk on Windows 10?
Connect the USB drive to PC, launch EaseUS Data Recovery Wizard WinPE Edition. Select the USB drive and click "Create" to create a bootable disk.
How to change boot sequence in BIOS?
For most users, it works well when they restart their computer and press F2 at the same time to enter BIOS. Set to boot the PC from "Removable Devices" (bootable USB disk) or "CD-ROM Drive" (bootable CD/DVD) beyond Hard Drive. Press "F10" to save and exit.
What is the best recovery software for Windows 11?
EaseUS Data Recovery Wizard is the best data recovery software for Windows 11. Use it to retrieve deleted, lost, formatted, corrupted data quickly.
What is the Windows system file checker?
Windows provides a built-in System File Checker and CHKDSK Disk Utility for users to check and repair missing or corrupted system files.
What is the solution to an endless 'Preparing Automatic Repair' loop?
The official Microsoft solution to an endless 'Preparing Automatic Repair' loop is to refresh or reset the PC directly.
What Causes a Windows 10 Automatic Repair Loop?
There isn’t a single cause for a Windows 10 automatic repair loop, but there are several situations that are likely to cause it. Missing or corrupted system files are one of the more common causes, where Windows can’t boot (or repair itself) because these essential files it needs to run aren’t available.
Why is my Windows 10 auto repair looping?
If you recently installed new hardware before a Windows 10 automatic repair loop began to appear, then the hardware you’ve installed is a likely cause of the problem.
How to get Windows to boot into safe mode?
Once Windows boots up in Safe Mode, right-click the Start menu and select Windows PowerShell (Admin). In the PowerShell window, type DISM /Online /Cleanup-Image /RestoreHealth and allow the process to complete, which could take some time.
How to boot to a minimal version of Windows?
In the Troubleshoot menu, select the Advanced options option. Select Command Prompt in the Advanced options menu to boot to a minimal version of Windows, showing only a command prompt window.
How to open command prompt in Windows 10?
In the boot troubleshoot menu, select Troubleshoot > Advanced options > Command Prompt, then wait for the command line window to open. You may need to authenticate with your local or Microsoft account password first.
How to check system drive for errors?
In the command prompt window, type chkdsk /r c: to begin a low-level check of your system drive for errors using the Check Disk utility. If it detects errors, chkdsk will automatically repair them (if possible).
How to restore health in PowerShell?
In the PowerShell window, type DISM /Online /Cleanup-Image / RestoreHealth and allow the process to complete, which could take some time.
What Causes the Preparing Automatic Repair Error?
Hardware failure is usually the primary reason behind this error. However, there are other reasons that may also lead to the problem, such as:
Simple Methods to Fix Preparing Automatic Repair Windows 10 Error
Here are some easy-to-use solutions to fix the Automatic Repair Windows 10 error.
What is automatic repair?
Automatic repair is a Windows system-recovery tool that diagnoses and troubleshoots common boot errors in Windows 8 and above systems.
How to disable auto repair tool?
When all else fails, disable the automatic repair tool using the following steps: Insert a Windows installation disc/media in your PC. Select your language preferences, and click “Next”. Click on “Repair your computer”. Click on “Troubleshoot”. Click on “Advanced Options”. Click on “Command Prompt”.
How to backup Windows 10?
To configure automatic backups on Windows 10, use the following steps: Open Settings and click on “Update & Security”. Click on “Backup”.
How to retrieve files from Windows 10 backup?
Click “OK”. Click “Save settings”. Click “Exit”. To retrieve individual files or entire system data from a backup on Windows 10, use the following steps: Open Settings. Click on “Update & Security”. Click on “Backup”. Under the "Looking for an older backup" section, click on “Go to Backup and Restore”.
How does system restore work?
System Restore rolls your system software back to its previous state by overwriting files on your PC’s local drive.
How to set up backup option in Windows 10?
Under the "Backup or restore your files" section , select “Set up backup option” option
How to check the integrity of a file?
Type “sfc /scannow” and hit Enter. This will check the integrity of Windows system files using System File Checker tool
Why does my computer go into auto repair?
Normally, by running Automatic Repair, Windows diagnoses the start-up problem (missing or corrupt system files, drivers, registry settings, etc.), fix it and then restart the PC automatically. But when Windows didn't shut down properly, it gets into automatic repair loop. For example, if your PC powered off improperly because of a power outage, system crash, data in the registry could be incomplete and corrupt, which lead to the automatic repair loop.
How to fix a computer that is stuck in repair loop?
Sometimes, your PC gets stuck at automatic repair loop or is attempting repair forever because Windows thinks that there is a problem with your PC while there is not, so you may just restart the PC. Step 1. Restart the PC and keep pressing F8 to get it into Windows Boot Manager. Step 2.
What Is Automatic Repair Loop and Why Does It Happen?
The tool is designed to launch automatically when a start-up problem comes up on Windows system.
What to do if bootrec.exe doesn't fix auto repair loop?
If the bootrec.exe command doesn't fix the automatic repair loop, some suggest that you should run chkdsk commands as well.
Why won't my computer repair?
When Windows shows "Windows Automatic Repair couldn't repair your PC", it could indicate a corrupted registry on your computer. Therefore, you can get your Windows out of automatic repair loop by restoring the registry from RegBack directory.
How to get out of auto repair loop?
Perform Command Prompt. If you see "your PC did not start correctly", you can go into Boot Options menu and use Command Prompt to get out of automatic repair loop. Step 1. Click Advanced Options; Choose Troubleshoot > Advanced Options > Command Prompt;
What is automatic repair?
Automatic Repair is a feature introduced in Windows 10/8 that can fix some PC issues when the computer cannot boot properly.
How to fix auto repair loop?
8 Solutions - Fix Preparing Automatic Repair Loop Windows 10 1 Remove the battery and AC adapter. 2 Press and hold the power button for 20 seconds and see if it will boot up normally.
How to install Windows 10 on a Windows 10 laptop?
Step 1: Turn off your computer. Step 2: Insert the Windows bootable installation disk to your PC and boot from it. Step 3: When prompted to Press any key to boot from CD or DVD, press any key to continue. Step 4: Select your language preferences in the Windows Setup interface, and click on Next button to continue.
How to fix a computer that won't boot?
If your Windows cannot boot because of the "Preparing Automatic Repair" or "Diagnosing your PC" error, you can do a hard reboot. Remove the battery and AC adapter. Press and hold the power button for 20 seconds and see if it will boot up normally.
How to re-build a boot record?
Step 1. Insert the Windows bootable installation disk into your PC that has "Preparing Automatic Repair" or "Diagnosing your PC" error message. Step 2. Boot your PC from the installation disk. Step 3.