- Preparation. Repairing a textured ceiling can be a very messy job. ...
- Sanding. Sand down the areas around the damaged patches which have now been removed. This will ensure that the repair will stick securely to the existing ceiling.
- Filling the Crack. Apply drywall compound to the damaged areas of the ceiling by using a putty knife. ...
- Sanding the Compound. After allowing the compound to dry you then need to sand the area down slightly by using a piece of sandpaper.
- Dealing with Stains. If you are repairing water stain damage then you should apply a coat of stain sealant to the repair.
- Re-Texturing. Use a spray texture repair kit to repair the look of the texture. ...
- Repainting. Choose the right paint color to suit your ceiling. ...
- Cleaning up. After you have finished the job you can now take away the dust sheet. ...

How do you fix a crack in drywall ceiling?
• If there is structural damage – If you see your ceiling sagging or there is a long crack damaging the entire drywall ceiling, then this is a clear indication of some structural damage. So, in this case, it is best to call a pro to find out what exactly is the root cause of the damage.
How to repair a cracked drywall ceiling?
Sand the wall around the hole and wipe off any dust. Apply the self-adhesive mesh patch on the damaged area. Cover the patch with joint compound or Spackle, depending on what comes in your kit. Feather the edges of the joint compound by increasing the pressure on the putty knife as you spread it on the existing drywall.
How to fix a bad spot in a stomped ceiling?
Prep Work
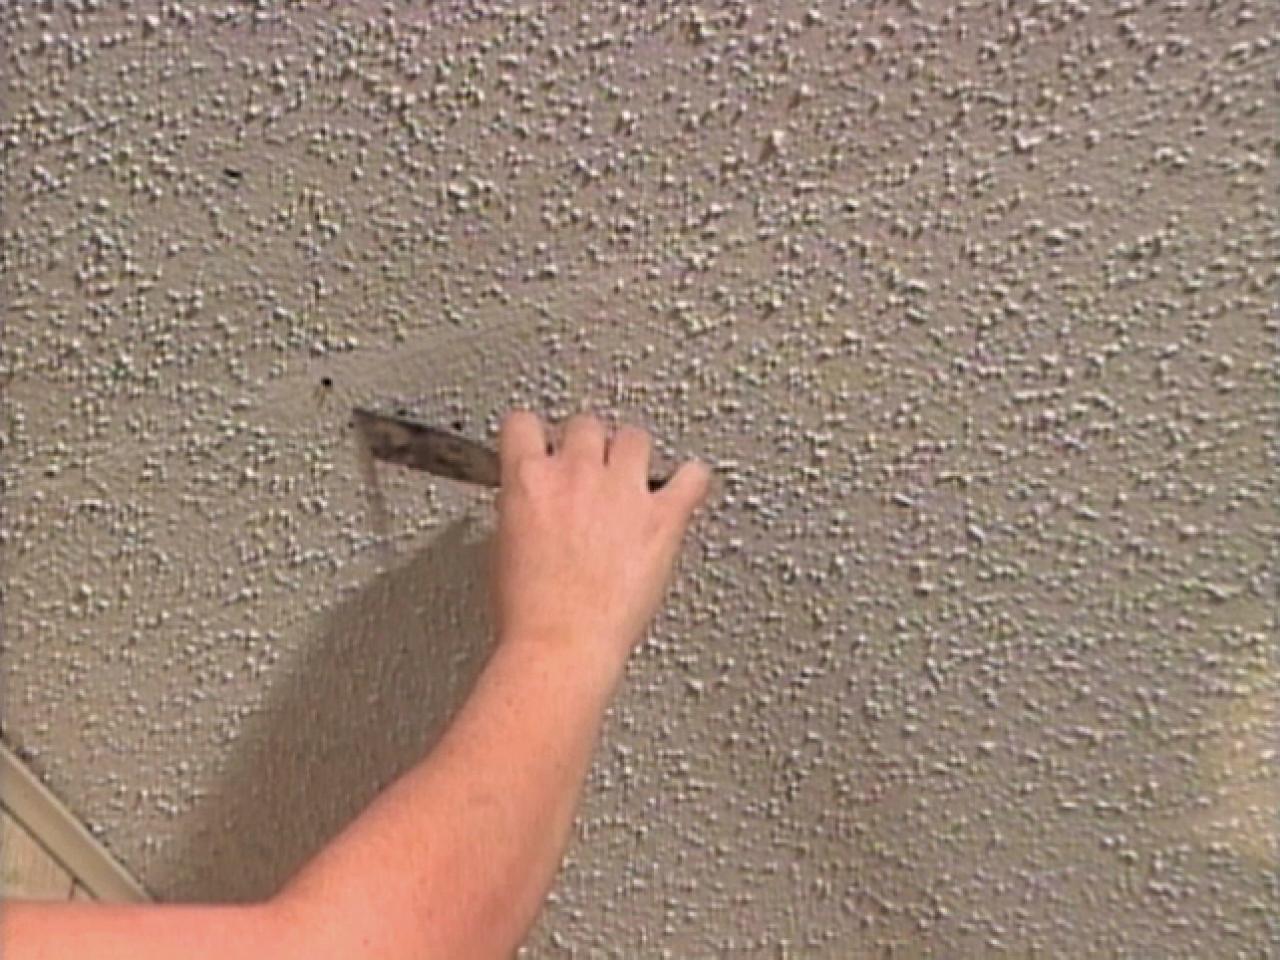
- Painted popcorn ceiling removal is challenging. ...
- Spray water in the area and scrape. ...
- Use a paint stripper to remove painted texture or call a professional.
- Cover outlets and fixtures with plastic sheeting and tape.
- Cover the floors and bottom third of the walls with plastic.
- Turn off power to the room.
How to perform ceiling repairs?
How to repair plaster ceiling: Cracked Plaster
- Measure the length and width of the area in need of repair. ...
- Drill a hole in the middle of the plaster washer with a drywall screw. ...
- Secure the damaged area with screws to the loose drywall plaster to the lath.
- Open a container of a premixed compound. ...
- Spread the premixed compound on the ceiling using a trowel. ...
How do you fix hairline cracks in textured drywall ceiling?
How to Fix a Hairline Crack in a Textured Sheetrock CeilingLook for Water Damage. ... Use a Drywall Knife. ... Apply Drywall Primer. ... Place Drywall Tape Over the Crack. ... Coat the Tape With Drywall Joint Compound. ... Apply a Second Coat of the Joint Compound. ... Apply the Texture. ... Finish With a Few Touch Ups.
Can textured ceilings be repaired?
Have water damaged textured ceilings or need to patch a hole? Almost every wall develops flaws at some point, but you can perfectly repair a textured ceiling with these tips and step by step instructions.
How do you repair a crack in a stippled ceiling?
0:416:22HOW TO FIX A CRACK ON A TEXTURED CEILING - YouTubeYouTubeStart of suggested clipEnd of suggested clipSo what I did was that that's a bottle adhesive caulking and smushed it in the crack. And then youMoreSo what I did was that that's a bottle adhesive caulking and smushed it in the crack. And then you take your fingers. And you're taking your fingers.
Why is my textured ceiling cracking?
Insufficient surface prep is usually the reason for the cracking. Over-thickening the paint or applying it too thinly can lead to cracks. Making your paint too thick causes tiny cracks that run in all over the popcorn ceiling because the paint shrinks as it dries – especially if you try to cure it faster.
How do you fill a textured ceiling?
1:467:00How to Flatten a Textured Ceiling | Ask This Old House - YouTubeYouTubeStart of suggested clipEnd of suggested clipMinutes until it dries regular junk compound. Takes forever to dry. So we need to use the 45 whichMoreMinutes until it dries regular junk compound. Takes forever to dry. So we need to use the 45 which would give us a nice and smooth finish ready for brand new paint sounds good are you ready let's do.
Can I use spackle for texture?
You can often replicate the texture with just the spackle if you are only repairing a small area. Practice the texture on a piece of scrap drywall before you begin repairing so you can match the look of your ceiling as closely as possible.
What is the best filler for ceiling cracks?
Toupret Fibacryl is a specialist flexible filler, which is suitable for filling and repairing movement cracks, problem cracks, and moving cracks on internal and external projects.
How do you caulk a cracked ceiling?
0:132:37Caulking a ceiling "crack" - YouTubeYouTubeStart of suggested clipEnd of suggested clipGot just a little pressure on my finger to get it out not much. And as I'm going back and forthMoreGot just a little pressure on my finger to get it out not much. And as I'm going back and forth that's also pushing it up into the crack. Okay and this has some spray texture on the ceiling.
How do I fix a crack in my ceiling before painting?
How to Patch Cracks in a Ceiling Before PaintingScrape Away Loose Paint. ... Sand Over Cracks. ... Vacuum Up Dust. ... Apply a Layer of Patching Compound. ... Add a Second Layer of Compound. ... Sand and Vacuum Again. ... Scrape Away Loose Paint. ... Sand the Ceiling.More items...
Should I be worried about a crack in my ceiling?
Ceiling cracks along with sagging indicate a possible structural problem that needs immediate attention. One, big, continuous ceiling crack that goes across the ceiling and down a wall is almost certainly a structural issue. Contact a foundation professional right away for an inspection.
Are hairline cracks in ceilings normal?
While hairline ceiling cracks might be an eyesore, they are not indicative of serious structural damage. They are usually addressed easily enough with a fresh coat of paint. Temperature and humidity control can help deter future hairline cracks from occurring.
How to make a texture on a ceiling?
1. Soak Ceiling Texture Brush. With the exception of the orange peel and popcorn ceilings, all of the other textures use joint compound and corresponding brush to create the pattern. For brush textures, soak the brush in warm water for at least an hour, or overnight.
How do I apply joint compound to drywall?
3. Apply Joint Compound 1 Mix the joint compound with a paddle and drill or small portion with a paint stick or large spoon to loosen and remove bubbles. 2 Test out your pattern on a spare board or extra piece of drywall until you get the right texture. I find that first working the compound into the brush makes the pattern more even when applying. 3 Once your ready to move on to the real area, spread the joint compound on with a putty knife across the area to be patched. Try to blend any edges with the existing texture. You aren’t trying to create texture yet, just get it up on the ceiling relatively smooth. Don’t be shy with it either, put it on at roughly as thick as the existing texture. 4 Using your texture tool, stomp the texture into the applied joint compound in the same fashion as the practice board. 5 If you have a knockdown ceiling, you will have to use a large putty scraper to go across the texture to smooth it to the knockdown texture. Wait a few minutes after the applied texture is set before knocking-down.
Can you paint a ceiling with a sealer?
After the sealer dries, paint the area with ceiling paint. You will probably have to paint the entire ceiling since it can be difficult to match the previous color.
Can you patch a ceiling with water damage?
First, not all water damage requires removing or patching the ceiling. Some damage can just be water stains if the ceiling texture isn’t chipping, falling or molding. In those cases, use an aerosol sealer like my favorite from Kilz. This sealer hides discoloration and stains like smoke, water stains, and cooking oils.
How to add texture to mud?
The best way to add texture to the mud depends on what kind of ceiling you have. If your ceiling has a swirl texture, use a soft paintbrush to recreate the pattern in the mud. If your ceiling has a knock-down texture, press a firm, wet piece of paper into the mud to replicate the texture.
How long does it take for mesh tape to dry?
Work quickly, since the mud will be dry in 5 minutes. Once you’ve applied the first layer, wait 30 minutes for the mud to fully dry.
Can you paint over a cracked ceiling?
If you have some paint leftover from when you (or contractors) painted your ceiling initially, you can use this to paint over the repaired crack. If you don’t have leftover paint, you’ll need to visit a paint shop or home-supply store to find a matching coat of paint.
Does mud stick to a ceiling?
Mud does not stick to dust, oil, mold, too flat or loose surfaces. Apply a layer of the mud to your ceiling crack. Using the broad edge of your putty knife, apply a single, smooth layer of mud. Make sure to completely cover the mesh tape with mud.
Can you use a step ladder to fix a crack in the ceiling?
If you have a low ceiling, you could feasibly use a step-ladder to fix the crack. The disadvantage, though, would be that you’ll be more precariously balanced on top of the step-ladder, and won’t have a way to set your patching materials within reach.
12 Ways on How to Fix a Bad Ceiling Texture Job
Put a light coat of texture on, and immediately after it has been applied, take the brush and hold the bristles flat in one hand.
How To Patch a Textured Ceiling?
As you know, painting is one of the most frequent home improvement tasks. And it’s not surprising because by painting your walls you can make a room brighter and more modern.
What Is the Best Way to Fix a Bad Ceiling Texture Job?
A bad ceiling texture job is not just unsightly; it can be hazardous to your health. Blobs of drywall compounds and lumps of lumpy texture could rupture a water line or conceal cracks in the ceiling that allow water, electrical wiring, and even rodents to penetrate inside.
Conclusion
If you’re wondering how to fix a bad ceiling texture job, the first step is identifying what needs to be fixed.
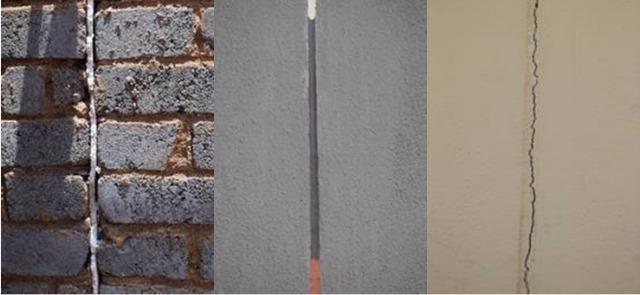
1. Hairline Cracks
Hairline ceiling cracks are very thin cracks – typically 1/16 th of an inch or smaller. In most cases, they are cosmetic in nature and while they may look unnerving, they are almost always not dangerous. These cracks are most commonly caused by old paint or plaster over drywall.
2. Brown or Yellow Cracks
If you have discolored cracks on your ceiling, this is usually a sign of a water leak. A yellowish or brownish tinge at the edges of a ceiling crack is an indication of moisture damage. In this case, you’ll want to start looking for water where it should not be. Before you repair the drywall, you must locate and address the leak.
How to Remove Drywall
Use a knife to cut away at the point where the molding meets the drywall. Then, use either a sledgehammer or a small mallet to carefully create holes in the center of the drywall. The goal is to avoid hitting the joists, otherwise you risk causing further structural damage.
How to Replace Ceiling Drywall
Once the drywall is removed, sand the edges of the drywall so that they are clean and straight. To stick the drywall to the joists, you’ll need to use specialized drywall adhesive and t-braces to keep it in place. These t-braces will hold the drywall to the ceiling as the adhesive cures.
3. Spiderweb Cracks
As the name suggests, spiderweb cracks appear like spiderwebs and are usually caused by foundational settling or cracking paint or plaster. They have a central point, with thin cracks extending outwards in all directions. If the drywall was applied too thickly, it can result in thin, spiderweb-like cracking as it shrinks during the drying process.
4. Straight Cracks
Cracks in the ceiling that are essentially a straight line are usually a result of improper taping or mudding during drywall installation. If not enough mud was applied, the tape cannot stick properly to the joints and will start to pull away, causing a crack in the plaster.
5. Cracks Between Wall and Ceiling
If you have a crack in the spot between your ceiling and an adjacent wall, this is usually caused by truss uplift. Your roof trusses are designed to move and shift as the wood expands and contracts with changes in heat and humidity. It’s possible for the trusses to shift so much that it lifts the ceiling away from the wall.