How to Repair Terra-Cotta Pots
- Clean all the dirt away from the crack or broken area on the pot. Leave the pot to dry completely after cleaning.
- Apply silicone caulk into the crack or damaged area. If you have broken pieces, apply caulk along the edges of the shard.
- Press the cracked or broken area together so the caulk bonds, and bind the pot with string to hold it in shape.
- Leave the pot to dry upside down for several hours or overnight. If your caulk recommends waiting longer, then do so.
- Remove the string from around the pot once the caulk has dried completely.
- Scrape away any caulk that leaked onto the inside or outside of the pot with a scraper.
- Step 1 – Clean and Dry the Surfaces to Be Joined. ...
- Step 2 – Pre-fit Parts to Be Joined and Mark Them for Easy Alignment. ...
- Step 3 – Prepare the Adhesive. ...
- Step 4 – Apply Glue to Broken Edges or Crack. ...
- Step 5 – Clean Up Dry Glue.
How to clean dirty terracotta pots?
How to Clean Terracotta Pots. You’re going to need the following : Water. Vinegar. Dish soap. Scrub Brush. There are several methods for doing this. I don’t make this that complicated. You can certainly fill up your sink with warm water and vinegar and a squirt of dish soap and let them soak for an hour and then clean.
How to upcycle terracotta pots?
You will need:
- 3 x terracotta plant pots (preferably glazed)
- 1 x ribbed metallic pot
- PVA glue
- Paintbrush and bucket
- Metallic copper spray paint
How to clean a terra cotta pot?
The Sanitizing Process:
- Begin by cleaning your container following the instructions above.
- Fill the bucket with a mixture of 10 parts water and one part bleach. ...
- Place the cleaned pot into the water/bleach mixture. ...
- Allow the container to soak for at least 30 minutes. ...
- Use the scrubber and/or sponge to remove any remaining dirt from the surface of the pot.
How to fix a broken terra cotta pot?
Terra Cotta Pot Repair
- Check the Fit... I didn't invent anything for this instructable, but it's a good idea to fit the pieces together for two reasons; to check if it is ...
- The Tool and Materials List. Twine or something to firmly hold parts together while the glue cures. ...
- The Glueing. Um, forgot to take a picture for this!!! ...
- Ta Da! So, the epoxy cost 5 bucks or so. ...

What glue can you use on terracotta pots?
A glue that contains marine epoxy is best for terracotta pots. The epoxy is strong and durable which will increase the lifespan of your terracotta pots. This epoxy is also waterproof so it will not get washed away when it rains or when watering the plant.
How do you fix peeling terracotta pots?
Stop terra cotta rot, fix your cracked clay, and reinforce cracked plastic with these few simple tricks....STEP ONE: SAND OFF THE AREA AROUND THE CRACK. ... STEP TWO: FILL IN CRACKS. ... STEP THREE: SAND OFF ROUGH EDGES. ... STEP FOUR: PAINT AND TEXTURIZE.
How do you restore terracotta pots?
How to Clean a Terracotta PotStep 1: Empty Your Pots.Step 2: Use a Brush to Wipe Away Loose Dirt.Step 3: Soak Your Pots in Warm Water and White Vinegar.Step 4: Scrub Your Pots While They Soak.Step 5: Scrub Persistent White Spots With Baking Soda.Step 6: Let Your Pots Air Dry.
Can terracotta pots be repaired?
Can Terracotta Be Glued Back Together? Most terracotta pots and garden features can be repaired fairly easily using modern adhesives, as they produce very structurally sound glue joins in this material. Two different types of adhesives are be used for repairing terracotta, and each has its advantages and disadvantages.
How do you fill holes in terracotta pots?
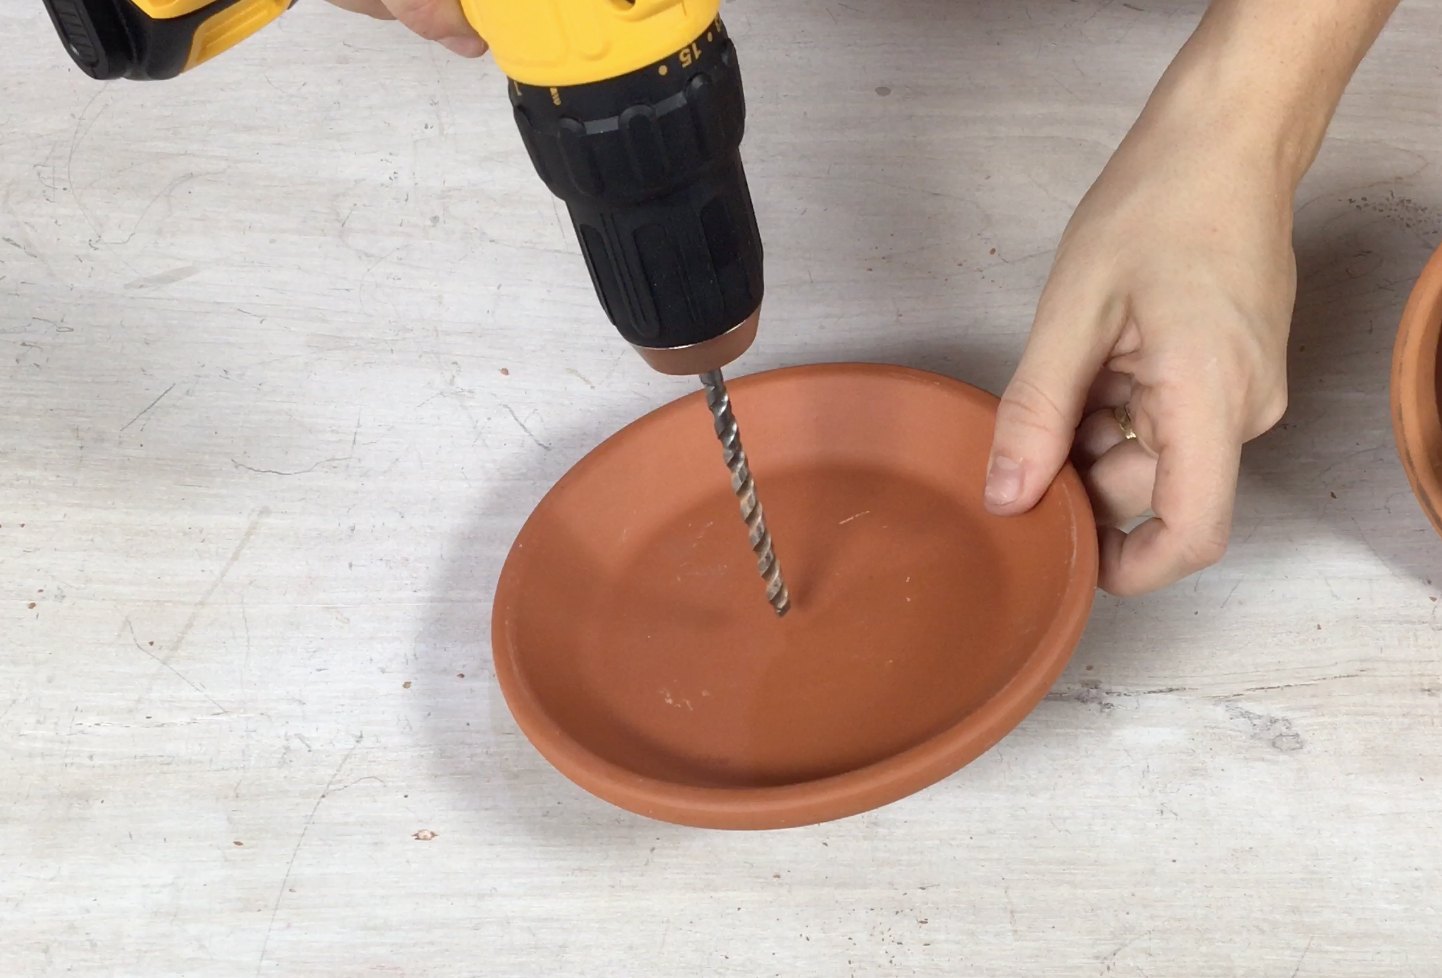
And here's how to seal drainage holes in pots!Step 1: Grab a sticker or foil. If your pot is new and came with a price tag on the bottom, use it to cover the hole. ... Step 2: Mix concrete if using concrete. Mix up just a bit of concrete in a disposable bowl. ... Step 3: Plug!
What do I do with cracked terracotta?
If you have a terracotta pot that's only slightly broken, lay it on its side in the garden and bury the broken part with soil. Then, plant flowers inside the pot, continuing out into the garden, so it looks like the flowers are spilling from the container.
How do you update terracotta pots?
0:023:09Here's How to Upgrade Your Plain Terra Cotta Pot - YouTubeYouTubeStart of suggested clipEnd of suggested clipThis pot looks nice and dry let's pull off the tape. And you really do want to make sure that yourMoreThis pot looks nice and dry let's pull off the tape. And you really do want to make sure that your paint is completely dry for the best. Results.
Can you seal terracotta pots with PVA glue?
You can make a simple terracotta pot sealer yourself using PVA glue and water. Add 10 parts water to 1 part glue (10:1) and mix well. Apply several thin layers of PVA sealer to make your stencil more hand wearing and protect the pot from moisture.
Does Gorilla glue work on clay pots?
Recommended Glue for Clay Pots: GORILLA Clear Glue This crystal-clear glue by the Gorilla brand offers an extremely strong, water-resistant, and non-foaming product for bonding your clay pots and pottery. You can use this glue with the greatest ease on both indoor and outdoor items.
What kind of paint do you use on terracotta pots?
A: Acrylic paint is the best paint to use on terracotta pots. You need to make sure that you seal the paint with a sealer once you finish painting.
How do you seal terracotta pots for painting?
1:112:49How to seal painted pots and why it's so important - YouTubeYouTubeStart of suggested clipEnd of suggested clipOnce your spray paint has dried. And any acrylic designs that you've put on the outside. The finalMoreOnce your spray paint has dried. And any acrylic designs that you've put on the outside. The final step is to seal it one more time. So you have your clear sealer over your terracotta.
What do I do with cracked terracotta?
If you have a terracotta pot that's only slightly broken, lay it on its side in the garden and bury the broken part with soil. Then, plant flowers inside the pot, continuing out into the garden, so it looks like the flowers are spilling from the container.
How to clean terracotta?
If dirt remains on the surfaces to be glued together and can’t be removed by washing, scrub them with a soft nylon brush while washing. Don’t use a wire brush, as terracotta is soft, and the wire brush will remove material , destroying the tight fit between parts.
How long do terracotta pots last?
Unlike plastic pots which degrade over time with exposure to sun’s UV rays, terracotta pots can last for decades, and are a natural material, making them far more sustainable to use. The disadvantage of terracotta is that it is brittle, and can crack if dropped or exposed to freezing temperatures.
What is terracotta used for?
Terracotta is a hard, fired clay that’s reddish-orange in colour, and is commonly used for making pots and garden features. This material has been used by human civilisations for centuries, dating back to the times of ancient China, Greece and Egypt, a testament to its usefulness.
How to prepare two part epoxy?
How to prepare two-part epoxy adhesives: Syringes – snap out cap from plunger and carefully cut the sealed tips at the end of the syringe tip. Tubes – pierce each tube with spike found in top of its own cap. Dispense equal parts of both liquids onto a clean disposable surface.
How long does it take for epoxy to cure terracotta?
For cracked terracotta, use epoxy! When using two-part epoxy, choose the super-strength formulations that take 24 hours to cure, they create a far stronger bond than the faster curing 5-minute varieties.
How to reposition a bond?
To reposition the bond once cured, check that the item is heat resistant. If safe, heat the item slowly, e.g. in an oven, to at least 150°C. The product will soften and liquify slightly. Scrape off any excess then reposition the joint carefully using appropriate safety equipment.
How to clean glued landscape material?
How to clean materials being glued with landscape construction adhesives: Clean and ensure surfaces to be glued are sound, dry and free from oil, grease and loose powdery material. If necessary, use mineral turps (turpentine) to clean the surface, then allow to dry.
What is terra cotta pot?
Restore old terra-cotta pots. Terra cotta, Italian for baked earth, is a ceramic made of mostly earthy clay and left unglazed when baked. A common use for terra cotta is for making planters and plant pots. You can find terra cotta pots in almost any size and when placed in the natural setting of a garden, they look right at home.
Can you use terra cotta pots indoors?
You can find terra cotta pots in almost any size and when placed in the natural setting of a garden, they look right at home. You can also use them indoors to bring some of the wonders of nature inside your home. Should your terra cotta ever suffer a crack or breakage you can easily repair it yourself. Advertisement.
Can you repair a terra cotta pot?
Bring terra-cotta pots out of the cold when the temperatures reach freezing to avoid getting cracks from the weather. Do not try to repair your pot while it has anything inside of it or the terra cotta will not bond properly. Restore old terra-cotta pots. Terra cotta, Italian for baked earth, is a ceramic made of mostly earthy clay ...
Step 1: Check the Fit..
I didn't invent anything for this instructable, but it's a good idea to fit the pieces together for two reasons; to check if it is actually worth while fixing the pot. Secondly you get an idea how to put the pieces together, once you've applied glue.
Step 2: The Tool and Materials List
A broken clay (terracotta) flower pot that's worth fixing Glue; I used epoxy A shop brush or whisk Twine or something to firmly hold parts together while the glue cures. Bits O Wood Make sure the parts that are being glued are clean and dry, but that' common sense, isn't it?
Step 3: The Glueing
Um, forgot to take a picture for this!!! The basic process is to mix the glue according to the instructions of the manufacturer.
Step 4: Ta Da!
So, the epoxy cost 5 bucks or so. A new pot would have been fifteen to twenty bucks... Looking forward to any comments. Now that I've done my first instructable!
How to reassemble terra cotta?
Line one edge on each of two pieces with waterproof silicon caulk. Press them together. Let these pieces dry completely. If there are many pieces, caulk several sets of two pieces together to form one larger piece. If the broken terra-cotta object is not large, caulk all of its pieces together to reassemble it entirely.
Can you repair a broken terra cotta pot?
Caulk and wire broken terra-cotta. Terra-cotta is fragile when mistreated, but it can be easily repaired. When the piece is an expensive garden pot or a vase or figurine, the repair is well worth the effort. With a little art, a repair gives your terra-cotta new life. Putting broken terra-cotta back together can be like piecing together a puzzle.
How to repair a terra cotta flower pot?
If your pot has started to crumble or crack, begin repairs with a flat-edge screwdriver and some fine- and medium-grain sandpaper. Use the edge of the screwdriver to remove any crumbling material. Do so gently, removing only the material that flakes off without much pressure. Be careful not to dig into the clay. Now, you can use the sandpaper to remove any other areas of rot, continuing to work slowly and carefully.
How to fix a cracked pot?
Another easy fix exists unless pieces of the pot are missing. You can use epoxy glue for this repair, and it shouldn’t take longer than half an hour. Clean the pot and allow it to dry. Then, run the glue down the crack until it covers all of it.
How long does it take for two part epoxy to cure?
Once you mix them up, however, they harden quickly, so you need to work fast. Two-part epoxy dries clear, forms a strong bond and must cure for at least 24 hours.
Can you use sandpaper to repair a terra cotta pot?
Now, you can use the sandpaper to remove any other areas of rot, continuing to work slowly and carefully. According to writers from Deep Green Permaculture, cracked terra cotta flower pots are easy to repair with the right adhesives. The two main categories of adhesives are landscape block adhesives and two-part epoxies.
Can clay pots be glazed?
It's normally not glazed and is prized for its durability, versatility and affordability. All types of clay pots can decay or crack after time, but unless they are really broken or shattered, you should be able to repair them with minimal fuss.
Can you paint over a ceramic pot?
If you want to paint over a terra cotta or glazed ceramic pot after repairing it, the experts from Ceramices recommend using acrylic, latex or epoxy paint – some are available in spray paints. Before starting, clean the pot with water and a stiff brush, and put it in the sun to dry. Use a foam brush or the spray to apply the paint, ...
Can Terracotta Be Glued Back Together?
Most terracotta pots and garden features can be repaired fairly easily using modern adhesives, as they produce very structurally sound glue joins in this material.
Two-part Epoxy Adhesive for Terracotta Repairs
The two-part epoxy adhesives are better for smaller jobs, as it typically comes in a 24mL syringe, or 35mL (2×17.5mL) tubes. Epoxy is better than landscape adhesive for cracks. It can also be forced into cracks more easily. For cracked terracotta, use epoxy!
Landscape Construction Adhesive for Terracotta Repairs
For larger jobs, exterior landscape construction adhesives are a better choice as they comes in large tubes for use in a caulking gun, which hold around 400g. This adhesive is lighter than two-part epoxy.
How to Repair Cracked or Broken Terracotta in 5 Easy Steps
In this example, we’ll be repairing an unglazed terracotta bird bath pedestal, which is quite large, thick and heavy.
Is Glue Alone Sufficient to Repair Terracotta?
Most terracotta pots and garden features can be repaired fairly easily using appropriate modern adhesives, which can create very structurally sound glue joins in this material.
What were the failures of Terra Cotta?
Failures that developed from these ingenious installations were often tied to errors in initial design and construction detailing, which is not surprising considering that they represented technologically challenging new usage. The National Terra Cotta Society published substantially different standards for installation between 1914 and 1927 after finding that initial recommendations did not adequately account for expansion, structural support and water migration. Mistaken or missing maintenance practices within the harsh variations of the North American climate frequently contributed to and increased the rate of failures.
When did Terra Cotta Society publish standards?
The National Terra Cotta Society published substantially different standards for installation between 1914 and 1927 after finding that initial recommendations did not adequately account for expansion, structural support and water migration. Mistaken or missing maintenance practices within the harsh variations of the North American climate ...
What is the clay body used in the backing of the units?
The clay body used in the backing of the units was found to be both inconsistently mixed and badly formulated, with a high proportion of grog and other inclusions. The material also appeared to have been unevenly vitrified during the firing process, leaving the clay vulnerable to expansion when it absorbed water.
