How To : Fix Broken Plastic Tabs on Bumper
- Wash with Soap and Water. Start the repairs with a good wash to remove contaminates on the bumper cover. ...
- Grind Tab. Where the tab broke, use a 50 grit roloc disc to grind the repair area to a point. ...
- Sand Tab. Using 80 grit by hand or 80 grit on a dual action sander, sand the repair area to assure all areas the adhesive will come in ...
- Drill Holes. Drill holes on repair location using a 1/8 inch drill bit. ...
- Clean Repair Area. Using compressed air, blow the repair area clean. ...
- Adhesion Promoter. Spray a light coat of adhesion promoter to the repair area. This is important so the adhesive adheres to the repair.
- Cut Plastic and Apply Adhesive. Cut a piece of plastic from the package the tab repair adhesive came in to shape the adhesive. ...
- Precut Tab. After a minute or two, before completely drying, precut the tab a little larger than the tab size. Then allow to finish drying about 5 minutes.
- Sand Tab. Once the tab is fully hardened (about 5 minutes) remove plastic from around the tab and shape the tab using the 50 grit roloc disc, followed ...
- Drill Hole. The last step is to drill the hole for the clip or bolt to go through to attach it to the vehicle. ...

How to fix broken plastic tabs on bumper?
- Aluminum Body Tape (several options available)
- 6125 Tapered Burr
- Nitrogen Plastic Welder (several options available)
- Welding Rod (several sizes/colors available). Check the identification symbol on your part and choose the rod that matches the plastic you need for your repair.
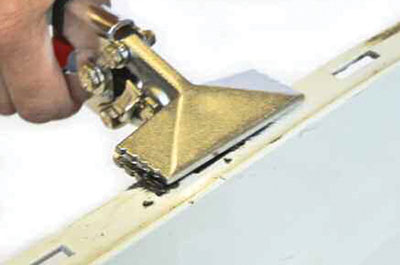
- 6145 Hand Seamer
How do you fix a cracked plastic bumper?
Cracked Bumper Repair Step 1: Remove the Bumper. Here's what the bumper damage looks like before the repair. Step 2: Sanding. Next, use a dremel tool to carve a V shaped groove in the back of the bumper along the crack. Step 3: Apply Epoxy. Step 4: Fill in the Crack. Step 5: Prime and Paint the Bumper. Step 6: Reinstall the Bumper.
How to fix a plastic bumper?
Tools you need:
- Remove the bumper and prep the repair area To repair the bumper you have to first get it off your car. ...
- Support the repair area Using the auto repair cloth, you're going to support the adhesive. ...
- Repair the hole and paint
How to repair a chip in a plastic bumper?
How to use Chipex touch up paint on car bumpers
- Clean the paint stone chips and surrounding area thoroughly. ...
- Put on the gloves that are provided with the kit.
- Shake the paint bottle well and then used the supplied Chipex paint applicator brush to dab the paint onto the chipped areas. ...
Can bumper tabs be repaired?
0:103:36Bumper Tab Repair - YouTubeYouTubeStart of suggested clipEnd of suggested clipWell. Cut a piece of the stainless steel reinforcing mesh to the width of the tab. Make the lengthMoreWell. Cut a piece of the stainless steel reinforcing mesh to the width of the tab. Make the length of the mesh twice the length of the tab. Fold the mesh in half and wrap the mesh around the tab.
How do you repair plastic car tabs?
Plastic Tab Repair: Step by StepStep 1: Clean the Damaged Area. ... Step 2: Initial Prep Sand. ... Step 3: Prepare the Tab. ... Step 4: Choose Super-Fast Repair Material. ... Step 5: Mix and Apply Repair Material. ... Step 6: Rough Shape the Damaged Tab. ... Step 7: Final Sand and Inspect.
How do you fix a broken front bumper tab?
0:136:22How to Fix Broken Bumper Tab Easily! - YouTubeYouTubeStart of suggested clipEnd of suggested clipCover with the rubbing alcohol all the grease out that way the tape especially the epoxy touch isMoreCover with the rubbing alcohol all the grease out that way the tape especially the epoxy touch is really good so next what we want to do is um secure the area with tape.
How do you repair a plastic bumper clip?
Installing them is pretty straightforward. Simply loosen your bumper screws using a screwdriver, pop the bumper and gently pull it out, then push the front bumper forward so you can access what needs to be replaced. Take out the broken clip, install the new one, and that's it!
How do you fix a broken plastic connector?
0:175:53How Pros Fix Broken Plastic Fittings I Best Fix on YouTube I Stronger ...YouTubeStart of suggested clipEnd of suggested clipIt on there cross your fingers and hope it'll hold with just epoxy alone you're gonna beMoreIt on there cross your fingers and hope it'll hold with just epoxy alone you're gonna be disappointed. It will leak every time we've got to add some reinforcement.
How much does it cost to fix a bumper tab?
Save several hours and up to $1,000 by repairing bumper tabs instead of replacing the bumper. The cost of a new bumper ranges anywhere from $100 to $1,000. Then, the technician has to prep, paint, and blend the color of the bumper to the fender to make it look original to the vehicle.
What is the plastic piece under the front bumper called?
That's why some automakers add a plastic strip (also called a front lower valance or air dam) to the bottom of the bumper on their cars. However, these plastic strips are also vulnerable to damage, as plastic breaks easily.
How much does it cost to fix front bumper clips?
Your technician will then sand the area until it's smooth. Once the damaged area is smooth, they will then paint the area. The cost is typically between $300 – $500, but it might be higher depending on the cost of your car's paint. On average, expect to pay between $200 – $700 for a bumper repair cost.
How do you repair broken plastic car parts?
0:1020:18How To Repair Broken Plastic Car Parts - YouTubeYouTubeStart of suggested clipEnd of suggested clipAnd rather than leaving it or replacing the entire back plastic housing i wanted to go ahead andMoreAnd rather than leaving it or replacing the entire back plastic housing i wanted to go ahead and repair it what i did was i used some masking tape and epoxy. And essentially made a new securing tab.
How do you pop bumper clips back in?
0:495:09Bumper Cover Quick DIY Fix - Put back your broken bumper - YouTubeYouTubeStart of suggested clipEnd of suggested clipAll these holes for the clips are fine they just need to be pushed back in the only thing preventingMoreAll these holes for the clips are fine they just need to be pushed back in the only thing preventing us from pushing back in is this screw not holding so let's take care of that let's undo the screw.
Can I use JB Weld on my bumper?
1:046:47How To Repair A Torn Bumper Cover, Review JB Weld Plastic BonderYouTubeStart of suggested clipEnd of suggested clipThis is a material that I use the jb weld plastic Bhandar. And if you take a look at. It. There youMoreThis is a material that I use the jb weld plastic Bhandar. And if you take a look at. It. There you go so it's body panel adhesive. So this is the really really good stuff for plastic.
What is the best glue for car bumper?
If you want the best overall glue for plastic automotive parts, you should consider the J-B Weld Plastic Bonder Adhesive and Gap Filler. Another excellent auto body glue for plastic car pieces that is also budget-friendly is the Loctite Plastics Bonding System.
How do you fix hard plastic?
2:028:11How to Fix Broken or Cracked Plastic or Weld Plastic - YouTubeYouTubeStart of suggested clipEnd of suggested clipSo what I want to do is build up plastic on top of this whole area okay and when I do this I'm goingMoreSo what I want to do is build up plastic on top of this whole area okay and when I do this I'm going to squeeze that gap together. So it doesn't leak through so to do this I'm using superglue.
How do you fix a headlight tab?
1:357:11Repairing a Smooth Headlight Tab Using the Nitrogen Plastic WelderYouTubeStart of suggested clipEnd of suggested clipSo use whichever staple fits the shape of the tab. Best use the airless welder to smear some meltedMoreSo use whichever staple fits the shape of the tab. Best use the airless welder to smear some melted plastic over the staples to further lock the staples into the plastic.
What materials should be used to clean the repair area of a plastic vehicle component?
The first step after identifying the plastic type is to thoroughly clean the entire part, specifically both sides of the repair area. This should be done with hot, soapy water (or a water-based cleaner) and then dried (photo 3). This will remove water-soluble contaminants.
How do you repair plastic with epoxy?
How to use 2-part epoxy glue for plasticPut on some gloves and safety goggles and clear the workspace. Put down a sheet to protect your surfaces.Mix the two parts of the epoxy glue. ... Remove the lid from both syringes. ... Apply the epoxy glue to both of the surfaces and press them together. ... Leave it to dry.
Step 1: Clean the Damaged Area
Keeping the repair area clean – both the tab area and the area of the vehicle where the tab will be reinstalled – is crucial to the strength, integrity and adhesion of the tab, and to an effective overall plastic tab repair.
Step 2: Initial Prep Sand
Grinding and sanding the area immediately around the broken tab creates a surface that best accepts the flexible adhesive material used in plastic tab rebuilding and repair.
Step 3: Prepare the Tab
Drill 1/8-inch pinning holes in the damaged area. Drill the holes about ¼ inch within the tapered area and ¼ inch apart. Pinning allows the adhesive to flow through holes and bond with itself for added strength. It’s almost like creating extra rivets or bolts securing the replacement tab or the repaired tab to the part.
Step 4: Choose Super-Fast Repair Material
In the next two steps, you will rebuild or recreate the plastic tab using contour film and a fast-curing plastic tab adhesive repair material such as 3M™ Super-Fast Repair Material. For longer work times or if working in hot environments, 3M advises substituting 3M™ Semi-Rigid Repair Material.
Step 5: Mix and Apply Repair Material
Roll out contour film sheet and cut it 3 times the length of tab. Fold the sheet over the tab repair area and verify that you are using enough to recreate the entire tab. For best results, use a marker to draw a rough version of the finished tab on the sheet. Mix the plastic adhesive material and apply it to the contour sheet.
Step 6: Rough Shape the Damaged Tab
The properly cured tab repair adhesive material can now be cut and shaped just as if you were working with the original plastic tab. Rough shape the entire repaired tab area with a 3-inch 60 grit 3M™ Roloc™ disc. Remove as much adhesive material as you can to achieve your desired tab shape.
Step 7: Final Sand and Inspect
This step is necessary to achieve a professional final finish for the tab, and to help ensure a lasting plastic part and bumper repair. Using a DA sander and a 3-inch 180 grade abrasive disc, finish sand the tab repair area.
How to repair a plastic tab?
Cut a piece of plastic from the package the tab repair adhesive came in to shape the adhesive. Support the bottom of the plastic using a spreader. Apply adhesive to the plastic, then lightly press the adhesive to the backside of the repair. Next, wrap the plastic around the tab location. Make sure the plastic extends past the original length of the plastic tab. Lastly, lightly apply pressure using a spreader on the top of the adhesive to shape the tab. Do not apply too much pressure, as this will build a tab that is too thin. Allow to set-up 30 seconds to one minute. The release pressure on spreaders and allow to finish drying.
How to repair a bumper cover?
Step 1: Wash with Soap and Water. Start the repairs with a good wash to remove contaminates on the bumper cover. This will assure all silicones are removed which will provide a quality repair.
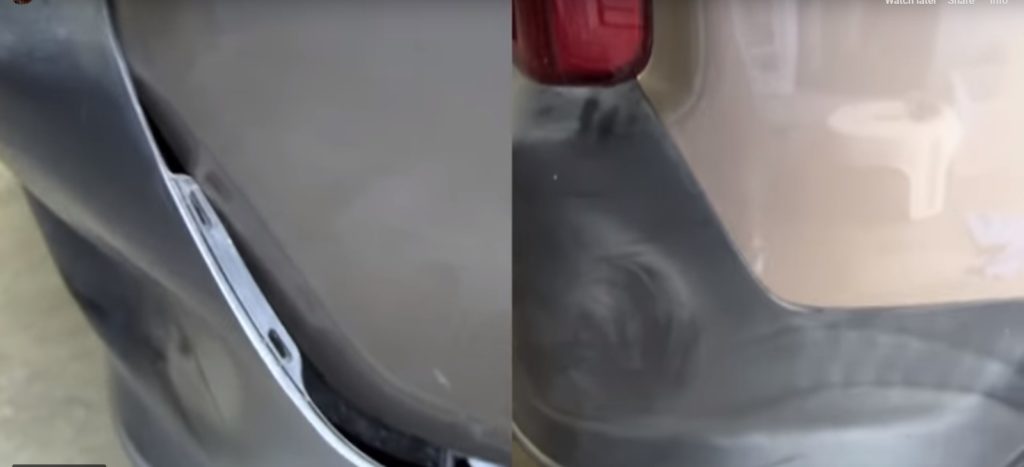
What is wrong with the bumper cover?
A common problem on bumper covers is that the tabs that attach the bumper to the car get broken. This is critical, as this is what secures and aligns the bumper cover. Many times, a broken tab is all that is wrong with the bumper cover.
How long does it take for adhesive to dry?
This is important so the adhesive adheres to the repair. Allow the adhesion promoter to dry for 5 to 10 minutes.
How to use 80 grit sanding?
Using 80 grit by hand or 80 grit on a dual action sander, sand the repair area to assure all areas the adhesive will come in contact with is sanded. Do not apply adhesive on an un-sanded surface.
Featured 3M Standard Operating Procedures for Bumper and Plastic Repair
Discover the best ways to repair minor scrapes and gouges in plastic bumpers. 3M designed these resources to guide you all the way through the process, from initial prep sanding through filler application and final inspection.
Technical Tips for Bumper and Plastic Repair
Here are some valuable insights into specific plastic bumper and parts repair challenges, including quick tips on preventing common issues such as bubbling and insufficient adhesion. For more in-depth information, click the link below each tip.
Why are bumper covers thrown away?
English Transcript: Many bumper covers are thrown away simply because the tabs are broken out. These are very simple to repair with the airless plastic welder. The first step is to grind away some plastic using an abrasive disc on a right angle drill. Make sure to grind at a slow speed to avoid melting the plastic.
How to apply fiberflex to a tab?
Continue applying FiberFlex until the mesh is completely covered. Apply FiberFlex to the opposite side of the tab. Continue to apply FiberFlex until the mesh is completely covered. Use grinders and sanders to smooth and contour the tab to the proper shape.
How to apply Fiberflex to a glossy surface?
Knock down the gloss with sandpaper. Apply the FiberFlex by pre-melting one side of the rod. Then flip the rod over so that the melted portion sticks, and then use the edge of the welder tip to cut off the melted part of the rod.
Can you put pressure on plastic?
Do not apply excessive pressure. Instead, allow the heat from the welder to soften the plastic before applying pressure. While the plastic is still hot, the mesh will sometimes spring back out of the plastic. You may need to hold the mesh under the plastic until it cools off.
